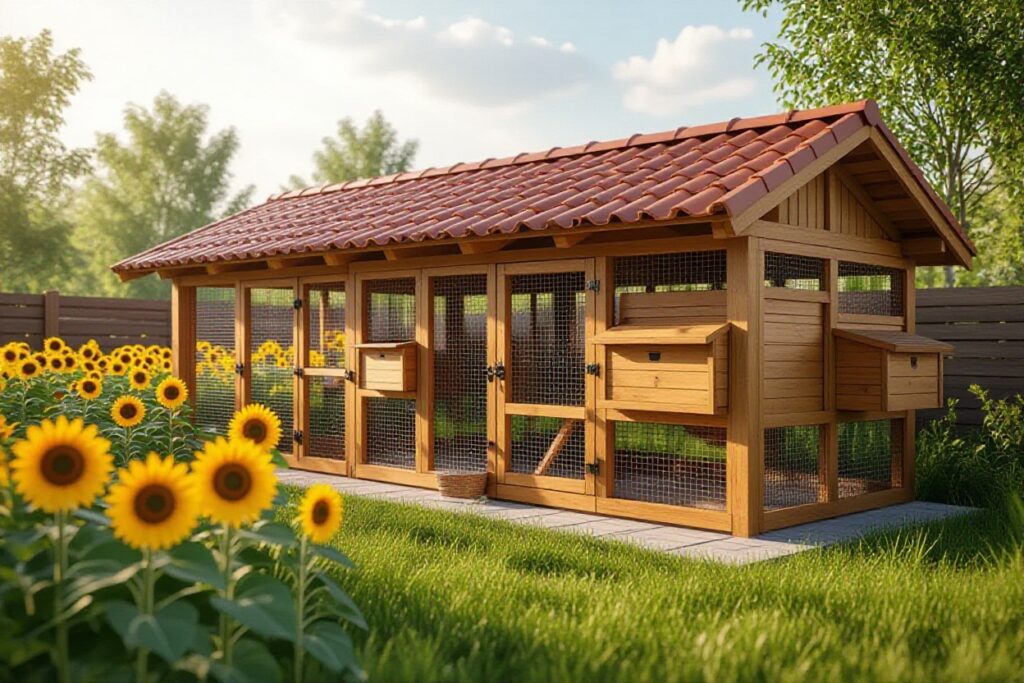
Most backyard chicken keepers underestimate how quickly a fox, raccoon, or even a neighborhood dog can breach a flimsy coop, but you can build a truly secure home that keeps your roosters safe every night. With heavy-duty hardware cloth, a solid concrete foundation, and reinforced locking mechanisms, your DIY coop won’t just look great-it’ll stand up to the most determined predators.
Planning Your Build: Key Factors to Consider
Location, size, and materials shape your coop’s success. Choose a spot with good drainage and minimal standing water to prevent predator access and health risks. Use galvanized hardware cloth instead of chicken wire for real protection. Any
- Predator-proofing starts with smart placement and solid materials
- Rooster size and number determine minimum space requirements
- Ventilation and shade prevent overheating in summer months
- Easy access for cleaning keeps your routine simple and safe
Choosing the safest spot in your backyard
Look for a flat, well-drained area away from dense shrubs or tree lines where predators might hide. Proximity to your house helps deter raccoons and foxes, especially if you install motion-sensor lighting. Avoid low spots that collect water after rain, as damp conditions invite mold and rodents. Elevated ground with southern exposure offers dry footing and natural warmth.
Deciding on the perfect size for your roosters
A single rooster needs at least 4 square feet inside the coop and 10 square feet in the run. Overcrowding leads to stress, aggression, and weaker immune responses. Plan for growth if you intend to add more birds later. More space also simplifies cleaning and reduces odor buildup.
Think about how your roosters move and stretch their wings. A six-foot-tall coop allows for proper roost bar height, letting them jump and perch naturally. For two roosters, aim for an 8×8-foot outdoor run connected securely to a 4×6-foot shelter. This layout supports healthy behavior without inviting territorial fights.
Gathering Your Materials
Start by listing every component you’ll need before heading to the store, so you avoid mid-project delays. Having all materials on hand ensures steady progress and lets you focus on precision. You’ll need heavy-duty hardware cloth, pressure-treated lumber, exterior-grade screws, and predator-resistant latches. Knowing exactly what to buy saves time, money, and stress.
Tips for picking heavy-duty hardware cloth over chicken wire
Hardware cloth is far stronger than chicken wire and resists raccoons, foxes, and rodents. Choose a 1/2-inch mesh or smaller to prevent small predators from squeezing through. Look for galvanized steel that won’t rust quickly. Avoid plastic-coated versions, as determined animals can chew through them. Knowing the difference keeps your flock truly safe.
- 1/2-inch mesh blocks small predators
- Galvanized steel lasts longer outdoors
- Hardware cloth withstands chewing and tearing
Selecting sturdy lumber that stands up to the elements
Pressure-treated pine resists rot and insect damage, making it ideal for ground-level framing. Cedar is another excellent option, naturally repelling insects and lasting years without chemical treatment. Avoid untreated pine, as it deteriorates quickly in damp conditions. Knowing which wood handles moisture and wear ensures your coop remains solid for seasons.
Cedar’s natural oils deter termites and decay, giving it a longer lifespan than many treated alternatives. A mid-sized SaaS firm might prioritize scalability, but your coop needs durability above all. Boards should be at least 2×4 inches for structural framing to prevent warping. Always pre-drill holes when fastening to avoid splitting. Knowing how wood behaves in wet or humid climates helps you build smarter from the start.
How to Build a Solid, Predator-Proof Foundation
A strong foundation stops predators before they get inside. You’ll want to secure the coop to the ground using a combination of sturdy supports and buried barriers. Skimping here risks everything, as foxes and raccoons are relentless diggers. Build with durability in mind, using pressure-treated wood and hardware cloth below ground level.
Step-by-step guide to installing a protective dig-guard
Install a dig-guard by extending hardware cloth at least 12 inches outward from the coop’s base, then bury it six inches deep. This hidden barrier stops animals from tunneling under. It’s one of the most effective yet overlooked defenses in backyard coops.
| Step | Action |
| 1 | Clear debris and level the ground around the coop perimeter |
| 2 | Lay 12-inch-wide hardware cloth in a skirt around the base |
| 3 | Bury the cloth 6 inches deep, folding the outer edge upward |
| 4 | Secure with landscape staples every 12 inches |
| 5 | Overlap joints by at least 4 inches for full coverage |
Why an elevated design keeps burrowing pests away
Lifting your coop off the ground adds a simple but powerful layer of protection. Animals like rats and weasels avoid climbing when easier targets exist. Even a small lift, combined with a tight skirt, forces predators to work harder, which most won’t do.
Elevation also improves airflow and reduces moisture buildup, which deters nesting rodents. A mid-sized SaaS firm might rely on uptime, but your coop relies on dry, stable flooring. Use concrete blocks or treated posts set deep into the soil to anchor the frame. Leave no gaps larger than 1/4 inch where pests could squeeze through.
Securing the Windows and Doors
Every opening in your coop is a potential entry point for predators, so treat windows and doors with the same rigor as walls. Use heavy-duty hinges and position all closures out of reach of clever raccoons. Install tight-fitting frames that seal completely when shut. After ensuring all components are firmly anchored, inspect them weekly for signs of wear or tampering.
How to install double-locking latch systems
Start by selecting latches that require two separate actions to open, making them racoon-proof and secure against paw manipulation. Mount each latch so the release mechanism faces inward, preventing access from outside. Reinforce the surrounding wood with metal plates to resist prying. After testing the mechanism dozens of times, you’ll know it’s ready for nighttime lockdowns.
Tips for reinforcing ventilation gaps and windows
- Use 1/2-inch hardware cloth instead of chicken wire for better strength
- Angle vents upward to block rain and reduce predator access
- Frame openings with steel edging to prevent chewing or tearing
- Place vents high, above average raccoon reach
Positioning airflow where it’s safe and effective keeps your roosters healthy without inviting danger. Cover each vent with tightly stapled hardware cloth, folded at the edges for a smooth finish that won’t snag feathers. After securing every edge with galvanized staples and checking for gaps, your birds will enjoy fresh air without risk.
Creating a Comfortable and Safe Interior
Inside your coop, prioritize clean, dry bedding like pine shavings to cushion feet and absorb moisture, reducing the risk of frostbite in winter and mites in summer. Ensure adequate space-roughly 4 square feet per bird-to prevent stress and aggression. Install proper ventilation above roost level to avoid drafts while letting ammonia from droppings escape. Thou shall find happy hens thrive in cozy, well-kept quarters.
How to set up the ultimate roosting bars
Roosting bars should be made from 2×4 lumber with the wide side up, giving chickens room to tuck their toes in cold weather. Place them at least 18 inches off the ground, higher than nesting boxes, as birds prefer to sleep up high. Space bars 12 inches apart to prevent droppings from falling onto birds below. Thou shall see fewer pecking disputes when each rooster has his own secure perch.
Tips for managing noise and light for your flock
Keep noise levels low by situating the coop away from busy roads or barking dogs, which can stress your birds. Use solid walls on the north side to block wind and sound, and consider planting a small shrub barrier for added buffer. Limit artificial light to no more than 14 hours daily, using a simple timer with a low-watt red bulb to avoid disrupting sleep cycles.
- Minimize external noise with natural windbreaks
- Use red-tinted bulbs to support natural circadian rhythms
- Avoid sudden sounds near nesting areas
- Install thick walls for better sound insulation
Thou shall notice calmer mornings and more consistent laying patterns.
Final Safety Checks and Maintenance
Before bringing your roosters home, walk through the coop with a critical eye, checking every seam, latch, and corner. Look for gaps wider than a pencil’s width-small predators like weasels can squeeze through surprisingly tight spaces. Reinforce weak spots with hardware cloth and ensure all latches are predator-proof. Any overlooked gap could become an entry point.
Factors to look for during your final walk-through
- Check for any gaps in walls or flooring larger than an inch
- Confirm doors close tightly and lock from the outside
- Inspect hardware cloth for tears or loose staples
- Ensure ventilation openings are covered and secure
- Test lighting and access points for ease and safety
Run your hand along joints and seams to feel for openings. Any soft spot or wobble could signal a vulnerability.
How to keep the coop secure through every season
Seasonal changes affect both structure and predator behavior. In winter, snow buildup can hide entry points or prop open weak doors. During spring rains, soil expansion might shift the foundation slightly, creating new gaps. Inspect monthly, especially after storms or freeze-thaw cycles. Trim back overgrown vegetation that could give predators cover. Any persistent moisture invites rot, weakening key supports over time.
A mid-sized SaaS firm wouldn’t skip routine server checks, and neither should you when it comes to coop integrity. Schedule a full inspection each season, tightening hinges, replacing worn bedding, and re-securing corners with fresh galvanized screws. Replace any damaged hardware cloth immediately-rust compromises strength. Any recurring issue, no matter how small, deserves prompt attention before it becomes a breach.
Summing up
You’ve built a safe, sturdy home for your roosters from the ground up, using strong materials and smart design choices like buried wire mesh and secure latches. Every detail, from the sloped roof to the vent placement, works together to keep predators out and your birds comfortable. A mid-sized SaaS firm might rely on digital security, but your coop’s strength lies in thoughtful, hands-on craftsmanship that stands up to real-world challenges.
FAQ
Q: What’s the best material to use for the coop’s exterior walls to keep predators out?
A: Heavy-duty welded wire mesh with 1/2-inch gaps is widely preferred over chicken wire, which predators like raccoons and foxes can easily tear through. The mesh should extend from the foundation up to the roofline and be securely fastened with galvanized staples or zip ties every 6 inches. For added strength, some builders frame the walls with pressure-treated lumber and cover the interior side with marine-grade plywood, which resists rot and provides a solid barrier against climbing animals. A mid-sized SaaS firm might prioritize cloud security, but a backyard chicken keeper knows that physical security starts with solid walls.
Q: How deep should the hardware cloth be buried around the perimeter to prevent digging predators?
A: Burying hardware cloth at least 12 inches underground in a horizontal ‘L’ shape deters diggers like coyotes and raccoons. The buried section should extend outward from the coop’s base, creating a barrier that makes tunneling underneath extremely difficult. Some homesteaders in high-predation areas go further, adding a 6-inch gravel trench beneath the buried mesh to discourage persistent diggers. This technique has proven effective even in regions with frequent fox activity, such as parts of rural Wisconsin and upstate New York.
Q: Can automatic door openers be trusted for daily coop access, or are they a security risk?
A: Many modern coop owners use solar-powered automatic door openers that respond to light levels, ensuring the door closes at dusk even if the owner is away. These units typically feature manual override switches and reinforced locking mechanisms that resist tampering by raccoons. One popular model includes a rubber-sealed housing that protects internal components from rain and dust, maintaining reliable operation for over two years in coastal climates. As long as the door frame is reinforced with metal brackets and the power source is shielded, automation adds convenience without compromising safety.