DIY dog grooming saves money and strengthens your bond with your pet, but using dull clippers can cause skin irritation. With the right tools and technique, you can achieve a smooth, salon-quality coat in your bathroom. This guide walks you through each step safely-so your dog stays calm and clean.
Essential Factors to Consider Before Starting
- Your dog’s coat type determines the tools and techniques needed
- Temperament affects how well your dog tolerates handling
- Regular grooming frequency prevents matting and skin issues
- Underlying health conditions may limit certain procedures
Any
Assessing coat texture and growth patterns
Understanding your dog’s coat texture helps you choose the right brush and shampoo. Wiry, curly, or double coats require different care than short, smooth fur. Observe how hair grows and where tangles form. This knowledge prevents damage during brushing and ensures a smooth trim. Any
Evaluating your dog’s temperament and comfort level
Dogs react differently to touch, noise, and restraint during grooming. A nervous dog may tremble or pull away, while a calm one stays still. Watch for signs of stress like panting or ears pinned back. Build trust with short, positive sessions. Any
Temperament plays a major role in how smoothly your grooming session goes. If your dog fears clippers or resists being touched on the paws, forcing the process can lead to injury or lasting anxiety. Start by handling their feet, ears, and tail daily so they get used to it. Use treats and praise to create a positive link with grooming. A relaxed dog is safer to work on and achieves better results. Any
Choosing the Right Equipment: Types of Grooming Tools
Every successful grooming session starts with the correct tools. You’ll need brushes, combs, clippers, scissors, and shampoos tailored to your dog’s coat and skin. Using the wrong equipment can cause discomfort or uneven results. This
| Tool Type | Purpose |
| Slicker Brush | Removes tangles and loose undercoat in medium to long-haired dogs |
| Pin Brush | Detangles silky or wavy fur gently |
| Undercoat Rake | Reduces shedding in double-coated breeds |
| Steel Comb | Checks for mats and fine debris after brushing |
- Use a slicker brush for curly or dense coats
- Choose a pin brush for long, flowing hair
- Opt for an undercoat rake during heavy shedding seasons
- Run a steel comb through fur to catch hidden tangles
- Match your shampoo to your dog’s skin type
Selecting brushes and combs for specific fur types
Coat texture determines which brush works best. For short-haired dogs, a rubber grooming mitt removes loose hair. Double-coated breeds need an undercoat rake to prevent matting. Long, silky coats require a wide-tooth comb followed by a fine-tooth one. The
| Fur Type | Recommended Tool |
| Short & Smooth | Rubber curry brush or grooming mitt |
| Double-Coated | Undercoat rake and slicker brush |
| Long & Silky | Pin brush and fine-tooth steel comb |
| Curly or Wiry | Slicker brush and metal comb |
- Rubber brushes are ideal for short, smooth coats
- Undercoat rakes reduce shedding in huskies and golden retrievers
- Pin brushes glide through long fur without pulling
- Steel combs detect tangles close to the skin
- Slicker brushes handle dense, curly textures effectively
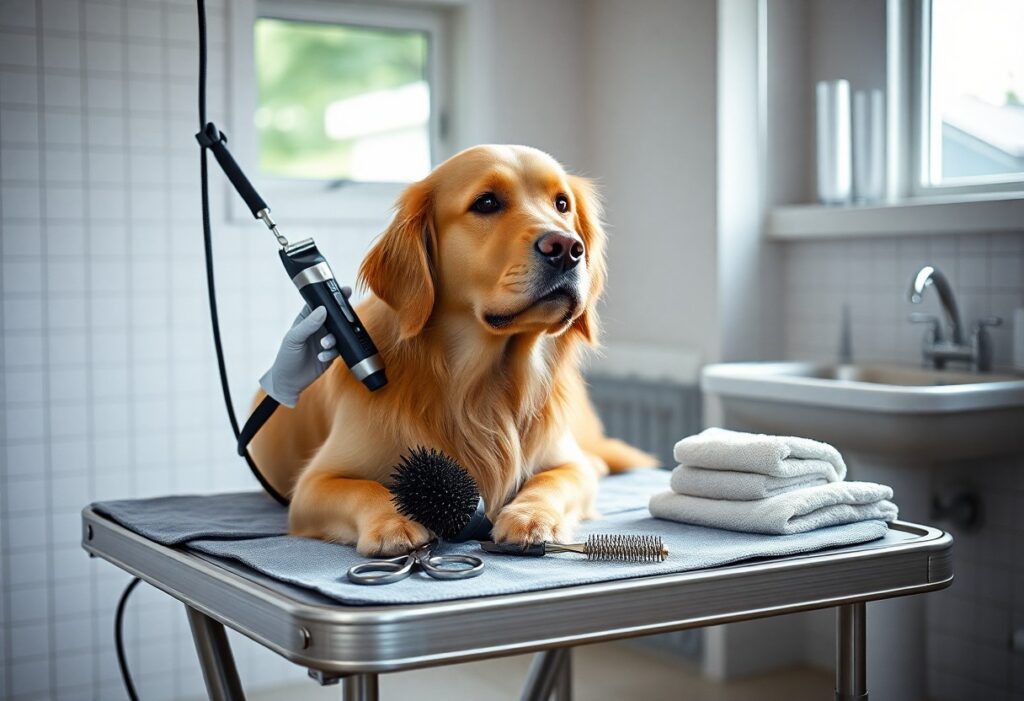
Professional-grade clippers and thinning shears
High-quality clippers ensure clean, even cuts without irritating your dog’s skin. Look for models with quiet motors and cool-running blades to reduce stress. Thinning shears blend fur seamlessly, especially around the face and paws. This
Professional-grade clippers offer consistent power and durability, making them ideal for regular home grooming. Models with adjustable blades allow you to switch between lengths without changing attachments. Thinning shears help reduce bulk without creating harsh lines, which is especially useful for breeds with layered coats. Always clean and oil blades after each use to maintain performance and prevent overheating. Your dog will stay calm and comfortable when the tools work smoothly and quietly.
Pre-Grooming Preparation and Hygiene
Begin by gathering all necessary tools-brush, shampoo, towels, and clippers-so everything is within reach. Check your dog’s ears, eyes, and paws for any signs of infection or irritation. A clean workspace prevents contamination, and a calm environment helps keep your pet relaxed. Never skip brushing before bathing; it prevents mats from tightening when wet.
Effective bathing and drying techniques
Use lukewarm water and a dog-specific shampoo to avoid skin irritation. Massage gently from neck to tail, avoiding the eyes and ears. Rinse thoroughly-leftover shampoo can cause itching. Towel-dry first, then use a pet-safe dryer on low heat, keeping it moving to prevent burns. Complete drying prevents dampness-related skin issues.
De-matting and detangling strategies
Start with a slicker brush or wide-tooth comb, working from the ends toward the skin. For small tangles, gently separate with fingers. Never cut mats out with scissors near the skin-use dematting tools instead. Regular brushing reduces future tangles and keeps the coat healthy.
When tackling mats, patience is key. Hold the base of the tangle to minimize pulling on your dog’s skin. Use a detangling spray to loosen knots and reduce discomfort. Severe mats may require professional help-forcing them can cause pain or injury. Consistent, gentle maintenance prevents painful matting and keeps your dog comfortable between grooming sessions.
The Step-by-Step Grooming Procedure
Follow this structured approach to achieve a polished, professional finish every time you groom your dog at home. Each stage builds on the last, ensuring no detail is missed and your dog stays comfortable throughout the process.
| Brushing | Remove tangles and loose fur before bathing to prevent matting. |
| Bathing | Use lukewarm water and dog-safe shampoo; rinse thoroughly. |
| Drying | Blow-dry on low heat, brushing as you go to smooth the coat. |
| Trimming | Start with body clipping, then move to sensitive areas. |
| Finishing Touches | Check nails, ears, and face for final neatness. |
Systematic body trimming and coat thinning
Begin trimming along the back with clippers or scissors, working in the direction of hair growth. Never press too hard-let the tool glide. Use thinning shears on dense areas to reduce bulk without harsh lines, creating a natural, balanced look.
Precise detailing for paws, ears, and face
Shape the fur around paw pads carefully to prevent slipping and debris buildup. Use blunt-tipped scissors near the eyes and trim ear hair gently to avoid irritation. These small touches make a big difference in safety and appearance.
When detailing the face, always stabilize your dog’s head with one hand while trimming. Focus on stray hairs around the eyes, muzzle, and ears, using short, controlled cuts. Never force your dog to stay still-take breaks if needed. Cleaning the ears with a vet-approved solution after trimming helps prevent infections, especially in floppy-eared breeds. This stage demands patience, but the results are worth it.
Professional Tips for a Polished Finish
Mastering the final details transforms a basic trim into a show-quality groom. Use thinning shears for smooth transitions, check symmetry with a comb, and finish with a light detangling spray. Always inspect ears, paws, and tail for stray hairs.
- Use blending techniques around the face and legs
- Keep clippers clean and cool to avoid skin irritation
- Final buffing with a soft cloth adds professional shine
This builds confidence in your skills and comfort for your dog.
Techniques for blending and smooth transitions
Start with longer guard combs and gradually reduce length to avoid harsh lines. Overlap each pass slightly and use curved strokes along the body’s contours. Focus on areas like the shoulders and hips where seamless blending matters most. This ensures a naturally groomed appearance.
Managing sensitive areas and nail maintenance
Approach the face, ears, and paws with slow, deliberate movements. Use blunt-tipped scissors near the eyes and fold ears gently when trimming. For nails, clip only the tip, avoiding the quick-a pink inner core that bleeds if cut. This prevents pain and builds trust over time.
When working on sensitive zones, pause often to reassure your dog with calm words and light petting. If your dog has dark nails, use a flashlight to spot the quick’s shadow inside the nail. File edges smooth after clipping to eliminate sharp points that can scratch. Never rush these steps-patience leads to safer, stress-free sessions. This strengthens your bond and makes future grooming easier.
Pros and Cons of DIY Dog Grooming
Doing your dog’s grooming at home offers convenience and strengthens your bond, but it also demands time and precision. Understanding both sides helps you decide if DIY is right for your pet’s needs and your lifestyle.
| Pros | Cons |
|---|---|
| Saves money over time | Requires initial tool investment |
| Builds trust with your dog | Steep learning curve |
| Control over products used | Risk of accidental cuts |
| Flexible scheduling | Time-consuming for beginners |
| Reduces salon stress for pets | Harder to handle matted coats |
| Customized care routines | Limited access to professional tools |
| Immediate response to skin issues | Potential for uneven trims |
| Encourages daily coat checks | Difficult with aggressive brushing |
| Less exposure to other animals’ germs | Need for consistent training |
| Stronger pet-owner connection | Not ideal for high-maintenance breeds |
Benefits of cost savings and pet bonding
You save hundreds of dollars a year by skipping professional groomers, especially with regular upkeep. More than just financial gain, this routine builds deeper trust-your dog learns to rely on you during vulnerable moments, turning grooming into a calming, shared ritual.
Risks of technical errors and time requirements
You may accidentally nick your dog’s skin or create uneven cuts without proper technique. These mistakes can lead to infections or anxiety around grooming. Each session also takes longer than expected, especially when your dog resists or gets tired.
Mastering scissor handling and clipper angles takes consistent practice, and even small missteps near sensitive areas like ears or paws can cause serious injury. Dogs with thick or curly coats demand even more time, often requiring full attention for over an hour. Without patience and proper prep, what starts as a simple trim can quickly become overwhelming for both of you.
Summing up
Now you have all the steps to groom your dog at home with confidence and precision. With the right tools, consistent technique, and a calm approach, you can achieve a clean, polished look that rivals a professional salon. Regular grooming strengthens your bond and keeps your dog healthy, comfortable, and looking their best.
FAQ
Q: What tools do I need to start DIY dog grooming at home?
A: You’ll need a few basic tools to get started: dog clippers with adjustable blades, thinning and straight scissors, a slicker brush, a comb with wide and fine teeth, nail clippers or a grinder, dog-safe shampoo and conditioner, cotton balls for ears, and several clean towels. A non-slip mat for the tub or grooming surface helps keep your dog steady. Choose tools based on your dog’s coat type-thicker coats need more powerful clippers and frequent brushing. Having the right equipment makes the process smoother and safer for both you and your pet.
Q: How often should I groom my dog at home to maintain a professional look?
A: Most dogs benefit from a full grooming session every 4 to 6 weeks. Daily or weekly brushing prevents tangles and reduces shedding, especially for long-haired breeds. Check your dog’s ears, nails, and paws weekly. Bathing every 3 to 4 weeks keeps the coat clean without stripping natural oils. Short-haired dogs may need less frequent attention, but regular maintenance ensures a neat appearance and helps you catch skin issues or parasites early. Consistency is key to achieving results that look like they came from a salon.
Q: Can I safely trim my dog’s face and paws at home?
A: Yes, you can trim your dog’s face and paws at home with care and the right technique. Use blunt-tipped scissors and work slowly, especially around the eyes and ears. For the face, comb the fur forward first, then trim downward to avoid cutting too short. On the paws, gently spread the toes and clip hair between them to prevent slipping and debris buildup. If your dog moves suddenly, stop and wait for them to settle. Practice short sessions to build trust. If you’re unsure, consult a grooming video specific to your dog’s breed or do a trial run on less sensitive areas first.