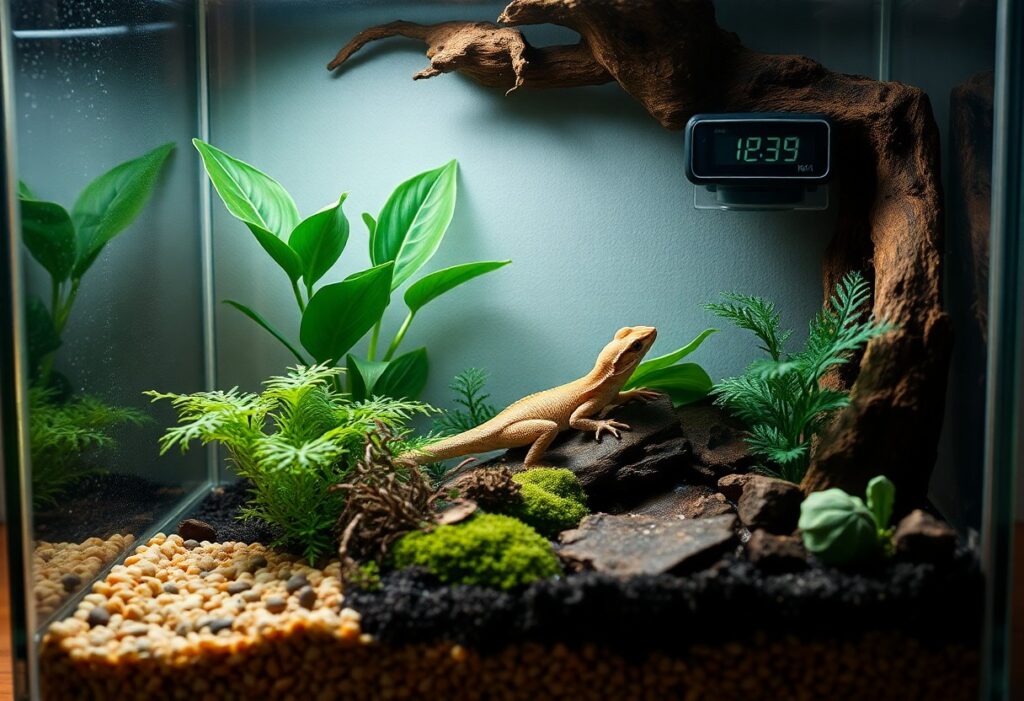
Most reptile and amphibian lovers dream of a thriving habitat that looks natural and stays clean with less daily work, and a bioactive enclosure makes that possible. You’ll create a living ecosystem where plants, microbes, and tiny cleanup crews work together to maintain balance. Skip the sterile setup and enjoy watching your pet thrive in a dynamic, self-sustaining environment that mimics their wild home.
Considering Key Factors for Your Pet’s New Home
Choosing the right species for a bioactive setup means matching your pet’s natural behavior with a sustainable, low-maintenance environment. Some frogs and small lizards thrive with minimal intervention, while others need precise conditions. Species like pacman frogs or crested geckos adapt well, thanks to their tolerance for humidity and leaf litter. Knowing your pet’s needs ensures long-term success and a healthier habitat.
Choosing the right species for a bioactive setup
Not every small reptile or amphibian suits a bioactive enclosure. Species with high moisture needs or those that burrow or climb often benefit most. Dart frogs, for example, flourish in tropical microcosms with live plants and drainage layers. Others, like leopard geckos, require drier substrates and may not support clean-up crews as effectively.
Selecting the perfect enclosure size and type
A glass terrarium with secure ventilation offers ideal visibility and humidity control. Front-opening enclosures reduce stress during maintenance and prevent escape. Size matters-aim for at least a 20-gallon equivalent for most small species to allow room for plants and microfauna. Knowing your pet’s adult size and activity level guides the best choice.
Enclosure dimensions should reflect your pet’s natural movement patterns. A tall, vertically oriented tank suits tree frogs and anoles, giving them space to climb on live vines and cork bark. For terrestrial species like dwarf monitors or juvenile skinks, a longer, horizontal footprint supports natural foraging. Mesh tops can dry out the environment too quickly, so sealed glass lids with partial ventilation are often better for maintaining stable humidity levels.
How to Build a Solid Foundation with Substrate
A well-structured substrate supports plant roots, beneficial microbes, and your pet’s natural behaviors. Start by layering materials from the bottom up, ensuring proper drainage and aeration. Never skip the drainage layer, as stagnant water can quickly lead to mold and health risks. Use only reptile-safe, chemical-free materials throughout.
Creating a functional drainage layer
Begin with a 1-2 inch layer of inert material like hydroton or lava rock at the base. This layer holds excess water away from the soil, preventing saturation. Standing water breeds harmful bacteria, so proper drainage is imperative for long-term success. A mesh screen can help separate this layer from the soil above.
Mixing a nutrient-rich soil blend
Combine organic topsoil, coconut husk, and leaf litter in roughly equal parts, avoiding any with fertilizers or perlite. This mixture retains moisture while supporting root growth and microfauna. Healthy soil hosts springtails and isopods, which break down waste naturally. Always dampen the blend before adding it over the drainage layer.
Think of your soil like a living compost system, not just ground to stand on. A mid-sized SaaS firm wouldn’t run on outdated servers, and your enclosure shouldn’t run on lifeless dirt. Microbes begin breaking down waste within days, especially when you include leaf litter from safe trees like oak or magnolia. These materials decompose slowly, providing long-term structure and food for cleanup crews.
Tips for Picking and Placing Healthy Plants
Choose reptile-safe plants that thrive in your enclosure’s humidity and light levels. Inspect each plant for pests or discoloration before adding it. Position taller species like pothos or snake plants toward the back for depth, and low-growers like fittonia in front. After placing, ensure roots are covered but crowns remain above the substrate line.
Finding the best reptile-safe greenery
Look for non-toxic, hardy species that tolerate low light and moisture, such as peperomia or ponytail palm. Avoid plants treated with pesticides, as these can harm your pet. A mid-sized SaaS firm wouldn’t risk unvetted software-don’t risk unsafe flora either. After confirming safety, rinse leaves gently before introduction.
Planting for both beauty and hiding spots
Group lush foliage around climbing branches and under shelters to create natural cover. Dense plants like ferns or pilea offer seclusion while enhancing visual appeal. Position them to block direct sightlines, helping shy species feel secure. After arranging, step back and view the enclosure from your pet’s level to check coverage.
Layering plants at different heights mimics wild habitats and encourages natural behaviors. Use wide-leaved varieties like calathea to catch moisture and provide drinking spots. Tuck small plants between hardscape elements to stabilize soil and reduce bare patches. After establishment, occasional pruning keeps growth balanced and airflow sufficient.
How to Introduce Your Beneficial Clean-Up Crew
Adding your clean-up crew at the right time ensures a balanced start. Wait until after planting and misting the enclosure, giving isopods and springtails a moist, stable environment to settle into. Introduce them gently, spreading them evenly across the substrate surface so they can begin breaking down waste and detritus right away. Skipping this step can lead to mold outbreaks and poor hygiene, putting your pet at risk.
Inviting isopods and springtails to the party
Start by releasing springtails first, as they reproduce quickly and help control fungal growth from the start. Add isopods shortly after, choosing species like Cubaris or Cyphodillium that suit your enclosure’s humidity. These tiny recyclers will begin processing waste within days, turning feces and fallen leaves into nutrient-rich material that benefits plant roots.
Helping your tiny helpers thrive in the soil
Keep the lower substrate layers slightly damp to support springtail movement and isopod burrowing. Offer supplemental food like dried leaves, almond bark, or a pinch of fish food every few weeks. Over-drying the soil will crash the population, so monitor moisture when you mist the enclosure.
Isopods need hiding spots to molt safely, so include pieces of cork bark or leaf litter on the soil surface. Springtails prefer biofilm and microorganisms, which develop naturally on wood and in aged substrate. A well-fed crew multiplies steadily, maintaining a clean floor layer and reducing the need for full cleanouts. One thriving colony can process waste for months without intervention, quietly supporting your pet’s health.
Managing Environmental Factors for Success
To keep your bioactive enclosure thriving, monitor temperature, humidity, and lighting closely. Small reptiles and amphibians rely on stable conditions to regulate their health and behavior. Include a reliable hygrometer and thermometer, and adjust as needed based on daily observations. Recognizing subtle shifts early prevents stress and illness in your pet.
Setting up natural lighting and heat cycles
Light influences your pet’s circadian rhythm and digestion. Use a UVB bulb for species that require it, and pair with an LED for daylight simulation. Set all lights on a timer to mimic a consistent 12-hour day-night cycle. Position the heat source to create a safe thermal gradient, allowing movement between warm and cool zones.
Dialing in the perfect humidity levels
Many small amphibians need high humidity to breathe through their skin. Mist the enclosure each morning using dechlorinated water, focusing on dense plant zones. Use a tight-fitting mesh lid to retain moisture, but allow some airflow to prevent mold buildup. Recognizing when the substrate feels slightly damp-not soggy-means you’ve hit the sweet spot.
Humidity needs vary widely; for example, a mossy leaf litter layer helps maintain moisture for red-eyed tree frogs, while desert geckos benefit from drier air and a humid hide only. Over time, you’ll notice how your plants and cleanup crew respond-lush moss and active isopods signal balanced conditions. Watch for water droplets on glass, which may indicate over-misting, especially in poorly ventilated areas. Adjust frequency based on your enclosure’s microclimate and seasonal changes in your home.
Helpful Tips for Keeping Your Ecosystem Happy
Observe your enclosure closely every few days to catch any shifts in behavior or plant health early. Keep a small log to track humidity levels, feeding schedules, and clean-up crew activity. Overfeeding can lead to mold, while too much light may encourage algae. After introducing new elements gradually, your system will find its natural rhythm.
Monitoring your plants and critters daily
Check for drooping leaves, unusual spots, or insects clustering in one area, as these can signal imbalances. Watch your reptile or amphibian for changes in appetite or activity-sluggishness might mean temperature issues. A quick glance each morning helps maintain stability and prevents small issues from growing.
Simple ways to maintain the biological balance
Remove any uneaten food within 24 hours to prevent bacterial overgrowth. Mist the enclosure as needed to sustain consistent moisture, and trim yellowing plant parts to encourage new growth. After replacing old or decaying materials promptly, the ecosystem stays clean and functional.
Introducing a small piece of cork bark or a piece of leaf litter every few weeks can boost microfauna diversity. These additions give springtails and isopods new places to thrive, helping break down waste more efficiently. A well-distributed leaf litter layer also supports root development and mimics natural forest floor conditions.
Summing up
You’ve created a living space that mimics the natural world, where moss creeps over cork bark, springtails flit through damp soil, and your little dart frog hops across a leaf after a light misting. With the right balance of plants, cleanup crew, and patience, your bioactive enclosure will thrive, making daily care simpler and your pet’s life richer. A well-maintained setup can stay healthy for years, bringing a piece of the rainforest to your living room.
FAQ
Q: What exactly is a bioactive enclosure, and how does it benefit small reptiles and amphibians?
A: A bioactive enclosure is a self-sustaining habitat that mimics a natural ecosystem by incorporating live plants, a drainage layer, a nutrient-rich substrate, and a clean-up crew of microfauna like springtails and isopods. These elements work together to break down waste, aerate the soil, and reduce the need for frequent cleaning. For small reptiles such as crested geckos or amphibians like dart frogs, this setup supports healthier skin and respiratory function by maintaining stable humidity and reducing ammonia buildup. A well-established bioactive terrarium can function effectively for years with minimal disruption, offering a more enriching environment than traditional setups.
Q: Which clean-up crew members are best suited for a small reptile or amphibian terrarium?
A: Springtails are often the first choice for most bioactive enclosures because they thrive in moist environments and efficiently consume mold, fungi, and organic debris. Isopods, particularly dwarf white or zebra varieties, are also excellent additions as they break down larger waste like shed skin and uneaten food. A mid-sized SaaS firm might rely on automated systems, but in a terrarium, these tiny organisms act as the maintenance team. Some keepers introduce multiple isopod species to occupy different microhabitats-one on the surface, another burrowing below. The key is matching crew size to enclosure volume; a 12x12x18 terrarium typically starts with 50-100 springtails and 10-15 isopods.
Q: Can I convert an existing enclosure into a bioactive setup, or should I start from scratch?
A: It is possible to convert an established enclosure, but success depends on careful planning and timing. First, remove the animal and temporarily house it in a safe, clean container. Drain any standing water, remove old substrate, and clean the glass with a reptile-safe disinfectant. Begin layering anew with drainage material like hydroballs, add a mesh barrier, then build up with substrate blocks or loose mix containing coco fiber, bark, and leaf litter. Introduce plants either at this stage or after cycling the enclosure for 2-3 weeks. Adding the clean-up crew before the animal allows microfauna to establish populations and begin breaking down organic matter. A planted, cycled terrarium with active microfauna is more likely to remain balanced once the reptile or amphibian returns.