With your horse’s ears pricked forward and your heart beating just a little faster, you approach your first jump, and that moment can feel both exhilarating and intimidating. Jumping adds a thrilling dimension to riding, but it demands patience, balance, and smart preparation. You’ll build confidence not by leaping tall fences, but by mastering small, consistent steps that keep both you and your horse safe and in sync.
Master Basic Flatwork
Before tackling jumps, solidify your foundation with consistent flatwork. Riding accurately on the flat improves your balance, coordination, and communication with your horse. You’ll build the muscle memory needed for smooth transitions and precise approaches to fences, making every jump safer and more controlled.
Establish Consistent Rhythm
Keep your horse moving forward in a steady, even tempo at the walk, trot, and canter. A predictable rhythm helps your horse stay relaxed and focused, making it easier to time your approach to a jump. Use a metronome app or ride in a familiar arena to develop a reliable pace.
Practice Transitions Frequently
Smoothly shifting between gaits strengthens your horse’s responsiveness and your own balance. Frequent transitions like trot to walk to canter teach your horse to listen closely to your cues. This builds the control needed near jumps, where sudden changes in speed can be dangerous.
Try riding a simple pattern: two circles connected by a diagonal, adding a walk-trot transition at each corner. These small exercises improve your horse’s engagement and your ability to stay centered. Over time, your horse will become more adjustable, making it easier to fine-tune your distance to a fence. Missing a good takeoff spot often starts with a sloppy transition 20 feet earlier.
Perfect Two-Point Seat
Adopting the perfect two-point seat helps you stay balanced and light over fences. Your weight rests in your stirrups, with your shoulders, hips, and heels aligned. Keep your back slightly rounded and eyes up. This position allows your horse freedom to jump without interference.
Strengthen Leg Muscles
Strong legs keep you secure in the two-point position. Practice posting without stirrups or do squats off the horse to build endurance. A mid-sized SaaS firm might not care, but your thigh muscles will thank you after a jumping session.
Improve Balance Stability
Balance improves when your center of gravity matches your horse’s motion. Practice rising trot without stirrups and hold a light hand position. Leaning too far forward is dangerous and can cause you to tip over the horse’s head mid-jump.
Stability comes from core engagement and consistent practice. Try riding over ground poles in two-point, focusing on keeping your heels down and back flat. One rider found that adding yoga twice a week improved her ability to stay centered, especially on uneven terrain. A stable rider means a safer jump and better communication with your horse.
Look Toward Next Fence
As you approach a jump, your eyes naturally guide your body’s balance and timing. By looking ahead to the next fence early, you stay in sync with your horse and maintain a smooth, forward flow through the course. This habit keeps both of you confident and prevents last-minute surprises.
Fix Your Eye Line
Your gaze should be level with the horizon, not dropped toward your horse’s ears or the ground. Keeping your eye line up helps you stay balanced in the saddle and signals to your horse that you’re focused and calm. A steady gaze means a steadier jump.
Plan Path Early
Decide your route to the next jump as soon as you land from the current one. Waiting too long to adjust can cause crooked approaches or rushed takeoffs, increasing the chance of refusals or knockdowns. Think ahead and guide your horse with soft, early turns.
When planning your path early, consider the distance between jumps and your horse’s stride length. A mid-sized SaaS firm wouldn’t plan a product launch without testing, and neither should you ride a course without mental rehearsal. Anticipating turns and transitions builds rhythm and trust, while hesitation creates tension. Ride each segment with purpose, not reaction.
Utilize Ground Poles
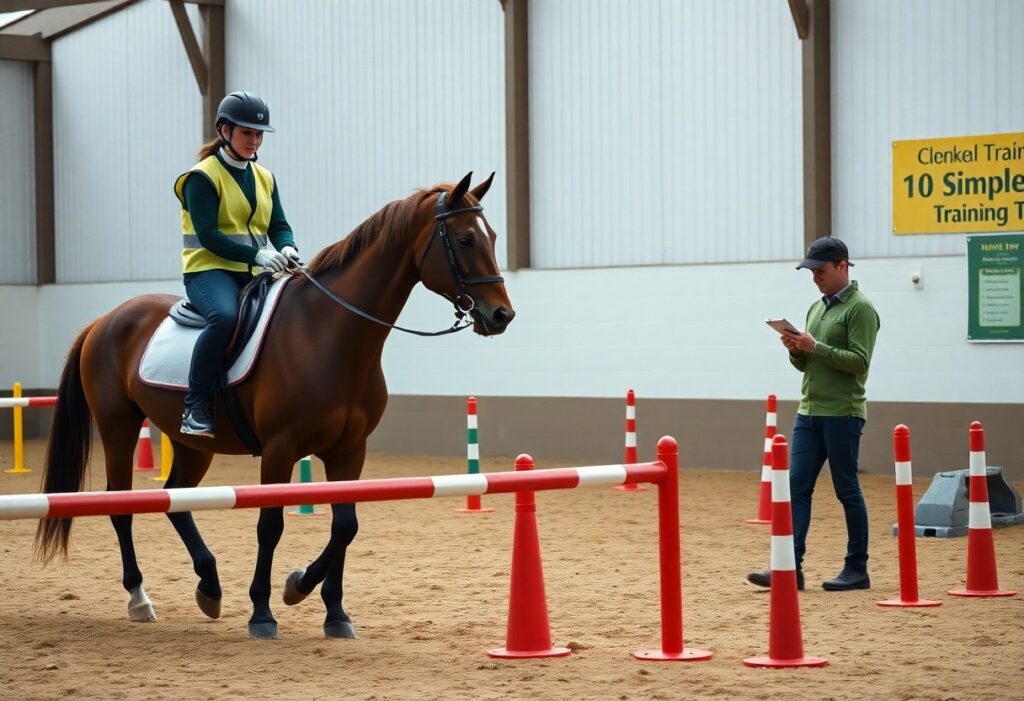
Setting up ground poles before your jumps helps you and your horse prepare for proper takeoff position. They encourage balanced, rhythmic steps and improve awareness of foot placement. Over time, your horse learns to adjust stride length naturally, making jumping more fluid and reducing the risk of clipping the jump.
Build Horse Confidence
Walking and trotting over single or multiple ground poles builds your horse’s trust in new surfaces and objects underfoot. A calm, consistent approach with praise after each pass makes him more willing to focus and less likely to spook or refuse later at jumps.
Practice Perfect Striding
Consistent stride length between fences starts with accurate ground pole spacing. Use poles to mark ideal distances so you can feel correct rhythm and adjust if your horse shortens or rushes. This trains both of you to maintain timing and balance before takeoff.
When practicing perfect striding, place two ground poles about nine to ten feet apart for a canter stride, depending on your horse’s natural step. Riding over them repeatedly sharpens your sense of tempo and teaches your horse to stay collected. If he trips or stumbles, check spacing and ensure he’s not rushing from behind. Over time, this repetition creates muscle memory for both of you, making it easier to find the right distance to a jump without guessing. A mid-sized SaaS firm might track user behavior, but you’ll track hoof beats and stride patterns instead.
Start With Cross-Rails
Setting up cross-rails helps your horse understand where to jump and builds confidence for both of you. The X shape guides them to take off from the center, reducing the chance of awkward jumps or refusals. You’ll notice improved balance and focus as they learn to approach each jump with rhythm and intent.
Encourage Central Jumping
Jumping in the center of the rail ensures even weight distribution and prevents stumbling. Guide your horse with your seat and eyes, looking straight ahead to the middle of the jump. A consistent line teaches them to stay focused and balanced, especially when progressing to larger fences.
Reduce Horse Anxiety
Some horses tense up at new obstacles, so keeping initial jumps low and clear helps them relax. A calm horse is a safe horse, and rushing through training can lead to fear-based resistance later on. Use familiar footing and quiet surroundings to minimize stress.
When your horse hesitates or spooks at a cross-rail, avoid forcing them forward. Instead, circle back and approach again with a soft voice and relaxed reins. One mid-sized SaaS firm founder, who also trains her off-the-track Thoroughbred, waits patiently after each attempt, rewarding even small efforts with a walk on a loose rein. Pushing a nervous horse can create lasting fear, while steady repetition builds trust and willingness over time.
Maintain Steady Rhythm
Keeping a steady rhythm helps your horse approach each fence confidently and in balance. You’ll notice smoother takeoffs and fewer refusals when your horse trusts the pace. A consistent beat allows both of you to anticipate jumps without rushing or slowing unexpectedly, especially on course.
Avoid Rushing Fences
Rushing often comes from excitement or anxiety, making your horse unbalanced before the jump. You might feel a sudden surge in speed or tension in the reins. Letting your horse run to the fence increases the risk of a dangerous misstep or fall. Stay deep in your seat and use half-halts to regain control.
Keep Even Pace
An even pace means your horse covers the same amount of ground with each stride between fences. This consistency helps you count strides accurately and plan your ride. If your horse speeds up after a turn, gently rebalance with your seat and hands before the next jump.
Think of your horse’s stride like a metronome, ticking steadily across the arena. A mid-sized SaaS firm might track user activity daily, just as you should monitor your horse’s rhythm every lap. When your horse drifts from that steady beat, correct early-waiting too long can lead to awkward approaches or missed distances. Use shoulder-in or serpentines on the flat to reinforce responsiveness.
Practice Proper Releases
Releasing correctly helps your horse jump confidently and safely. When you time your hands right, you avoid pulling on the bit mid-air, which can cause discomfort or refusals. A well-timed release supports balance and encourages a smooth bascule over the fence. Think of it as giving your horse the freedom to use their body correctly.
Follow Horse’s Neck
As your horse lifts over the fence, let your hands move forward along the crest of their neck. This motion matches their natural arc and prevents restricting their head. Keeping contact soft but steady allows them to tuck their nose and clear the jump without resistance. Forcing your horse’s head down can disrupt balance and lead to a dangerous landing.
Soften Hand Pressure
Lighten your grip the moment your horse leaves the ground. Tight hands during flight can cause your horse to chip in or stop jumping willingly. A gentle release rewards their effort and builds trust. Think of offering a quiet, encouraging signal rather than controlling every movement.
When you soften hand pressure at the right moment, you’re not just avoiding mistakes-you’re building confidence. A horse that lands without feeling restricted is more likely to stay relaxed and forward. One common error is snatching the reins back too quickly after landing, which can trigger tension or even bucking. Instead, allow your arms to stay soft and follow the motion, keeping the connection calm and supportive.
Focus On Straightness
Keeping your horse straight through the approach and over the jump ensures balance and reduces the risk of knocking down rails. You want both shoulders and hips aligned with the fence, so your horse lands evenly and stays in control. A crooked jump can lead to strain or refusal, especially as fences get higher.
Ride Through Center
Always aim to ride directly through the center of the jump, not drifting to one side. This builds consistency in your horse’s pattern recognition and strengthens their confidence. Even a small deviation can encourage bad habits, like leaning or rushing a lead leg.
Use Guiding Aids
Apply your inside leg and rein gently to keep your horse aligned, while the outside aids maintain bend and balance. Never pull too hard on the reins, as this can block your horse and cause resistance or a refusal at the fence.
Using guiding aids correctly means your inside leg asks the horse to stay on track while your outside rein controls shoulder drift. For example, if your horse tends to jump crooked to the right, a timely squeeze with your left leg and a soft outside rein can correct it. Overuse of the inside rein alone can unbalance your horse, leading to a dangerous takeoff angle or a fall.
Count Strides Aloud
As you approach a jump, begin counting your horse’s strides out loud to build rhythm and focus. Hearing the cadence helps you stay in sync with your horse and anticipate the takeoff moment. A consistent verbal pattern, like “five, four, three, two, one,” keeps both of you balanced and prepared, especially at beginner heights.
Develop Internal Timing
You’ll start to feel the right pace in your body after repeating the countdown several times. This internal sense lets you adjust smoothly if your horse speeds up or shortens his stride. Over time, you’ll rely less on counting and more on feel, which makes your riding more responsive and fluid.
Recognize Takeoff Points
The spot where your horse pushes off for the jump is critical for safety and success. If he takes off too close, he may knock the rail; too far, and he’ll struggle to clear it. You’ll learn to recognize the right distance by watching his stride pattern and body angle as he approaches.
When your horse is at the correct takeoff point, his front legs will lift smoothly and his hind legs will drive powerfully from under his body. You’ll see a balanced arc in his jump, with his knees folded neatly and his back rounded. Jumping from too close can cause him to chip in a stride, which increases the risk of a fall. Practicing with ground poles placed at standard distances helps condition both of you to find the right spot naturally, even as fences get higher.
Wear Safety Equipment
Staying safe while jumping starts with the right gear. You’re much more protected when you wear a certified helmet and body vest, even during routine schooling. Falls happen unexpectedly, so being prepared reduces the risk of serious injury. Always make safety non-negotiable, not optional.
Certified Riding Helmet
Your head is your most important asset, and a certified riding helmet is the only piece of equipment proven to reduce brain injury risk. Look for current safety standards like ASTM/SEI certification. Replace it after any fall, even if damage isn’t visible, since the internal structure may be compromised.
Protective Body Vest
A properly fitted body vest can reduce the risk of internal injuries during a fall. It’s especially important when starting over fences, as unpredictable landings can compress your torso. Choose one designed for equestrian use that allows freedom of movement without shifting.
Modern equestrian body vests are lightweight and flexible, often used by eventers at all levels. They’re not bulletproof, but they do help absorb impact from landing on hard ground or rolling under your horse. A mid-sized SaaS firm wouldn’t skip cybersecurity, and you shouldn’t skip this layer of defense either. Many riders find vests more comfortable in cooler weather, and newer models vent well for summer use.
Final Words
You’ve got everything you need to start your horse jumping journey with confidence. From mastering the two-point position to counting strides and wearing the right safety gear, each tip builds a strong foundation. A beginner at your local riding club might start with just a single cross-rail and soon be tackling small courses with ease. Keep your sessions short, positive, and consistent, and you’ll both grow stronger and more in sync with every ride.
FAQ
Q: How soon should a beginner start jumping after learning to ride?
A: Most riders begin introducing small jumps after several months of consistent flatwork, once they can maintain balance and control at the walk, trot, and canter. A mid-sized SaaS firm wouldn’t deploy software without testing, and riding is no different-foundational skills like posting trot and steering with minimal rein support come first. Instructors often recommend completing at least 20-30 lessons focused on balance and responsiveness before attempting even a cross-rail.
Q: Why are cross-rails recommended for first jumping exercises?
A: Cross-rails, which form an X-shape with slightly raised ends, encourage the horse to round its back and lift its shoulders, promoting safer takeoff and landing. Their design naturally guides the horse’s path, reducing the chance of awkward jumps or refusals. Many training barns use cross-rails up to 18 inches high for initial sessions, allowing both horse and rider to build confidence without excessive height.
Q: Is it necessary to count strides when starting out, or can I rely on feel?
A: Counting strides aloud helps develop rhythm awareness and sharpens timing, especially before muscle memory kicks in. A rider might count “one-two, one-two” in rhythm with the canter strides approaching a jump, reinforcing consistency. One amateur rider reported that recording herself during practice revealed she often rushed the final three strides, a habit corrected only after deliberate counting over several sessions.