You need a clear, practical plan to build a safe rooster coop that fits your flock and property; this guide shows you how to choose the right size, design efficient ventilation, and prioritize predator-proofing to avoid dangerous breaches while keeping maintenance and costs manageable. You’ll get step-by-step building tips, materials lists, and setup strategies so your coop is secure, comfortable, and compliant with local rules.
Key Takeaways:
- Size and layout: plan 4–6 sq ft of coop space per rooster and 10–12 sq ft of secure run per bird; include dedicated roost bars, nesting/retreat zones, and circulation space to reduce aggression and stress.
- Safety and comfort: prioritize predator-proofing (1/2″ hardware cloth, buried perimeter, secure latches) plus passive ventilation at eaves and high vents to control moisture and ammonia without creating drafts at roost level.
- Build-to-maintain approach: use a detailed materials list, step-by-step plans, and cost breakdown; design for easy cleaning (removable droppings trays, washable surfaces), plan separation for multiple roosters, and verify local regulations before construction.
Understanding the Basics of Rooster Keeping
Benefits of Keeping Roosters
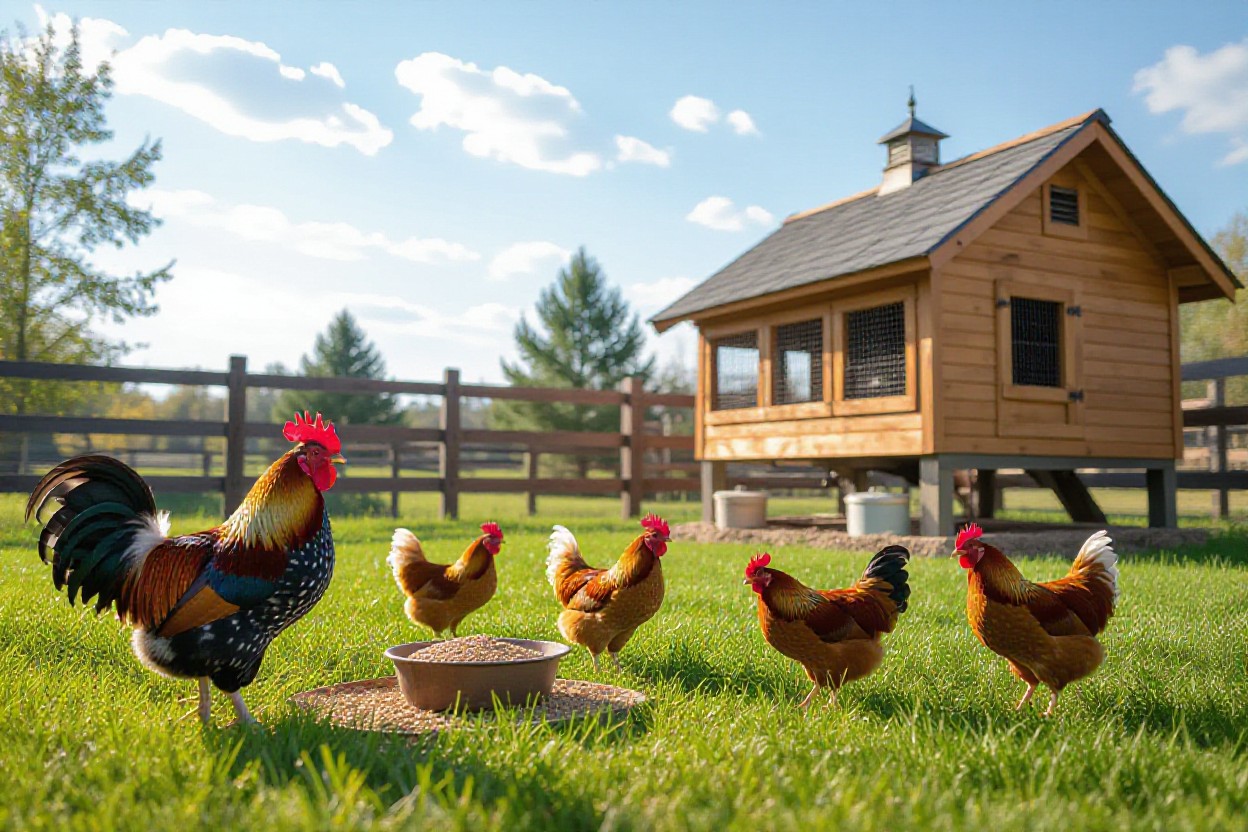
You get more than a crow: roosters provide fertility for hatching (important if you incubate), act as an early-warning system against predators, and help maintain flock order so hens stress less. Many keepers also use roosters for selective breeding and to improve chick survival rates; for example, a single healthy rooster can maintain fertilization across a flock for months with fertility often exceeding 80%–90% under good conditions.
Common Myths about Roosters
Not every rooster is aggressive, and you don’t need one for hens to lay eggs—hens lay unfertilized eggs regardless. The idea that roosters will always fight or kill hens is exaggerated; behavior varies by breed, handling, and flock composition. Avoid assuming worst-case behavior without assessing breed and management.
Digging deeper, aggression correlates more with breed and poor handling than species—game breeds are more likely to be territorial, while Orpingtons, Australorps, and Silkies are typically docile. Crowing frequency varies by bird and environment, and can violate local noise ordinances, so check regulations before keeping roosters. Also note that keeping multiple roosters can lead to dominance fights; the common guideline is 1 rooster per 8–12 hens to limit aggression and overmating.
Choosing the Right Breed of Rooster
Pick a rooster based on temperament, size, and purpose: choose a docile breed like Orpington or Silkie for family flocks, a hardy dual-purpose Rhode Island Red or Wyandotte for eggs and breeding, and avoid game breeds if you want low aggression. Consider whether you need bantams for space-saving or large standards for breeding, and how each will fit your rooster coop layout.
In practice, weigh specifics: standard roosters often suit homesteads where you want both breeding and deterrence—many keepers report success using one Rhode Island Red for 8–10 hens with high fertility and calm behavior. If space or neighborhood rules constrain you, select a bantam Silkie or a calm Ameraucana; they need less nest space and typically cause fewer complaints. Always match breed to climate (e.g., heavy-feathered breeds handle cold better) and verify local ordinances about keeping roosters to avoid conflicts.
Space Requirements for Rooster Coops
Minimum Space Requirements
Give each rooster at least 4–6 sq ft of indoor coop space to reduce pecking and stress; for most backyard flocks plan on 10–12 sq ft of secure outdoor run per bird so they can forage and exercise. The recommended baseline is 4–6 sq ft inside and 10–12 sq ft outside, increasing for large breeds or multi-rooster setups.
- rooster coop: 4–6 sq ft per bird inside
- run space: 10–12 sq ft per bird outside
- multiple roosters: add 2–4 sq ft more per extra male to reduce conflict
Factors Influencing Space Needs
Breed size, temperament, and flock hierarchy change how much room your rooster needs: a large breed like a Jersey Giant needs more floor and roosting space than a bantam, and aggressive breeds need extra territory to prevent fights. You should also factor in age, health, and whether you allow free-ranging versus strictly penned runs.
Consider these practical factors when calculating space so you avoid overcrowding, disease spread, and behavioral issues:
- breed size: bantams vs. large breeds
- temperament: calm vs. aggressive roosters
- housing type: free-range reduces required run area
- seasonal needs: winter shelter and summer shade
The best approach is to size your rooster coop and run conservatively and increase space for larger or multiple males.
Outdoor Run Considerations
Design runs with at least 10–12 sq ft per bird, 6–8 ft high fencing for jumpers, and secure buried perimeter fencing (2–3 ft or an apron) to block diggers; include shade, dust-bathing areas, and sheltered access to the coop. You should also plan for rotation or vegetation recovery to prevent mud and parasite buildup.
Prioritize predator-proofing with 1/2″ hardware cloth on the lower foot of fencing and 1/4″ mesh for overhead protection if raccoons or hawks are common; slope the run for drainage, add gravel or sand lanes where mud concentrates, and install a covered section so your roosters can shelter from sun or storms. The combination of fenced height, buried barriers, and overhead cover will keep your flock safer and reduce stress-related aggression in the rooster coop.
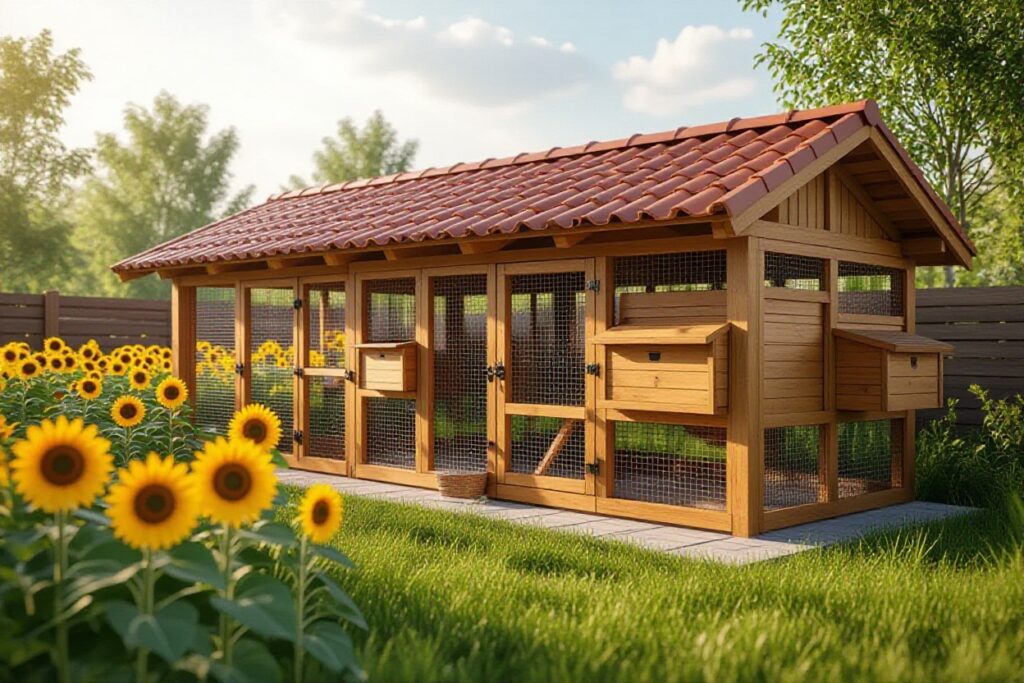
Essential Design Features of a Rooster Coop
Coop Design Fundamentals
You should plan layout and materials for durability, drainage, and predator resistance: aim for 4–6 sq ft of coop space per bird and 10–12 sq ft of secure run per bird, place feed and water away from nesting areas to cut bedding contamination, and slope floors for drainage with a 1–2% fall to an exterior drain. Use 1/2″ hardware cloth on openings and bury a 12″ apron to deter diggers; prioritize easy-clean surfaces and an accessible access door for maintenance.
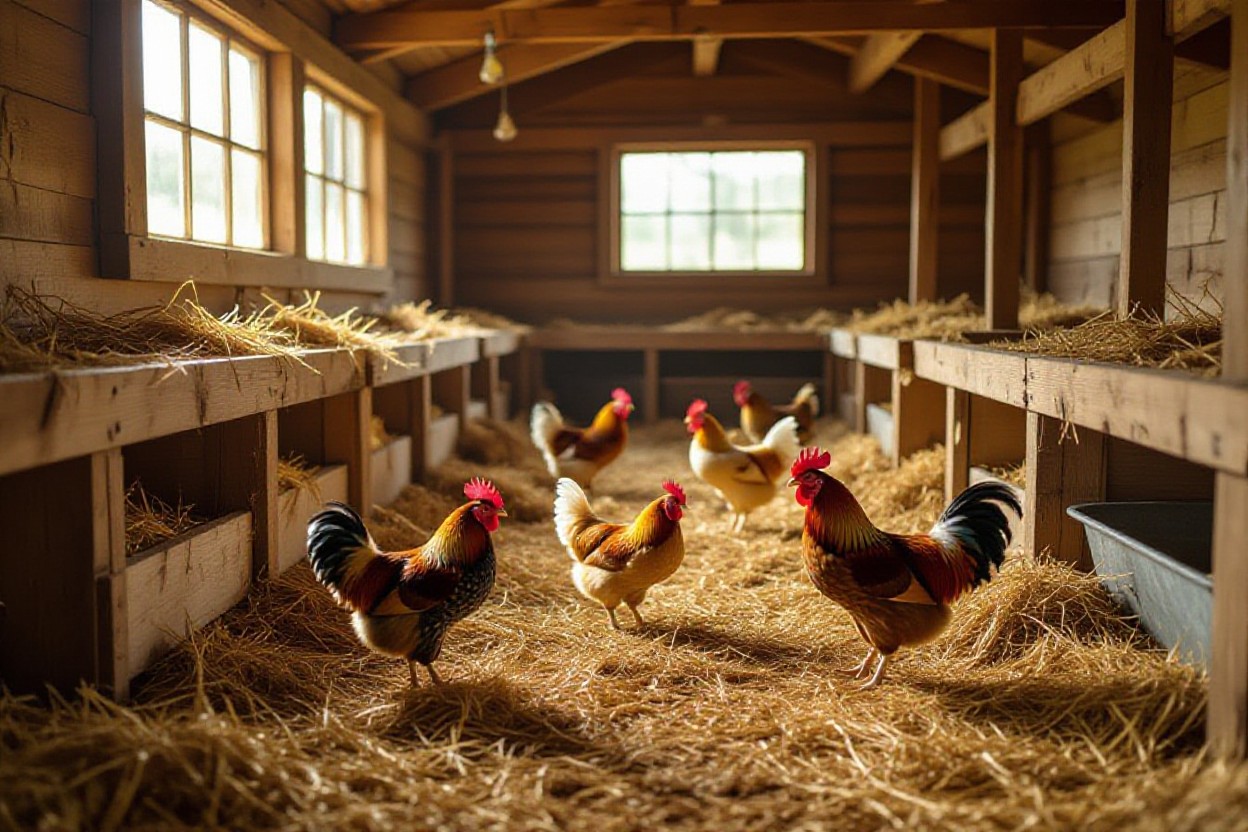
Nesting Boxes and Roosting Bars
Provide nesting boxes sized about 12″ x 12″ x 12″, with one box per 4–5 hens, even if roosters don’t use them; set roosts to give 8–12 inches of perch space per bird and use 2–3″ diameter rounded perches. Mount roosts higher than nesting boxes by 6–12″ to discourage hens from sleeping in nests and to reduce soiling.
Use untreated hardwood or rounded PVC for perches to protect feet; install a removable droppings board under roosts for weekly scraping. For a mixed flock example—2 roosters + 6 hens—build 2 nesting boxes, provide ~8′ of total roosting length, and set roost height 18–24″ off the floor. Angle nest box lids for access, add 3–4″ lip to keep bedding in, and ensure easy replacement of worn perches.
Ventilation and Lighting Needs
Design adjustable vents to maintain dry air and safe light levels: target about 1 sq ft of net ventilation per 10 sq ft of floor area (net free area measured through screens) and place vents high near the ridge plus low intake vents for cross-flow, while avoiding direct drafts on roosts. Use timers and low-wattage LEDs to extend daylight for laying to 14–16 hours when needed, and seal vents against predator entry with 1/2″ hardware cloth.
In practice, a 6′ x 8′ (48 sq ft) rooster coop needs roughly 4.8 sq ft net venting—split into soffit, ridge, and adjustable side vents. Always screen vents and include baffles to prevent wind-driven drafts; excessive moisture leads to ammonia buildup and respiratory disease. Avoid heat lamps due to fire risk—prefer insulated coops, thermostatic panel heaters, or safe ceramic heat emitters if winter supplemental heat is necessary.
Materials for Building Your Rooster Coop
Wood Types and Durability
Cedar and redwood offer the best natural rot resistance—expect roughly 15–20 years outdoors when sealed; pine is affordable but needs sealing and may last 5–10 years for exterior use, while exterior-grade plywood (CDX, 3/4″) works well for walls and roofs. Assume that the following wood options suit different budgets and lifespans:
- rooster coop – Cedar: long-lasting, naturally rot-resistant, low maintenance.
- rooster coop – Pine: cost-effective, paint/seal to extend life.
- rooster coop – Pressure-treated lumber: use for ground-contact framing only; avoid peck areas.
- rooster coop – Exterior plywood (3/4″ CDX): stable for walls/roof; fasten with exterior screws.
- rooster coop – Reclaimed hardwood: durable but inspect for chemical contaminants.
| Cedar | 15–20 yrs; natural rot resistance; low-maintenance |
| Pine | 5–10 yrs when sealed/painted; budget-friendly |
| Pressure-treated | Excellent for ground contact; avoid interior surfaces birds peck |
| Exterior plywood (3/4″) | Good for walls/roof; use marine/exterior adhesives and galvanized fasteners |
| Reclaimed hardwood | Very durable; verify no lead paint or chemical residues |
Alternatives to Traditional Materials
Metal shipping containers, recycled plastic lumber, concrete block, and galvanized steel framing offer durable, low-maintenance options; for example, recycled plastic boards resist moisture and last >20 years, while a converted 8’x20′ container gives instant predator-proofing but needs insulation and ventilation upgrades.
Concrete block provides thermal mass—helpful in cold climates—but you must seal joints and add bedding to prevent dampness; aluminum framing paired with corrugated panels speeds construction and keeps pests out, and using 1″ closed-cell foam plus vapor barrier solves condensation issues in metal structures.
Recommended Hardware and Accessories
Use 1/2″ welded hardware cloth for run protection, 3/4″ or 1″ hardware cloth is insufficient; choose galvanized or stainless 2–2.5″ exterior wood screws for framing, and 1.5–2″ decking screws for trim and plywood fastening.
Include spring-loaded or carabiner-style latches on all access points to stop raccoons, install soffit vents with 1/4″ hardware cloth backing for ventilation, fit predator skirts (18–24″ wide) buried 6–12″ around the run, and add removable droppings trays (approx. 18″x24″) and 10–12″ of roost space per rooster for comfortable roosting.
Cost Breakdown of Building a Rooster Coop
Budgeting for Materials
When pricing your rooster coop, expect basic lumber and hardware to run about $300–$800 for a 4×6–6×8 build; choose cedar or redwood and costs jump to $800–$1,500 but you get 15–20 years of rot resistance. Plan for rolls of 1/2″ hardware cloth at $80–$150, plywood sheets $25–$50 each, corrugated metal roofing $20–$60 per panel, plus screws, hinges, and latch packs (~$50–$150). Use hardware cloth not chicken wire for predator proofing.
Labor Costs vs. DIY
Hiring a carpenter typically runs $35–$75/hour, so a simple coop (8–20 hours) costs about $280–$1,500 in labor; DIYers usually spend 15–40 hours depending on skill, which trades cash for time and reduces total outlay to materials plus incidentals.
Break tasks into foundation (2–4 hrs), framing (6–12 hrs), roofing (2–6 hrs), hardware-cloth installation (2–6 hrs), and finishing (4–8 hrs); if you pay for specialty installs like electric or a concrete pad expect contractor minimums and permits to add $200–$800. A real-world example: a 6×6 coop built by a homesteader cost $520 materials + ~30 DIY hours; hiring a pro for the same job quoted ~$1,600–$2,200.
Ongoing Costs of Coop Maintenance
Plan recurring expenses: bedding and deep-cleaning supplies (~$10–$30/month), routine repairs ($50–$200/year), predator-repair contingencies ($50–$300/event), and occasional paint/stain every 3–5 years (~$100–$300). Factor in tools and replacements so your annual upkeep budget is roughly $150–$600.
Schedule monthly bedding swaps and visual checks of latches, hardware cloth, and roof fasteners; replace worn 2x roost bars ($10–$30) or damaged mesh promptly to avoid a predator breach, which can cost far more than routine fixes. Over a decade, choosing durable materials (cedar, metal roofing, stainless fasteners) often lowers lifetime maintenance to half the cost of cheaper builds that need frequent patching.
Building Step-by-Step: Constructing Your Rooster Coop
| Planning and Preparation |
Planning and PreparationLay out your footprint with specific numbers: plan on at least 4–6 sq ft inside per bird and 10–12 sq ft of run per rooster, factor in a 4–6 week build timeline, and budget roughly $300–$700 for basic materials or $1,000+ for premium cedar and metal roofing. Check local ordinances for setbacks and noise limits, pick a level, well-drained spot with afternoon shade, and list tools: circular saw, drill, level, posthole digger, and 1/2″ welded hardware cloth. |
| Foundation and Frame Construction |
Foundation and Frame ConstructionStart with supports suited to your soil: use concrete piers or 16″ deck blocks on compacted gravel; set joists on pressure-treated 4×4 skids or treated sill plates. Lay floor sheathing with 3/4″ plywood, space joists 16″ on center, and lay out wall studs at 16″ OC for consistent framing and insulation options. Dig piers to local frost depth—typically 12–24 inches—or use concrete pads on gravel if frost isn’t a concern; bolt hold-downs to anchors for uplift resistance. Frame walls with 2×4 studs, reinforce corners and door openings, and brace temporarily while sheathing. Install a sill gasket under the floor to block moisture, and fasten exterior-grade screws rather than nails where possible. Integrate a hardware-cloth skirt, buried 12–18″ and extending outward as an apron to stop diggers; use 1/2″ welded hardware cloth for predator resistance, and plan ventilation ports high on opposite walls to create cross-flow without drafts at roost level. Anticipate load paths for roof snow loads—use rafters sized to span your width (for a 8–10 ft span, 2×8 rafters @16″ OC is a common choice) and add collar ties or ridge beam if needed. |
| Completing the Coop: Roofing and Finishing Touches |
Completing the Coop: Roofing and Finishing TouchesChoose roofing based on budget and longevity: corrugated metal lasts 30+ years, asphalt shingles typically 15–25 years; provide a minimum 3:12 pitch for shingles and include drip edge and flashing. Fit nest boxes 12″x12″x12″ with external access, install roosts 8–12″ off the wall with 18″ spacing per bird, and fit predator-proof latches on all access points. Finish by sealing gaps larger than 1/2″ with trim and caulk, and paint exterior surfaces with exterior-grade, low-VOC paint or stain—avoid treated lumber in roosting areas where birds peck. Fit gutters and a downspout if you get heavy rain; slope the coop floor slightly toward a removable droppings tray or an easy-to-clean corner for maintenance. Mount ventilation vents (two 6″x12″ screened vents low and two high) to produce passive airflow without direct drafts at roost level, and attach corner guards and edge trim to cover sharp metal ridges. Install double-door access (a human door plus a secure egg/nest access panel), and fit locks rated for predators: carabiner-style clips or keyed hasps work well. Address electrical safety by keeping wiring in conduit, using GFCI outlets for heated elements, and placing heat sources away from bedding to avoid fire risk. |
Adding a Run: Outdoor Space for Roosters
Importance of an Outdoor Run
You’ll give your birds exercise, foraging opportunities, and a place to dust-bathe — all of which lower stress and reduce aggressive behavior in a rooster coop. Aim for at least 10–20 sq ft per bird for basic activity and 20–30 sq ft per rooster if you keep multiple males; studies of backyard flocks show space directly correlates with fewer fights and better feather condition.
Design Ideas for a Chicken Run
Consider an A-frame arched run built from cattle panels for an inexpensive 8’×12′ footprint, a modular 10’×10′ pen with removable panels for cleaning, or a mobile tractor that gives pasture rotation every 1–2 weeks. Use 1/2″ hardware cloth on sides, add an overhead cover for hawk protection, and include a 3–4 ft sheltered dust-bath and low perches to mimic natural behavior.
For layout, zone the run into foraging, dust-bathing, and shaded loafing areas; a 10’×12′ run divided with a mesh partition lets you isolate new roosters or introduce birds gradually. Install a pop-hole that opens into the run at 18–24″ off the ground and place feeders in a covered box to prevent spill and reduce vermin attraction. Shade cloth rated 50–70% cuts heat load while allowing ventilation.
Safety Measures for the Run
Protect your flock by using 1/2″ hardware cloth, burying it at least 12 inches with an 18-inch outward apron to stop diggers, and fitting all doors with double-latch systems (spring latches plus a carabiner). Add overhead netting or solid roofing to guard against hawks, and keep run walls at least 6 feet tall to deter jumping predators like coyotes.
For extra defense, mount motion-activated lights or sprinklers and consider a low-voltage electric wire 6–8 inches above ground to discourage persistent intruders; both reduce nocturnal and daytime raids. Secure feed in wildlife-proof containers and routinely inspect fastenings—rotten wood, loose staples, or 1″ gaps are how predators exploit a rooster coop run.
Predator-Proofing Your Rooster Coop
Identifying Common Predators
You’ll face a mix of diggers (foxes, coyotes), climbers and dexterous marauders (raccoons that can open simple latches), small squeezers (weasels and mink that slip through 1″ gaps), aerial hunters (hawks, owls), and rodents (rats, mice) that chew and spread disease; track signs like scat, tracks, torn wire, or missing feathers to identify which threat is active at your rooster coop.
Effective Predator-Proofing Techniques
Use 1/2″ galvanized hardware cloth for walls and 1/4″ mesh where rats or minks are a problem, bury mesh 12–24″ or install a 12″ outward apron, cover runs overhead, replace 2″ welded wire (which predators can rip), and fit raccoon-proof latches and tamper-resistant hinges to stop most attacks on your rooster coop.
Go deeper by fastening hardware cloth with galvanized or stainless 1/4″ screws and washers, overlap seams 6″ and staple before screwing, and run an embedded barrier (concrete footer or buried cloth) at least 12″ deep—18″ is better in fox country; add an overhead cover of welded wire or poly netting to block hawks, and use double-latch systems (external carabiner plus internal slide bolt) or spring latches that raccoons can’t manipulate; store feed in metal containers, add motion lights or low-voltage poultry netting for perimeter defense, and consider a guardian animal if predators are persistent.
Regular Inspection and Maintenance
Inspect your coop monthly and after storms: look for new holes, chewed edges, loose screws, rusted mesh, and gaps larger than 1/2″; test latches daily during high-risk seasons, clear vegetation 2–3 ft from structures, and keep feed sealed to reduce attractants around your rooster coop.
Maintain a simple checklist: weekly visual walk, monthly hardware and foundation check, seasonal roof and vent inspection; carry spare 2x2s, screws, 1/2″ hardware cloth, wire cutters, and a cordless drill so you can patch holes (a 3″ tear can become a full entry overnight); replace heavily corroded mesh every 6–10 years, treat or replace rotted wood promptly, and log incidents (date, predator type, repair made) to track patterns and upgrade weak points proactively.
Supplies and Equipment for Rooster Care
Feeding and Watering Solutions
Use a mix of a 3–5 lb hanging gravity feeder and a trough feeder so a dominant rooster can’t monopolize food; aim for 4–6 inches of feeder space per bird. Feed adult roosters a maintenance mash at 14–16% protein, switching to 16–18% for breeding. For water, install a bell or nipple system plus a backup 1–2 gallon container, and add a heated base in winter to prevent freezing and water contamination.
Comfort Items for Roosters
Provide sturdy perches 2–4 feet high, using rounded wood 2–3 inches diameter or 2–4 inch flat roosts with 8–10 inches of perch space per bird, plus a dust bath of about 18–24 inches diameter filled with sand, wood ash and optional DE. Add sheltered hide boxes, pecking blocks, and hanging treats to reduce boredom and aggression in your rooster coop.
Choose hardwood perches (oak, maple) over pressure-treated lumber to avoid toxins, and mount them at staggered heights to limit fights. Rotate dust bath material every 2–4 weeks or after heavy rain, and use coarse sand to help controlling mites. Small enrichment items—cabbage, mirror, or foraging trays—cut down on pecking and improve feather condition.
First Aid Supplies for Roosters
Keep a waterproof kit with a digital thermometer, sterile saline, chlorhexidine or povidone-iodine, sterile gauze, adhesive vet wrap, tweezers, small scissors, styptic powder, triple-antibiotic ointment, oral electrolytes/vitamins, and a bulb syringe. Note normal chicken temp is ~104–107°F, and heavy bleeding or collapse needs immediate action.
For wounds: clip feathers, flush with saline, apply antiseptic, then powder and bandage as needed; use styptic powder for comb nicks. Treat bumblefoot by soaking the foot 15–20 minutes in warm Epsom salt, then clean and pack with antibiotic ointment and sterile gauze. If you see persistent fever, severe lameness, or no improvement in 48 hours, seek veterinary care.
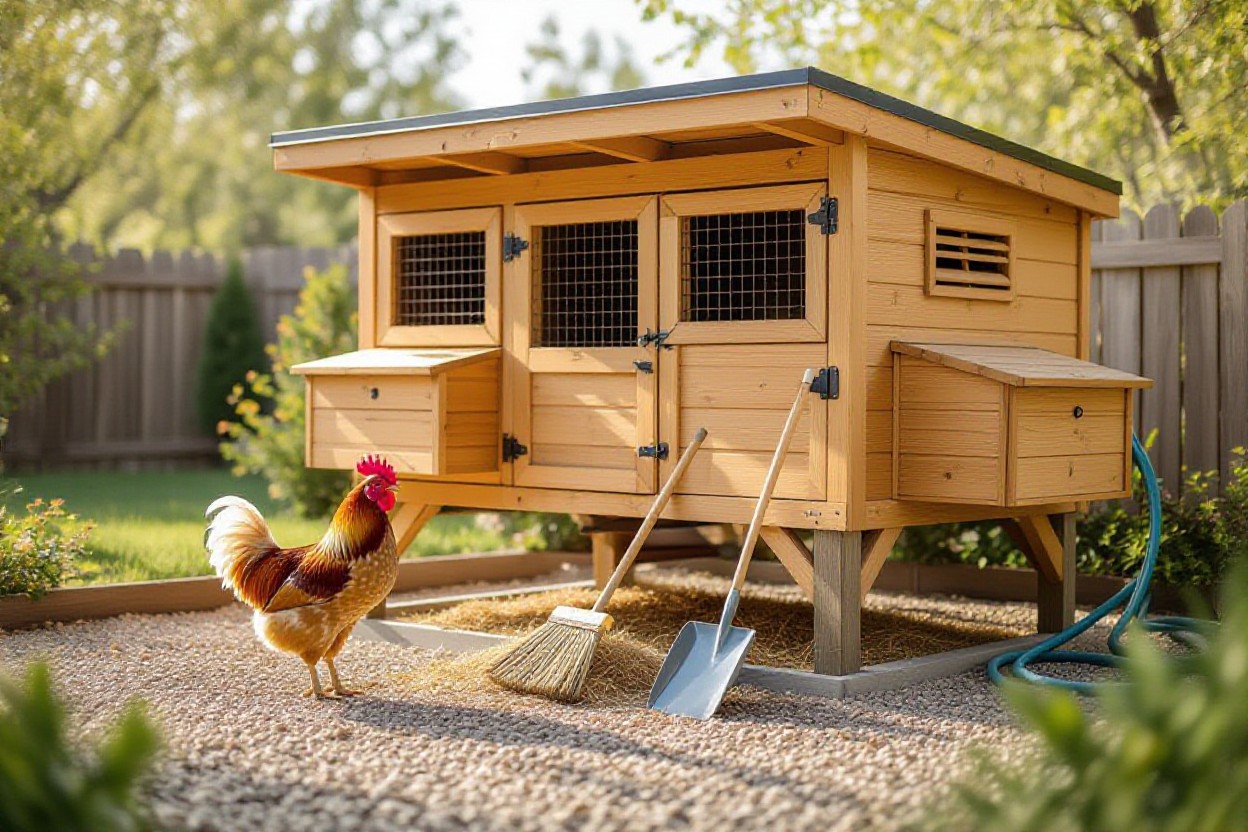
Maintenance and Cleaning of Your Coop
Daily, Weekly, and Monthly Tasks
You should do a quick daily check: collect eggs, top off water, remove obvious droppings, and scan for damage or predators. Weekly, replace or stir bedding, clean feeders and waterers, and check for mites or lice. Monthly, perform a deeper scrub: remove all bedding, inspect hardware cloth, hinges and vents, and treat infestations or ammonia buildup; log repairs so you track recurring issues.
Choosing Safe Cleaning Products
Use diluted household bleach (1:32) or a labeled poultry disinfectant like Virkon S for true disinfection, and enzyme cleaners or white vinegar for organic grime. Avoid cleaners with high fumes or unknown chemicals; always rinse, dry, and ventilate before returning birds to prevent respiratory irritation from lingering residues.
Mix bleach at roughly ½ cup (4 oz) per gallon of water, apply to clean surfaces, allow at least 10 minutes contact time, then rinse and air-dry. For routine removal of droppings use an enzyme-based cleaner to break down organic matter and reduce ammonia odors; wear gloves and remove birds during intensive treatments, and always follow product label directions for concentration and contact time.
Seasonal Maintenance Tips
In winter, add insulation, use a heated or well-insulated water heater, and increase bedding depth; in summer, maximize ventilation and shade to prevent heat stress. Spring and fall are prime times to inspect for rot, replace worn roofing, and reinforce predator-proofing. After severe weather, inspect the roof, latches, and run-off channels for damage.
- Winter: boost bedding to 6–12 inches, protect water lines with heat tape
- Summer: add 2–3 additional soffit vents and shade cloth over the run
- Spring/Fall: check predator-proofing and clear vegetation 3 feet around the rooster coop
- Yearly: inspect roof and replace torn hardware cloth; reseal gaps under ¼” with caulk
Plan specific seasonal tasks: wrap exposed pipes before sub-freezing nights, swap to coarse shavings for winter composting, and install adjustable vents for summer airflow. You should schedule a full hardware check every 6 months, re-stain or paint exterior wood every 3–5 years, and rotate nest-box bedding at the start of laying seasons. After each season, update your maintenance log and prioritize repairs found during inspection.
- Before winter: secure latches, add bedding, test water heater
- Before summer: add shade, increase ventilation, check fans
- Every 6 months: tighten screws, inspect roofing, treat for pests
- Post-storm: replace damaged panels and reinforce predator-proofing
Socialization and Interaction with Roosters
Understanding Rooster Behavior
Roosters establish a strict hierarchy; expect dominance displays like chest-thrusting, spur-raising, and a strut. You should note that a typical breeding ratio is about 1 rooster per 8–10 hens, and changes in flock size or space in your rooster coop will shift aggression. Watch for signals — lowered head and puffed neck often precede charging — and use those cues to prevent escalation before spurs make contact.
Best Practices for Handling Roosters
Approach calmly at an angle, speak softly, and limit initial sessions to 5–10 minutes daily to build trust. When you pick up a bird, support the body under the breast and secure legs to prevent kicking; wear thick gloves and long sleeves to protect against spurs and beaks. Keep interactions consistent so the rooster learns routine and respect without fear.
For a practical routine, start by offering treats through the wire for three days, then progress to cup-feeding mealworms while you stroke the chest; after 7–14 days most birds accept brief handling. If the rooster shows persistent aggression, use a towel wrap to safely control wings and legs while you inspect or trim nails — only trim spurs with proper tools or a vet. When multiple roosters are present, handle them separately to avoid redirected aggression, and always exit the pen first when tensions rise.
Bonding Activities with Roosters
Use short, frequent activities: hand-feeding mealworms, target-training with a stick, and supervised free-ranging near you build familiarity quickly. Try calling your rooster with the same soft whistle or word before every treat; within 2–4 weeks you’ll see reliable responses. Keep sessions positive and avoid surprise moves that trigger defensive behavior.
To deepen the bond, create a consistent schedule: 5–10 minute morning treat sessions, 10–20 minute afternoon free-range under supervision, and evening perch time on your knee at coop cleaning. Equip your rooster coop run with low platforms so the bird can jump to your level; this reduces intimidation and increases voluntary approach. Track progress—note latency to approach in seconds—and adjust rewards to reinforce calm behavior.
Health Concerns and Veterinary Care for Roosters
Common Health Issues
You’ll most often face external parasites (mites, lice) and internal worms, plus respiratory infections like Mycoplasma or Infectious Bronchitis; trauma from fights and bacterial infections such as colibacillosis are common too. Watch for sudden weight loss (>10% in weeks), decreased activity, pale combs, or abnormal droppings—these signal problems that demand rapid action to protect the rest of your flock and the rooster coop.
Signs of a Healthy Rooster
A healthy bird shows bright eyes, a glossy feather coat, an upright posture, steady appetite, clear nostrils, and a strong, regular crow; weight should be within breed norms and droppings firm with defined color and texture.
Measure expectations: bantams commonly weigh 0.5–1.0 kg, standards 2.5–4 kg depending on breed, and normal cloacal temperature runs about 105–107.5°F. Check comb color—firm, evenly colored combs and wattles indicate good circulation and health, while pale or mottled combs can mean anemia or respiratory distress. Monitor breathing rate (normal at rest ~15–30 breaths/min) and inspect vents for mites or prolapse; catch early abnormalities by weekly handling and weight checks, and isolate any bird showing lethargy, loose droppings, or uncoordinated gait to prevent spread within the rooster coop.
Vaccination and Healthcare Tips
Follow region-specific protocols: Marek’s is given at hatch in many programs, while Newcastle and Infectious Bronchitis vaccines depend on local risk and flock exposure—biosecurity and sanitation lower disease pressure. Thou should consult a poultry vet to set a precise schedule for your flock.
- Keep vaccine and treatment records in or near the rooster coop.
- Quarantine new birds away from the rooster coop for at least 30 days before mixing.
- Log boosters, batch numbers, and any adverse reactions in your rooster coop health binder.
Administer live vaccines according to label timing and route—eye-drop, spray, or in-water—and store refrigerated vials properly; inactivated vaccines often need vet administration. Rotate dewormers based on fecal egg counts (treat when counts rise; many homesteads treat every 3–6 months as a baseline), and use premix or topical controls for mites while cleaning bedding and treating nests. Maintain dry litter, 6–8 air changes per hour in winter ventilation plans, and weekly coop checks to reduce pathogen load. Thou must document every intervention and consult your vet for off-label medication use or suspected reportable diseases like avian influenza.
- Stock emergency meds and a first-aid kit inside or adjacent to the rooster coop.
- Schedule biannual flock health reviews with your poultry vet at your rooster coop.
- Use clear signage on the rooster coop door for quarantine and treatment status.
Legal Considerations and Regulations for Roosters
Understanding Local Ordinances
You must check city, county, and HOA rules before building a rooster coop: many municipalities cap poultry numbers, ban roosters outright, or require permits and setbacks of roughly 10–25 ft from property lines. Noise and nuisance ordinances often set quiet hours or decibel limits (commonly ~60–70 dB at the property line), and violations can carry fines of $50–$500+ or mandatory removal.
Preparing for Neighborhood Concerns
You should proactively engage neighbors: disclose flock size, coop location, and daily routines, offer a written contact plan, and place the coop away from property lines (aim for 20 ft+) to reduce noise and odor complaints. Documenting your compliance with permits and sanitation schedules helps defuse disputes before they escalate to code enforcement.
Mitigation tactics include soundproofing the rooster coop with 1–2″ rigid foam panels and a double-door vestibule to cut crow transmission, planting a dense evergreen hedge 6–10 ft wide as a living sound barrier, and scheduling feeding/cleaning outside sensitive hours. You can also use a decibel meter app to demonstrate compliance during mediation; if neighbors object repeatedly, propose a 30–90 day trial with measurable conditions (hours of disturbance, acceptable dB level) and a written agreement to resolve issues without immediate legal action. Avoid any device or restraint that could harm birds—check animal welfare rules before using collars or anti-crow gadgets.
Keeping Roosters in Urban Areas
Urban codes typically restrict roosters more than hens: many cities allow hens but limit roosters to 0–1 per property, or ban them due to noise. You should verify zoning, livestock setbacks, and nuisance ordinances because keeping a rooster in a dense neighborhood can trigger complaints, inspections, or mandatory removal if rules are violated.
Operationally, keep the rooster coop compact but well-ventilated—aim for at least 10 sq ft per bird in run space and roosting height that directs sound upward, not toward neighbors. Choose quieter breeds (e.g., Orpingtons versus Leghorns), install insulation and a south-facing windbreak, and maintain strict cleanliness to minimize odor. If permits are required, include a site plan showing setbacks and predator-proofing; having that paperwork ready often prevents city officers from pursuing removal after a complaint.
To wrap up
Upon reflecting, you can see that a well-planned rooster coop balances size, ventilation, predator-proofing, and easy maintenance. Follow the design, materials list, and step-by-step build to meet regulations, accommodate multiple roosters, control costs, and simplify your cleaning routine. With these practical guidelines you’ll create a durable, safe, and functional coop that supports healthy birds and minimizes ongoing work.
FAQ
Q: How do I size and design a rooster coop for one rooster or a small flock so it stays comfortable, safe, and easy to maintain?
A: Sizing and layout are the foundation of a functional rooster coop. For a single average-sized rooster plan on at least 10–12 sq ft of enclosed coop floor space and 30–50 sq ft of run area. If you keep multiple roosters or larger breeds, increase the coop space to 12–15 sq ft per rooster and the run proportionally. Roosters are larger, more active and need more perch space than hens: provide 8–12 inches of roost bar length per bird and place bars 2–3 feet above the floor with 12–18 inches vertical spacing between staggered tiers. Nest boxes are primarily for hens; for a mixed flock plan 1 box per 3–4 hens and keep them slightly lower than roosts to discourage sleeping in boxes.
Layout basics:
– Footprint: a 4′ x 8′ coop (32 sq ft) suits one rooster plus 2–4 hens indoors with a 10′ x 12′ run attached for daytime exercise. For two roosters plan 24–30 sq ft indoor minimum.
– Doors: a human-sized access door (30–36″ wide) plus a smaller pop door for chickens. Include an external clean-out door or removable droppings tray.
– Roosts: solid wood (2″x2″ or 1.5″x3″) or rounded perches; aim for at least one continuous roost bar rather than many short pieces.
– Ventilation: cross-ventilation without drafts at roost level—intake vents low and exhaust vents high near the ridge. Use screened vents (hardware cloth) and place them on opposite walls for airflow.
– Flooring: raised wooden floor for wet climates or concrete slab with a deep litter or removable trays in drier areas. Choose bedding such as pine shavings, straw, or pellets depending on cleaning regime.
Materials list (typical for a 4’x8′ basic coop plus run):
– Framing lumber: 2x4s and 4x4s for posts
– Sheathing: 1/2″ or 3/4″ exterior plywood
– Roof: corrugated metal or asphalt shingles with plywood underlayment
– Exterior siding: T1-11, siding boards, or recycled pallets (insulate as needed)
– Fasteners: 3″ and 1.5″ galvanized screws, joist hangers
– Hardware cloth 1/2″ (recommended) or 1/4″ for high-risk predators, plus heavy-duty staples and washers
– Latches: predator-proof cam locks, carabiner clips, padlocks
– Hinges: heavy-duty exterior hinges for doors and hatch
– Paint or exterior sealant
– Roost bars and nesting boxes material
– Feeders, waterers, lighting (optional for cold climates), insulation if needed
Cost breakdown (approximate ranges):
– Basic DIY small coop and run: $300–$700 (used lumber or budget materials)
– Mid-range build (better materials, hardware cloth, shingles): $700–$1,500
– High-end custom coop with insulation, finished siding, automatic features: $1,500–$3,000+
Itemized examples: lumber $150–$400, plywood $50–$150, roofing $50–$200, hardware cloth $50–$150, fixtures/latches $30–$100, paint/sealant $30–$150, feeders/waterers $20–$150.
Step-by-step build summary:
1. Plan and site: level ground with good drainage, sun exposure, and neighbor considerations.
2. Foundation: concrete piers, treated skids, or a slab—raised frame prevents rot and pests.
3. Floor and frame: construct floor frame, add plywood, build wall frames, raise and secure walls.
4. Roof: add rafters, sheathing, underlayment, and roofing; ensure overhangs for weather protection.
5. Ventilation: cut vents, install screened openings low and high; add shutters for winter if needed.
6. Run and predator-proofing: attach run frame, cover with hardware cloth overhead and on sides, bury an apron or bury fencing 12–24″ deep.
7. Interior fixtures: install roosts, nesting boxes, feeders, waterers, and lighting/heat if required.
8. Finish and paint: exterior sealant or paint, add trim, weatherproof doors and windows.
9. Bedding and setup: deep litter or removable tray, place feeders and waterers at comfortable heights.
10. Test closures and predator resistance, adjust ventilation and insulation as seasons change.
Maintenance considerations that tie into design:
– Include easy access for daily feeding and weekly cleaning.
– Make roosts and nesting boxes removable or hinged for cleaning.
– Durability of materials matters: galvanized hardware and treated lumber reduce long-term repair costs.
– Design for expansion: modular runs or an easy way to add an attached run makes future flock growth simpler.
Q: What are the best predator-proofing, ventilation, and cleaning strategies for a rooster coop, and how do I build them into the design?
A: Predator-proofing, airflow and cleaning access should be integrated during planning so they don’t become retrofit headaches. Predator-proofing starts with material choices and ends with details on latches and soil barriers; ventilation must balance fresh air with wintertime warmth; cleaning-friendly design reduces labor and disease risk.
Predator-proofing necessarys:
– Hardware cloth: use 1/2″ welded or 1/4″ where predators are aggressive. Avoid poultry netting—it’s not predator-resistant.
– Buried apron: bury hardware cloth or chain link 12–24″ deep and extend it outward 12–24″ to prevent digging predators.
– Overhead protection: cover the run with hardware cloth or welded wire to stop hawk and raccoon access.
– Door and latch design: double-latch all doors. Use spring-loaded or carabiner-style latches and consider a padlock for human intruders.
– Solid lower walls: use solid boards or sheets up to 2–3 feet to prevent persistent animals from forcing gaps.
– Reinforce corners and attachment points: predators focus on weak spots, so use metal flashing or plates at junctions.
– Night security: close pop doors at dusk and use a secure human door; some keepers use automatic doors with safety sensors.
Ventilation best practices:
– Cross-ventilation: intake vents low on the windward side, exhaust vents at or just below ridge. This keeps air moving without blowing directly onto roosting birds.
– Screen vents: all openings must be covered with hardware cloth to keep predators out.
– Winter adjustments: add closable shutters or internal baffles to reduce drafts while maintaining some airflow; avoid sealing the coop completely.
– Avoid floor-level drafts on roosts: position vents higher than roost level and slope roosts so droppings fall away from birds.
– Passive vs. active ventilation: passive design (ridge vents, soffit vents) is often sufficient; small fans can help in humid, heat-prone climates.
Cleaning and maintenance features to build-in:
– Removable droppings trays: hinge roosts over removable trays to make daily scraping and weekly cleaning fast.
– Access doors: large external clean-out doors let you pitch out soiled bedding, pressure-wash if needed.
– Smooth interior surfaces: painted plywood or sealed wood is easier to disinfect than rough, untreated boards.
– Nest box access from outside: make boxes with external doors so you can collect eggs without entering the coop and disturbing birds.
– Storage: integrate a small feed/gear locker to keep feed dry and tools close by, reducing cross-contamination.
– Deep litter vs. frequent clean: design supports both—if using deep litter, ensure good airflow and monitor ammonia. If frequent clean-outs are planned, include storage for fresh bedding and easy disposal access.
Step-by-step predator-ventilation-clean routine:
1. Daily: close pop door at dusk; check latches; top off feed and water; inspect vents and screens.
2. Weekly: remove droppings trays or scrape roosts; replace high-use bedding areas; check for gaps and repairs.
3. Monthly or seasonal: deep clean by removing all bedding, scrub and disinfect surfaces, inspect hardware cloth and structural fasteners; reseal paint or stain as needed.
4. After repairs or bad weather: re-check buries, re-tension fencing, and verify water drainage to avoid attracting predators.
Cost-saving tips that don’t compromise security:
– Use reclaimed materials for non-critical items (siding, interior trim) but buy new hardware cloth.
– Prioritize strong latches and buried fencing over decorative finishes.
– Build modular sections: if a section is damaged by a predator, you can replace it rather than rebuild the entire run.
Biosecurity and pests:
– Keep feed in sealed metal containers to avoid rodents.
– Add a boot scrub or footbath near the coop and limit outside visitors to reduce disease introduction.
– Monitor for mites and lice; design includes inspection gaps under roosts and in corners where treatments are easiest.
Putting these features into the initial design saves time and reduces costs over the coop’s life while keeping your rooster coop safe, dry, and simple to maintain.
Q: How many roosters can I keep, what behavior and legal issues should I plan for, and how do I design a coop that handles multiple roosters safely?
A: Rooster numbers depend on space, temperament, flock composition and local rules. Many backyard keepers keep one rooster for breeding, flock order and protection; two or more roosters can work if you have enough hens and space but may require more management.
Space and social considerations:
– Space per rooster: plan 12–15 sq ft of coop space per rooster and at least 30–50 sq ft of run per additional rooster. Give each bird distinct perch space and sight lines to reduce tension.
– Rooster-to-hen ratio: a common guideline is 1 rooster to 8–12 hens to reduce harassment of hens; if you have multiple roosters, increase the hens per rooster or separate males into their own area.
– Territorial behavior: roosters establish dominance; design the coop with multiple roost bars at different heights and several hiding places or partitioned areas so subordinate birds can avoid conflict.
– Introductions: when adding roosters, use a neutral area for initial contact, slow introductions through wire partitions, and supervised joint time until pecking order stabilizes.
Design features for multiple roosters:
– Multiple roosts: provide more linear perch length than birds—avoiding crowding reduces fights. Offset roost levels so birds don’t beak each other while sleeping.
– Visual barriers: short partitions in the run give birds a place to escape aggression and reduce continuous eye contact, which escalates fighting.
– Separate pens: build small removable divider panels in the run or coop for temporary isolation, injury recovery, or separated roosters.
– Feeding layout: multiple feeders and waterers spaced apart to prevent monopolization. Consider placing feed stations at different heights.
– Escape routes: ensure hens and lower-ranking roosters can exit to protected corners or covered ground shelters.
Health, breeding and noise management:
– Breeding plan: if you plan to breed, rotate roosters in and out or use separate breeding pens to prevent continuous fighting and overbred hens.
– Noise: roosters are loud; many jurisdictions restrict roosters in residential zones. Position the coop as far from neighbors as possible, use sound-absorbing landscaping (earth berms, dense evergreens) and avoid placing roosts near exterior walls facing neighbors. Night confinement reduces dawn crowing but won’t prevent it.
– Health issues: more birds increase disease risk. Provide quarantine space for new birds, keep clean feeding/watering systems, and design for easy inspection and veterinary access.
Legal and neighborhood considerations:
– Check local ordinances, HOA rules and state laws before acquiring roosters. Many cities allow hens but restrict roosters due to noise. Permits, setbacks, and maximum flock sizes are common.
– If roosters are allowed, there may be rules about noise, nuisance complaints and animal welfare standards (shelter, water, food, veterinary care).
– Speak with neighbors proactively, share your husbandry plan, and offer to mitigate noise or odors with design changes.
Conflict resolution and emergency plans:
– Have plans for removing or isolating aggressive roosters: portable pens, catch nets, and humane handling gear.
– Decide in advance whether to rehome, re-breed, or butcher an aggressive rooster.
– Keep first-aid supplies for wounds, and design coop access so you can separate injured birds quickly.
Summary practical steps for a multi-rooster coop:
1. Calculate space required, err on the generous side.
2. Design multiple roost bars, escape routes, and visual barriers.
3. Provide separate feeding stations and multiple waterers.
4. Include removable dividers or small pens for temporary isolation.
5. Check and comply with local regulations before purchasing roosters.
6. Monitor behavior closely during introductions and have a separation plan.
A thoughtful coop layout reduces fights, manages noise and keeps birds healthy while complying with local expectations. Plan space and social structures up front and you can keep multiple roosters successfully without constant intervention.