Dog grooming at home can save you hundreds and strengthen your bond; this step-by-step guide shows you how you can confidently groom your dog with clear photos, specific tool recommendations, breed-specific techniques, seasonal adjustments, and important safety protocols to avoid cuts, burns, and stress, plus troubleshooting tips and signs when you should seek professional help.
Key Takeaways:
- Complete, step-by-step DIY grooming workflow (with photos) covering bathing, brushing, clipping, breed-specific techniques and seasonal timelines, plus troubleshooting and expert tips to help owners confidently groom at home.
- Clear cost comparison: one-time starter kit (~$200) versus $50–$100 per professional visit — emphasizes significant long-term savings and time benefits to highlight in meta descriptions.
- Essential tools and recommended products, safety protocols for handling anxious or fearful dogs, and guidance on when to seek professional grooming for medical or behavior-related reasons.
Understanding the Benefits of DIY Dog Grooming
Cost Savings Compared to Professional Grooming
You can cut grooming costs dramatically: a one-time DIY setup of about $200 (clippers, brushes, nail trimmers, shampoo) replaces recurring salon bills of $50–$100 per visit. If you groom every 6–8 weeks (≈7–9 visits/year), professional care runs roughly $350–$900/year, so your initial investment typically pays for itself within the first 2–3 professional visits.
Cost comparison
| DIY | Professional |
|---|---|
| Initial investment: $200 | Per visit: $50–$100 |
| Per-visit cost after purchase: minimal (supplies) | Typical frequency: 7–9 visits/year |
| Estimated annual cost: $200–$300 (supplies/consumables) | Estimated annual cost: $350–$900 |
| Break-even: ~2–3 visits | Ongoing recurring expense |
Strengthening the Bond with Your Dog
Grooming at home gives you repeated, calm handling sessions that increase trust: short, positive sessions of 10–20 minutes, done 1–2 times weekly, teach your dog that touch equals reward. Use treats, gentle praise and slow desensitization to turn grooming into quality time and avoid rushing—this builds confidence and reduces fear over weeks.
Go deeper by scheduling specific training-style grooming: start with 30 seconds of touching paws or ears, then reward; progress by 30–60 seconds each session until your dog tolerates full brushing or nail trims. Many owners see measurable improvement in cooperation within 2–6 weeks. If your dog is highly anxious, pair grooming with calming aids (thunder shirts, pheromone diffusers) and consult a trainer for behavior-modification steps before attempting complex procedures.
Tailoring the Grooming Experience to Your Dog’s Needs
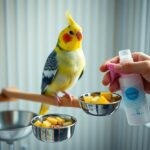
You should match tools and frequency to coat type: clipper schedules like every 6–8 weeks for Poodles, de-shedding sessions 2–3 times weekly for double-coated breeds during heavy shed, and gentle daily brushing for long-haired dogs to prevent mats. Adjust water temperature, brush pressure and session length to your dog’s tolerance and age.
Be specific: for double-coated breeds (e.g., Huskies, German Shepherds), avoid shaving the undercoat—use a de-shedding tool and schedule seasonal blowouts instead. For single-coated or short-haired breeds, a weekly brush and monthly bath usually suffice. Always check nails every 3–4 weeks and trim cautiously to avoid cutting the quick; if you’re unsure, use a grinder and stop at a blunt edge. When your dog has skin issues or severe matting, opt for a professional to prevent injury.
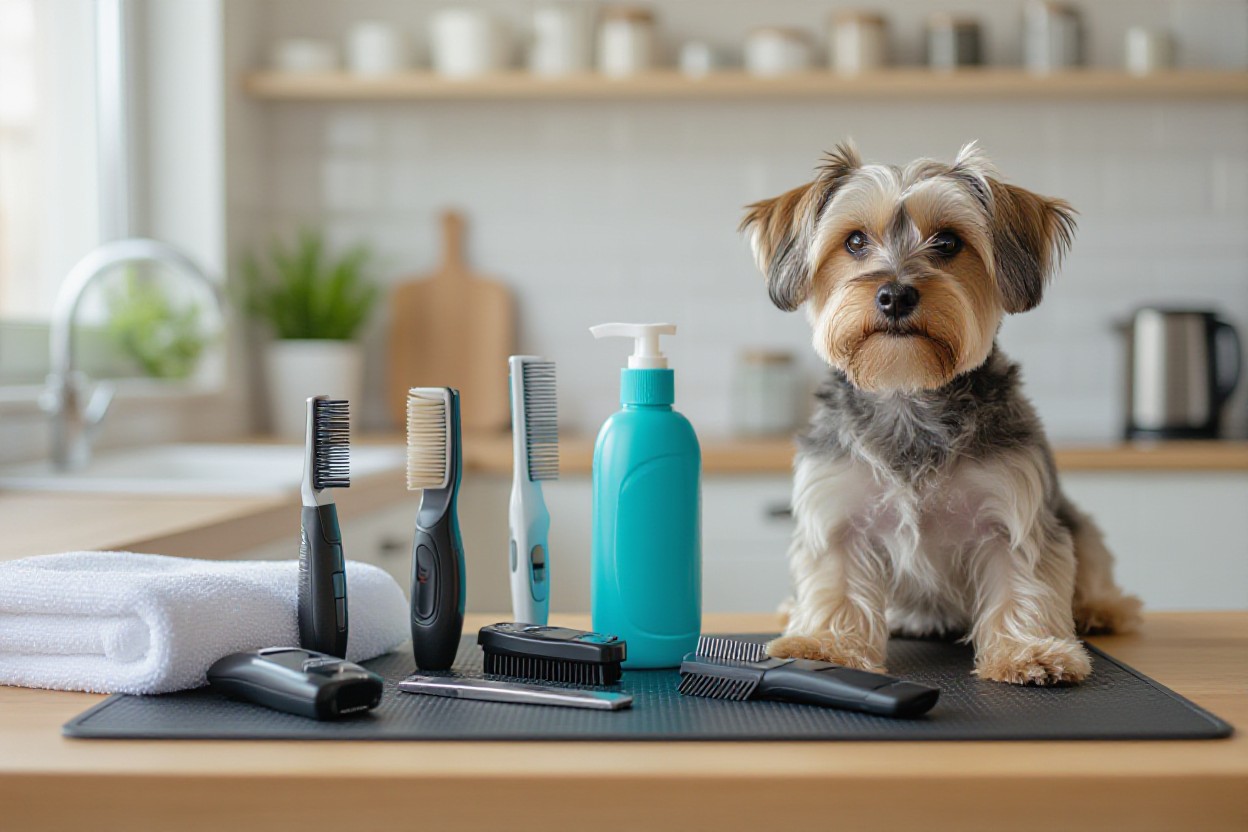
Essential Tools for Effective Dog Grooming
Grooming Tool Essentials
You should assemble a basic kit that covers brushing, cutting, bathing and first aid — expect about a $200 initial investment versus $50–$100 per professional visit. Include: a slicker brush, undercoat rake, steel comb, quality shears (6–7″ straight and thinning), clippers with spare blades, nail trimmer or grinder, high-velocity or force dryer, non-slip grooming mat, towels, ear-clean solution, styptic powder and treats to manage anxiety.
Choosing the Right Brush and Comb
Match tools to coat type: use a bristle brush for short coats, a slicker for medium-long curly or woolly coats, and an undercoat rake or de-shedding tool for double coats. For finishing, a stainless-steel comb finds hidden tangles and checks cut lengths; carry a fine-toothed and a wide-toothed comb to cover all coat densities.
For example, a Labrador benefits from an undercoat rake and rubber curry glove for weekly loose-hair removal, while a Pomeranian needs daily slicker brushing plus thinning shears every 4–6 weeks to prevent matting. Use the slicker at a 30–45° angle, working in small sections from base to tip, and follow with a steel comb to confirm no tangles remain. If you encounter mats, apply a detangler spray and work from the edges inward with a dematting tool; avoid yanking because pulling mats can tear the skin. Recommended products: FURminator de-shedding tool ($25–40), Hertzko slicker ($15–25), and a stainless-steel Chris Christensen comb for finishing work.
Clipper and Trimmer Specifications
Choose clippers by motor strength, blade type and noise level: high-torque, low-vibration motors cut dense coats; ceramic blades run cooler; and cordless models help calm anxious dogs. Keep a set of blades/guards for common lengths, plus a quiet face trimmer for sanitary and facial work. Always monitor blade temperature and have styptic powder ready for nicks.
Understand blade sizes and maintenance: blade numbers correlate to cut length—#10 ≈ 1/16″ (1.6 mm) for close body work, #7F ≈ 3/32″ (2.4 mm) for shorter trims, and #4F ≈ 1/8″ (3.2 mm) for a slightly longer finish. Popular, reliable options include Andis AGC2 or Wahl Bravura for household use (~$80–$150), and Oster A5 for heavy-duty coats (~$200). Oil blades every 10–20 minutes of runtime, clean hair with a brush after each session, and periodically swap blades to maintain sharpness; overheated blades can burn skin, so pause to cool them or use ceramic blades that dissipate heat faster. For face and paw detail, use a small trimmer (cordless, low-noise) and finish with scissors and a comb for safe, precise results.
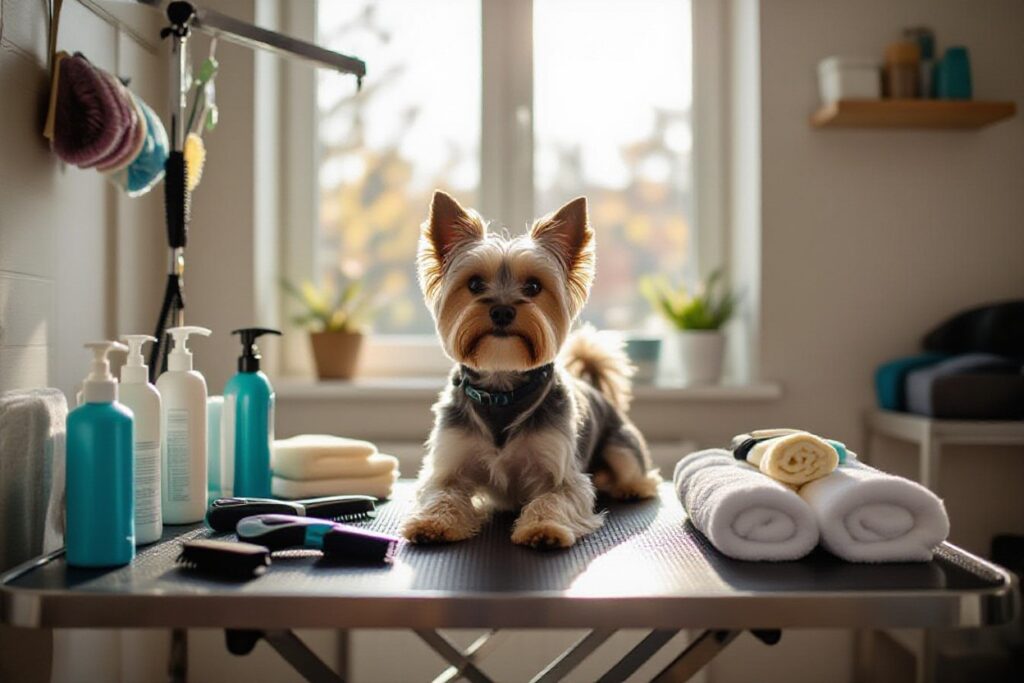
Setting Up Your At-Home Grooming Station
Choosing a Suitable Location
Pick a well-lit, ventilated spot with a non-slip surface—garage, laundry room, or bathroom work well; aim for 65–75°F (18–24°C) to keep your dog comfortable. Place the grooming table or tub near an outlet and water source, with clear floor space of at least 6×6 ft for larger breeds. Reduce distractions by closing doors and turning off TVs, and avoid elevated surfaces without a secure restraint to prevent falls.
Organizing Your Tools and Supplies
Keep vitals within arm’s reach: clippers (Wahl or Andis), a pair of curved stainless scissors, slicker brush, undercoat rake (FURminator or similar), nail clippers (Safari/Millers Forge), styptic powder, towels, Earthbath or Buddy Wash shampoo, and a low-heat dryer (B-Air or handheld). Budget ~$200 initial investment for quality tools to match professional results and lower long-term costs versus $50–100 per salon visit.
Arrange tools by task in a rolling caddy or wall-mounted bins so you move smoothly from brushing to clipping to bathing. Use a magnetic strip for metal tools and label compartments for blades, guards (#10–#40), and first-aid items. Replace clipper blades or sharpen after ~50 hours of use or every 6–12 months, and keep a cleaning & lubrication routine to prevent overheating and blade failure.
Ensuring Safety and Comfort for Your Dog
Use a non-slip mat, a properly sized grooming loop, and an assistant for larger or anxious dogs; never leave your dog unattended on a table. Schedule short grooming segments—10–15 minutes—interspersed with treats and calm praise to reduce stress. Choose low-noise tools and keep water temperature lukewarm to avoid thermal shock, and always have styptic powder and a towel within reach for quick response to nicks.
For fearful dogs, employ gradual desensitization: start with 1–2 minute handling sessions, pair tools with treats, and progress over days. Consider a basket muzzle only if your dog tolerates it and you’ve trained for it; otherwise use gentle restraint or a helper. Stop and consult a professional or veterinarian if your dog shows persistent aggression, extreme panting, or signs of overheating—sedation should only be performed under veterinary supervision.
Preparing Your Dog for Grooming
Timing and Conditions for Grooming
Pick a time when your dog is rested and slightly hungry—after a short walk works well—so they’re calm and cooperative. Work in a well-lit, warm room with a non-slip surface and minimal distractions; avoid grooming right after vaccinations or when your dog is ill. Aim for sessions under 30–45 minutes for anxious dogs, and schedule regular short sessions instead of infrequent long ones to build tolerance.
Pre-Grooming Techniques: Bathing vs. Brushing
Brush before bathing to remove loose hair and tangles unless the coat is very dirty; brushing first prevents mats from tightening when wet. For light shedding, a quick brush after a bath clears residue; for dense undercoats, use a deshedding tool beforehand. If you encounter heavy mats, use a dematting tool or consult a pro—cutting mats can cause skin cuts and pain.
Bathing frequency typically ranges from every 4–6 weeks for most breeds to weekly for very active dogs or skin conditions; brushing frequency varies—daily for double coats (Siberian Husky, Golden Retriever), 2–3 times per week for short coats (Lab), and every few days for curly coats (Poodle). Use a dog-formulated shampoo—oatmeal for sensitive skin, medicated when prescribed—and lukewarm water at about 37–39°C (98–102°F). Dry thoroughly with towels and a low-heat dryer on breeds that tolerate it; keep blades and scissors dry and never clip wet fur to avoid uneven cuts and slippage.
Desensitization Tips for Anxious Dogs
Start with 1–2 minute handling drills: touch paws, ears, and muzzle while offering high-value treats, gradually increasing time and adding tools like a brush or clippers. Pair every step with rewards and calm praise, progress in small increments over days or weeks, and keep sessions consistent to reduce fear. Use a harness or gentle restraint if needed, and stop before tension rises to keep trust intact.
Break sessions into micro-steps (30–90 seconds) and record progress—many owners see measurable calm after 2–4 weeks of daily practice. Include these focused drills and keywords for guidance:
- dog grooming at home
- how to groom your dog
- DIY pet grooming tips
Knowing gradual exposure plus positive reinforcement reduces resistance and cuts the chances of escalation to aggressive behavior, making regular at-home grooming safe and effective.
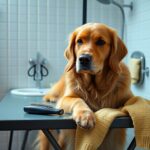
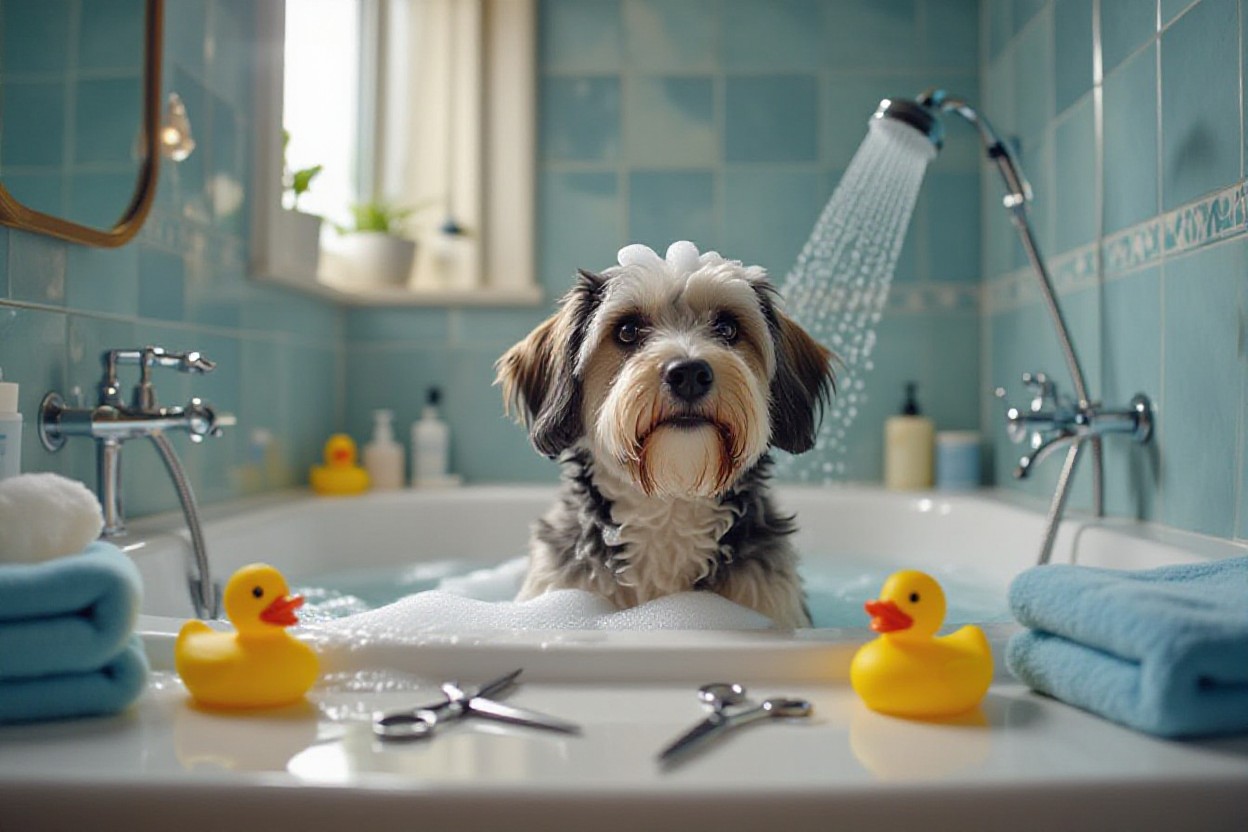
The Bathing Process: Step by Step
Preparing for Bath Time
Set up a non-slip mat, two towels, a microfiber towel, cotton balls for the ears, and your shampoo/conditioner within arm’s reach. Aim for water around 100°F (38°C)</strong) and clip or file nails beforehand if your dog tolerates it to reduce slipping. Use a calm routine—short warm-up play and treats—and keep a handheld spray or cup ready. Avoid getting water or shampoo in the ears and eyes to reduce the risk of infections and irritation.
Perfecting Bath Techniques: Washing and Conditioning
Wet the coat thoroughly, then apply shampoo diluted to the product’s recommendation—generally between 1:4 and 1:10 (shampoo:water) depending on coat thickness—working lather from neck to tail and saving the head for last. Massage the skin for 2–3 minutes to lift dirt and oils, rinse fully until water runs clear, then apply conditioner if needed and leave for 2–5 minutes before rinsing.
For medicated shampoos follow label contact times (often 5–10 minutes) and rinse meticulously to avoid residue. Use a rubber curry brush or grooming mitt to work product into dense coats; for curly or wooly coats, finger-comb conditioner through to the ends to reduce mats. Keep the head dry by tipping the chin up and using a damp cloth around eyes and muzzle; plug the ear canal lightly with cotton without pushing it in. For anxious dogs, break the bath into small steps—wet, lather, rinse—rewarding each stage with high-value treats.
Post-Bath Water Removal Techniques
Start by gently squeezing excess water from the coat, then wrap your dog in a microfiber towel and blot—do not rub—working from neck to tail. For short-coated breeds a single 5–10 minute towel session plus air-dry in a warm room often suffices. For thick or double coats plan on using a dryer to avoid prolonged dampness that can cause skin problems.
Microfiber towels can remove up to 80–90% of surface water, dramatically cutting drying time. When using a blower or handheld dryer, set it to low-to-medium heat, keep the nozzle 6–12 inches away, and keep it moving to avoid hot spots; high-velocity dryers reduce drying from 60+ minutes to 10–20 minutes for double coats but require patience and training. Check skin folds, underarms, and between toes for trapped moisture; leaving these areas damp increases the risk of irritation and infection.
Drying Your Dog Effectively
Different Drying Methods: Towel vs. Blow Dryer
You can start with a super-absorbent microfiber towel to remove surface water, which is gentler and reduces stress for anxious dogs; use a blow dryer on a cool or low-heat setting to speed drying for thick coats, keeping it 20–30 cm from skin to avoid burns and loud noise that can scare your dog.
Preventing Matting During the Drying Process
Brush in sections before and while drying—work from the roots to the tips with a slicker brush or comb and use a detangling spray for stubborn tangles; mats trap moisture and can lead to skin infection, so keep hair separated and dry each section fully to prevent re-formation.
For long or silky coats, clip small anchor points with your fingers and use the dryer on low while brushing continuously; for double-coated breeds, use a rake to lift undercoat then a high-airflow dryer to blow loose undercoat out—spend roughly 5–15 minutes per major section depending on coat density, and stop immediately if you see redness or your dog shows stress.
- dog grooming at home — focus on technique to reduce trips to the pro.
- how to groom your dog — section-by-section brushing prevents mats.
- Assume that DIY pet grooming tips you apply now will save ~> $50 per professional visit over time.
| Step | Action |
| Pre-brush | Remove tangles with slicker brush or comb before wetting. |
| Detangler | Use leave-in detangling spray for long coats to ease drying and prevent mats. |
| Drying order | Start at chest and shoulders, finish tail and belly to keep dog steady. |
| Tool choice | Low-heat dryer + brush for long hair; towel + quick comb for short coats. |
Drying Techniques for Different Coat Types
Short-coated dogs dry fast—use towels and cool air while you trim; double-coated breeds need air movement to remove loose undercoat; long or curly coats require brushing while blow-drying on low to prevent tangles and overdrying, which can cause skin irritation.
For example, use a high-velocity dryer at low heat for double coats to remove undercoat in 10–20 minutes, a blower on medium for 5–10 minutes per section for long coats while brushing with a slicker, and a towel plus brief cool-dryer blasts for short coats—adjust times for size and density and avoid holding heat closer than 20 cm to skin.
- dog grooming at home — match method to coat type for efficiency.
- how to groom your dog — use breed-specific tool choices, e.g., rake for undercoat.
- Assume that DIY pet grooming tips applied per coat type reduce matting and cut salon time in half.
| Coat Type | Drying Tip |
| Short | Towel off, finish with cool air dryer; 5–10 minutes total. |
| Double | Pre-rake undercoat, use high airflow low heat to remove loose hair. |
| Long | Brush while blow-drying in sections; use detangler to prevent tangles. |
| Curly/Wavy | Partially air-dry then diffuse on low to preserve curl and reduce frizz. |
Brushing and De-Shedding Your Dog
Selecting the Right Brush for Coat Type
You’ll match brushes to coat: use a slicker brush or pin brush for long, flowing coats; a bristle brush for short, smooth coats; and an undercoat rake or de-shedding tool (FURminator or similar) for double-coated breeds. Choose a size that fits your hand and the dog’s body; cheap metal teeth can snag, so opt for quality to avoid skin abrasion and mat pulling.
Techniques for Different Coat Lengths
For long coats, work in small, overlapping sections, holding the base of the hair to avoid pulling and using a slicker brush to remove tangles before finishing with a comb; for medium coats, alternate a bristle then rake; for short coats, a rubber curry or bristle brush in the direction of growth removes loose fur and stimulates skin. If you hit a mat, use scissors only if you can insert one blade between coat and skin to avoid nicks.
When you groom each coat type, start with a visual and tactile check for mats, debris, or skin issues—pay special attention to ears, armpits, and tail base where mats form first. Work patiently: long-coat dogs may need 20–30 minutes per session, while short-coat dogs often take 5–10 minutes; double-coated breeds need a de-shedding tool during seasonal blowouts and gentle raking year-round. Use a detangler spray on stubborn knots and keep your fingers between comb and skin to protect against cuts or irritation.
Frequency and Tips for De-Shedding
Adjust frequency to coat and season: long coats benefit from brushing every 1–2 days, short coats weekly, and double coats weekly with increased work in spring/fall for blowouts; use a de-shedding tool for 5–15 minutes per session on heavy shedders and always check the skin for redness or hot spots. Use a clean, dry coat—after bathing, wait until completely dry before de-shedding to avoid skin damage.
- dog grooming at home
- how to groom your dog
- DIY pet grooming tips
Prep your space with a non-slip mat and a vacuum or lint roller nearby; if your dog tolerates it, do a short walk beforehand to reduce anxiety and make sessions smoother. For heavy shedding, schedule a bath with a clarifying shampoo 24–48 hours before de-shedding so loose undercoat rises, then use a high-velocity dryer or thorough towel drying to finish. Perceiving thinning patches, increased scratching, or open sores means stop and consult a veterinarian or professional groomer.
- dog grooming at home
- how to groom your dog
- DIY pet grooming tips
Mastering Nail Trimming
Understanding Nail Anatomy and Growth
You need to know the quick is a living, vascular part of the nail—visible in light nails but hidden in dark ones—and cutting into it causes bleeding and pain. Nails typically grow about 1–2 mm per week, so plan trims every 3–4 weeks for most breeds; active dogs often wear nails down naturally while small, indoor dogs may need more frequent attention.
Choosing the Right Nail Trimming Tool
Match the tool to your dog’s size and coat: use scissor clippers for medium-to-large thick nails, guillotine clippers for small to toy breeds, and a rotary grinder (Dremel) for smoothing edges or trimming very hard nails; always pick sturdy, sharp stainless-steel blades and replace dull tools promptly to avoid splitting.
For specific picks, professionals often recommend the Resco Classic or Safari Professional clippers ($15–$30), and the Dremel 4.8V or 8V rotary ($50–$90) for grinders; choose a tool with ergonomic grips for control, test on a single nail first, and keep styptic powder on hand for accidental bleeding—cheap, dull clippers increase the risk of splits and pain, while a grinder lets you finish with smoother edges and less chance of hitting the quick.
Safe Nail Trimming Techniques: Tips and Cautions
Trim in small increments, keeping the blade perpendicular and aiming for a 45° angle to avoid jagged edges; if your dog has dark nails, take off tiny amounts and look for a chalky center before stopping. Use treats and short sessions to reduce anxiety. Perceiving your dog’s micro-expressions and sudden tenses helps you pause before a jerk.
- dog grooming at home
- how to groom your dog
- DIY pet grooming tips
When you trim, hold the paw firmly but gently, extend the nail to expose the curve, and snip only the tip—stop if you see a grey/black dot in dark nails or a pink center in light nails; apply styptic powder immediately if bleeding occurs and reward calm behavior to build positive associations. Use short sessions (3–5 minutes), enlist a helper for large or wiggly dogs, and consider a grinder for thick, cracked nails. Perceiving sudden signs of stress lets you switch to a calmer approach or call a pro if needed.
- dog grooming at home
- how to groom your dog
- DIY pet grooming tips
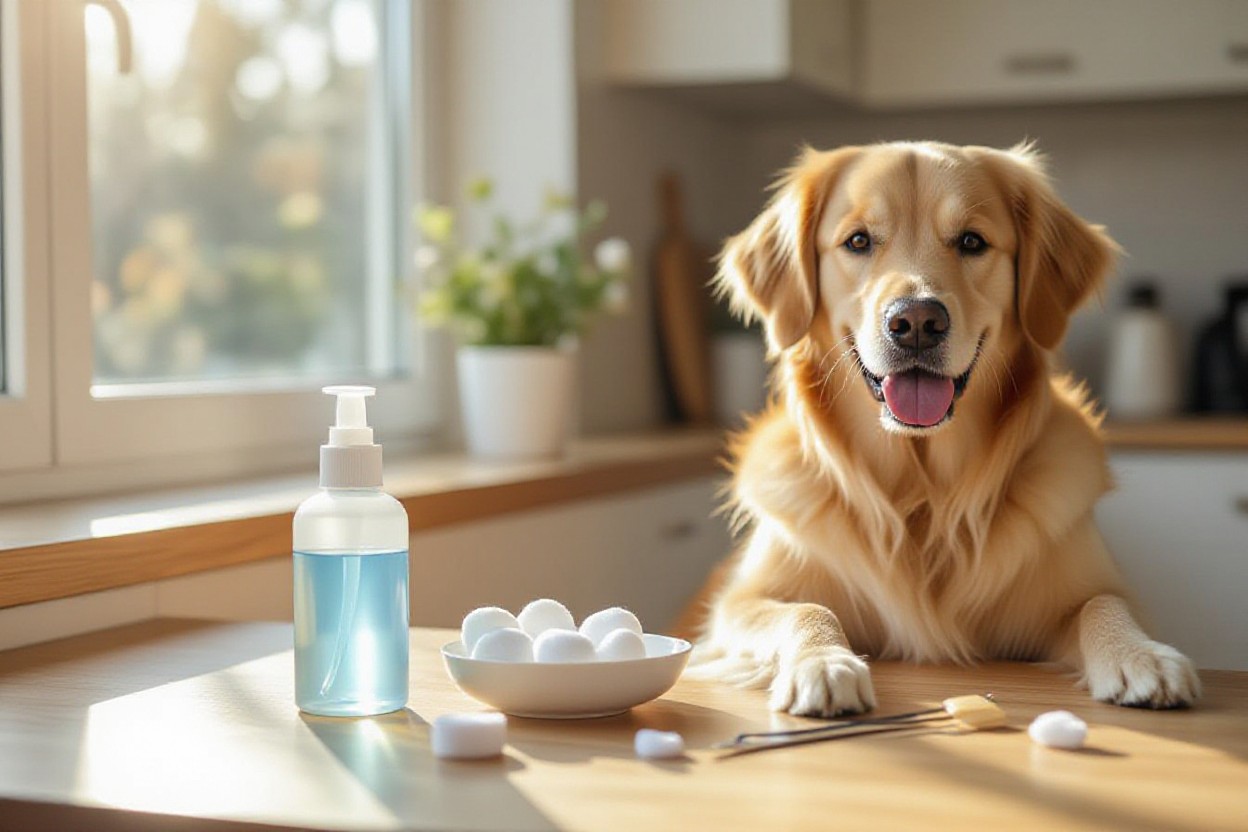
Ear Cleaning Essentials
Recognizing When Ears Need Cleaning
You should inspect your dog’s ears weekly for odor, visible wax, or debris; frequent head shaking, ear scratching, or a dark brown discharge mean it’s time to clean. Floppy-eared breeds like Cocker Spaniels and Basset Hounds typically need cleaning every 1–2 weeks, while erect-eared breeds often manage with monthly checks. If you detect a foul smell or persistent discharge, clean gently and monitor—if pain accompanies these signs, contact your vet.
Safe Ear Cleaning Solutions and Techniques
Use a veterinarian-approved, pH-balanced cleaner (examples: Virbac Epi-Otic, Zymox, or enzymatic ear wipes) warmed in your hand; fill the canal, massage the base for 20–30 seconds, let your dog shake, then wipe away loosened debris with a cotton ball. Do not use hydrogen peroxide, alcohol, or oil-based home remedies, and never insert cotton swabs into the ear canal.
For technique details, hold the ear flap up to straighten the canal, apply 1–2 mL for small dogs or 5–10 mL for large breeds, then gently massage the leather-like base to distribute the solution and break up wax. After your dog shakes, use a soft cotton ball or microfiber cloth to wipe the visible canal—avoid probing deep. If the ear is painful, inflamed, or you see blood or pus, stop and seek veterinary care because you may be dealing with a ruptured eardrum or deep infection. Dogs that swim often should be rinsed and dried after each swim to prevent moisture-related infections.
Signs of Ear Infections and When to Seek Help
Watch for intense scratching, repeated head shaking, red or swollen ear canals, yellow or dark discharge, and a strong, unpleasant odor; changes in hearing, balance problems, or a head tilt signal progression. If you see blood, severe pain, fever, or neurological signs, get veterinary attention immediately, and if routine cleaning doesn’t improve signs within 48–72 hours, schedule an exam.
Most infections are yeast (Malassezia) or bacterial—cytology at the vet identifies the cause so the right topical antibiotic, antifungal, or steroid can be prescribed. Chronic cases may require culture, systemic antibiotics, or an aural flush under anesthesia; in long-standing, refractory otitis externa, surgical options like TECA may be discussed. Early, regular prevention with proper cleaning and drying is far less costly than treating chronic infections, which can run several hundred to over a thousand dollars depending on diagnostics and surgery.
Dental Care for Your Dog
Importance of Regular Dental Hygiene
Your dog’s oral health affects more than fresh breath: up to 80% of dogs show signs of periodontal disease by age three, and untreated infections can spread to the heart, liver, and kidneys. You can cut long‑term costs and health risks by brushing regularly; professional dental cleanings often run $300–$700, so preventive home care saves money and keeps your dog healthier.
Tools and Techniques for Brushing Teeth
Use a soft-bristled toothbrush or finger brush paired with an enzymatic dog toothpaste (Virbac CET or Petrodex are reliable choices); do not use human toothpaste. Aim to brush daily or at least 3× weekly, using small circular motions at a 45° angle on the outer surfaces for about 30–60 seconds per side, rewarding your dog between steps to build positive association.
Start by letting your dog lick the toothpaste from your finger, then progress to a finger brush for 1–2 minutes total as you lift the lips and expose the gumline. Focus on the large cheek teeth where tartar accumulates most; an angled toothbrush or a small electric brush can improve plaque removal. If gums bleed or your dog shows pain, stop and consult your vet—bleeding beyond light pinprick is a sign of gingivitis or deeper disease. Capture step‑by‑step photos of your technique to track progress and share with your vet if you need guidance.
Additional Dental Care Options
Supplement brushing with enzymatic oral gels, water additives (Oxyfresh), and veterinarian‑approved dental chews (choose size-appropriate Greenies or Whimzees) to reduce plaque between brushings. Avoid very hard chews and bones that can cause tooth fractures. Schedule professional cleanings as needed—many dogs benefit from a vet exam and scaling every 1–2 years depending on breed and tartar buildup.
Evaluate chews by texture: pliable, fibrous chews abrade plaque without risking fractures; hard marrow bones and hooves are high risk and should be avoided. Dental diets like Hill’s t/d have clinical data showing reduced tartar when fed exclusively; consider them for dogs with chronic buildup. Use water additives as interim care for anxious dogs that resist brushing, and employ veterinary sealants (OraVet barrier) for dogs prone to heavy tartar. Escalate to professional scaling under anesthesia if tartar is heavy, breath remains foul, or your dog displays drooling, pawing at the mouth, or appetite loss—those are signs you should have your vet evaluate dental disease.
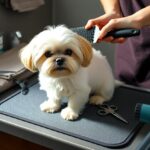
Coat Trimming and Styling Techniques
Understanding When and How to Trim
You should trim when hair obscures vision, causes matting, or fouls sanitary areas; many companion trims need attention every 4–8 weeks. Work in small, controlled cuts—use a comb to lift sections and cut no more than 1/4 inch at a time until you achieve shape. For double-coated breeds, avoid full-body shaving: shaving can damage the undercoat and increase heat risk. Prioritize paw pads, sanitary trims, and feathering first to keep your dog comfortable and safe.
Using Scissors vs. Clippers for Styling
You’ll use scissors for finishing and clippers for bulk removal: straight and curved shears for contours, thinning shears (30–40% teeth) for blending, and clippers with guard combs (1/8″–1″) for length control. Choose blunt-tipped scissors around eyes and ears and a well-ventilated cordless clipper to reduce noise stress. Keep blades oiled and test a small patch before major work to avoid pulling or heat buildup.
For technique, use scissor-over-comb to refine toplines and slide-cutting for soft edges; point-cutting gives texture on faces and legs. When clipping, go with the coat growth on sensitive areas and against it on dense body fur to even bulk. Opt for clippers rated about 2,500–3,500 RPM for most dogs and select blade sizes to match desired finish (a #10 yields a very close cut, useful for sanitary areas; larger guards leave more length). Stop every few minutes to feel blade temperature and give the dog breaks—hot blades can burn skin.
Grooming for Specific Breeds: A Style Guide
You should tailor schedules and tools: Poodles and Bichons need scissor shaping and trims every 4–6 weeks; Terriers benefit from hand-stripping every 8–12 weeks; double-coated breeds like Golden Retrievers and Huskies require regular deshedding and seasonal blowouts, not full shaves. Match tools—slicker brushes and undercoat rakes for shedding breeds; stripping knives and firm pins for wiry coats—to breed needs to maintain coat health and appearance.
Examples: for Poodles, combine a body clip with scissored topknots using curved shears and thinning shears to blend; for a Schnauzer, use clippers for the back and scissors to sculpt the beard and eyebrows, trimming every 6–8 weeks. With a Labrador or Husky, focus on frequent brushing and an undercoat rake during spring/fall blowouts rather than clipping; shaving these breeds can disrupt natural insulation and lead to overheating. If you’re uncertain about a breed-specific technique, do a conservative trim and consult a pro for the first full style—this upfront caution saves time and avoids costly fixes.
Breed-Specific Grooming Guidelines
Grooming Long-Haired Breeds
You should brush long-haired breeds like Afghan Hounds, Shih Tzus, and Collies daily using a slicker brush and pin brush, adding a de-matting rake for tangles; bathe every 4–6 weeks with a moisturizing shampoo, and trim coat ends or sanitary areas every 6–8 weeks. Use combs (7–10 teeth/cm) to check for hidden mats, and be extremely careful with scissors around skin—mat-removal by cutting can easily nick the skin. Consider professional dematting if mats are severe.
Grooming Short-Haired Breeds
For short-haired dogs like Labs, Boxers, and Beagles, you can manage shedding and skin health with weekly brushing using a bristle brush or rubber curry and a deshedding tool (e.g., Furminator) during seasonal blowouts; bathe every 6–8 weeks and trim nails every 3–4 weeks. Watch for hotspots and flea dirt—skin lesions or excessive hair loss warrant a vet or pro groomer.
Seasonal shedding needs extra attention: during spring and fall you can perform a focused deshedding session with a high-velocity dryer and Furminator to remove undercoat loose hair, reducing fur around the house and lowering professional grooming frequency. Use gentle, short strokes to avoid irritating skin, apply an oatmeal or hypoallergenic shampoo for sensitive coats, and always check ears and paw pads for debris—these small steps can save you $50–$100 per visit if you DIY consistently.
Special Considerations for Hypoallergenic Breeds
With hypoallergenic breeds such as Poodles, Bichon Frise, and Portuguese Water Dogs you should plan on clipping or scissoring every 4–6 weeks because hair grows continuously; brushing 3–4 times weekly with a slicker and comb prevents matting. Use clippers like an Andis UltraEdge or Wahl Arco with guard combs (3–10 mm) for body work, and avoid dragging dull blades—they overheat and can burn skin.
Between full clips, perform regular sanitary trims, face and paw tidy-ups, and monthly baths with a low-residue shampoo to prevent buildup that exacerbates matting. For show styles or complex scissoring, schedule professional grooming every 6–8 weeks; otherwise, invest the ~$200 in quality clippers and scissors to handle maintenance at home safely and save $50–$100 per salon visit over time. If your dog has persistent skin irritation or reactive ears, seek a pro or vet assessment before continuing DIY cuts.
Troubleshooting Common Grooming Issues
Handling Anxiety and Fear during Grooming
Start with very short, 2–5 minute sessions and build up over days so your dog associates grooming with treats and calm praise; use a non-slip mat, a gentle voice, and high-value treats like tiny bits of cooked chicken. If clippers or baths trigger fear, run the tool away from them first, then gradually bring it closer while rewarding calm behavior. Use pheromone diffusers (Adaptil) or a snug calming wrap, and avoid forcing the dog—that increases risk of bites and injuries; consult your vet before using sedatives or prescription anti-anxiety meds.
Dealing with Severe Matted Fur
When mats are close to the skin, never pull—apply a detangling spray and work small sections with a dematting rake or mat splitter, holding skin taut to prevent pinching; for dense mats you’ll likely need clippers with a guard to shave rather than cutting with scissors, which risks nicks. Severe cases often take 30–90 minutes and if mats cover more than 20% of the body or hide sores, seek professional grooming to avoid skin tears and infection.
Begin dematting at the tips, working toward the base in 1–2 inch sections and using a wide-tooth comb to check progress; soak stubborn mats in warm water with conditioner for 10 minutes to loosen fibers, then use a FURminator deMatting Comb or Safari Dematting Rake to tease them apart. If you must clip, use an Andis or Oster clipper with a #10–#4 blade depending on breed, clip with the hair growth direction, and treat exposed skin with a soothing antiseptic spray. Professional dematting sessions typically cost $50–$120 but can save you from medical bills caused by skin damage.
Skin Reactions: Causes and Solutions
Allergic reactions often stem from new shampoos, flea treatments, or pollen; stop the suspected product, rinse your dog with cool water, and use a gentle oatmeal shampoo (Veterinary Oatmeal Shampoo) to soothe the skin. For localized irritation, a vet-approved 1% hydrocortisone spray can reduce inflammation short-term; if the rash spreads, shows pus, or your dog has facial swelling or breathing trouble, seek veterinary care within 24–48 hours.
Always patch-test new products on a 1-inch area for 48 hours before full use and document product changes and exposure dates to help diagnosis. For yeast or bacterial issues, your vet may prescribe medicated shampoos (MalAcetic) or oral antibiotics/antifungals based on culture results. Maintain flea prevention year-round—flea allergy is a common driver of recurrent hot spots—and photograph reactions to track progression for your vet appointment.
Summing up
Presently you can take control of your dog’s grooming with this step-by-step guide, saving money while improving bonding and coat health. By investing in important tools, following breed-specific timelines, practicing safety and calm handling for anxious dogs, and consulting pros when needed, you’ll manage baths, brushing, trimming and seasonal adjustments confidently. Troubleshooting tips and expert recommendations ensure professional-quality results at home that protect your pet and your budget.
FAQ
Q: What is the complete step-by-step process for grooming my dog at home?
A: Prep (15–30 min): gather tools (brushes, comb, clippers, towels, non-slip mat, treats), choose a well-lit area, put a grooming table or stable surface with a non-slip mat. Brush and inspection (15–45 min): start with a full-body brush to remove loose hair and identify mats, skin issues, parasites, lumps or wounds. Use an undercoat rake or de-shedding tool for double-coated breeds and a slicker/pin brush for long coats. Dematting (10–60+ min as needed): isolate mats, hold the base close to skin, work from ends toward roots with a dematting tool or comb; if mat is too tight or near skin, cut it out in a controlled way using blunt-nosed scissors leaving a small gap between scissors and skin. Bath (15–40 min): use lukewarm water, wet coat thoroughly, apply dog-formulated shampoo (dilute if concentrated), lather from neck to tail—avoid eyes and inner ears—follow with conditioner for long or dry coats. Rinse until water runs clear. Drying (15–60+ min): towel-dry, then use a blow dryer on a low-heat, high-air setting or a high-velocity dryer for thick coats while brushing to prevent tangles; keep dryer moving and check skin temperature frequently. Clipping and trimming (20–90 min): use clippers for body cuts (match blade to coat/breed), scissors for face, feet, sanitary trim. Work in small sections, clip with hair growth direction, inspect blade temperature often. Nail care (5–15 min): trim nails with clippers or use a grinder; cut small amounts and stop before the quick; use styptic powder for bleeding. Ears and eyes (5–10 min): clean ears with a vet-approved ear cleaner on cotton; trim excess hair around ear canal; wipe around eyes with a damp cloth. Final brush and finish (5–15 min): brush again, apply finishing spray or detangler for long coats, apply paw balm if needed. Session length varies by size, coat and dog tolerance—split into shorter sessions when needed. Photograph progress at each main step for your records and to replicate good results.
Q: What tools and equipment do I need, what should I buy first, and how does DIY cost compare to professional grooming?
A: Essential starter kit (~$180–$250 total): – Clippers: Wahl Bravura Lithium or Andis UltraEdge kit ($60–$120) – Blade set: #10, #30, #40 or manufacturer combos ($15–50) – Scissors: straight grooming shears and curved finishing scissors ($20–50) – Thinning shears ($15–35) – Slicker brush: Hertzko or Chris Christensen style ($10–30) – Undercoat rake/de-shedding tool: FURminator or Safari rake ($15–40) – Pin brush/comb set ($10–25) – Nail trimmer + grinder: Safari clippers + Dremel 7300 or similar ($15–70) – Ear cleaner: Virbac Epi-Otic or similar ($10–20) – Shampoo & conditioner: Earthbath or Burt’s Bees ($10–20 each) – Towels, non-slip mat, grooming loop/arm, grooming table (basic table $40–100 or table alternative) – Styptic powder, detangler spray, muzzle (Baskerville) as needed ($5–20). Typical DIY initial investment ~ $200 (budget selection) to $400 (higher-end). Professional grooming cost: average $50–$100 per visit depending on size and services. Break-even: if pro visits cost $75 on average and you invest $200, DIY pays off in ~3 visits (not counting replacement blades/scissors, electricity, occasional pro visits for complex jobs). Prioritize quality clippers and a good slicker brush first; add specialized tools as you expand skills.
Q: How should grooming techniques and timelines vary by breed and coat type?
A: Short-haired (Labs, Beagles): brush weekly with a bristle or rubber curry. Bath every 6–12 weeks or as needed. Nail trims every 4–6 weeks. No body clipping necessary; light sanitary and paw trims. Double-coated (Golden, German Shepherd, Husky): frequent brushing—3–5× weekly during heavy shed seasons, 1–2× weekly otherwise. Use undercoat rake and de-shedding tool. Baths every 6–10 weeks; avoid shaving the undercoat—stripging (blowout) and thinning recommended in summer. Long-haired (Shih Tzu, Maltese, Afghan): daily brushing to prevent mats; baths every 3–6 weeks; trims every 4–8 weeks depending on style; full-body scissoring or clipper work for practical trims. Curly/wool (Poodle, Bichon): daily brushing to avoid tight mats, clip every 4–6 weeks to maintain shape; use appropriate blades and regular ear hair maintenance. Terrier coats (Airedale, Westie): many require hand-stripping to maintain texture—every 8–12 weeks—or professional trimming. Breed-specific notes: poodles need attention to skin folds and ear hair, double coats shouldn’t be shaved except vet-advised, and angora-type coats are more prone to matting. Tailor frequency to the dog’s lifestyle and coat growth; keep grooming logs with dates and photos to establish an optimal schedule.
Q: What safety protocols should I follow, how do I handle anxious or fearful dogs, and when must I seek professional help?
A: Safety protocols: keep tools clean and sharp; dull tools pull and increase skin injury risk. Check clipper blade temperature often to avoid burns—cool blades with clipper oil and brief rests. Always hold skin taut when cutting close to body. Use blunt-nosed scissors near eyes and groin. Clean ears with a vet-approved solution; avoid inserting cotton swabs into the canal. Trim nails in small increments; have styptic powder ready. Maintain good lighting and stable footing for you and the dog. Handling anxious dogs: desensitize in short, positive sessions—5–10 minutes with high-value treats, grooming toy, or a calm training routine before increasing duration. Use counterconditioning: pair tools with treats and praise; let the dog sniff tools turned off. Try calming aids: Thundershirt, Adaptil pheromone diffuser, low-dose anxiety supplements (vet approved). Use a muzzle only if the dog tolerates it and after training—introduce a muzzle gradually. Break tasks into micro-steps and stop before stress spikes; follow with play or reward. If the dog is aggressive, severely fearful, in pain, has deep mats near skin, severe skin disease, or requires sedation for safety, consult a professional groomer with behavior experience or a veterinarian. Professionals should handle hand-stripping, medicated baths, heavy mat removal that risks skin tears, and grooming under sedation.
Q: What are common grooming problems and how do I troubleshoot them? What seasonal adjustments and expert tips will improve results?
A: Mats and tangles: prevent with daily brushing; to fix, use a detangling spray, work from ends to roots, use a mat splitter or careful scissors for tight mats—cut large mats out only if necessary and avoid close-to-skin cutting. Clipper pulls and razor burn: use sharp blades, proper blade speed, and clipper oil; if irritation appears, stop, apply a cool compress and an antiseptic spray; wait until skin heals before re-clipping. Uneven cuts: work in uniform, small sections, use comb as a guide for scissors, step back and photograph frequently to check symmetry. Quicked nails: press styptic powder into the nail, hold pressure, keep calm and reassure the dog; switch to a grinder to reduce risk in future. Skin reactions to products: patch-test new shampoos on a small area; if redness or itching develops, rinse and consult a vet. Fleas and ticks discovered during grooming: treat per your vet’s guidance and use flea combs—avoid bathing a flea-infested dog with certain products without vet approval. Dryer anxiety: introduce dryer off for sniffing, reward for proximity, use low settings and distance, or air-dry/towel-dry and groom later. Seasonal adjustments: spring/fall heavy sheds require daily to several-times-weekly de-shedding and at least one deep bath plus high-velocity drying. Summer: shorter trims for air flow but don’t shave double coats; maintain paw and pad trims, check for hot spots and sun damage. Winter: moisturize dry skin, check pads for salt/ice buildup and apply paw balm. Expert groomer tips: take step-by-step photos to replicate styles, keep a grooming log with dates, tools, blade sizes and results; replace blades and oils regularly, disinfect tools between dogs, and sharpen shears professionally as needed. Start slow, focus on building positive associations, and schedule periodic professional visits for breed-specific trims, complex tasks or behavior-assisted grooming.