FAQ
Q: How much does it realistically cost to build an indoor playground for cats on a budget?
A: Figuring out what this little DIY adventure is going to cost is usually the first thing people stress about, and honestly, it can be way cheaper than you think if you plan it out. If you stick to basic shelves, a couple of scratching areas, and some simple toys, most people can pull together a nice indoor cat play area for about $40-$80 using a mix of new and repurposed stuff.
Big box stores are your friend here. You can grab cheap wall brackets, plain wooden shelves, a pack of L-brackets, and some screws for pretty low prices. Then add a small rug remnant, a couple of sisal rope rolls, and some clearance toys and you already have the bones of a pretty fun setup without touching the triple digits.
Thrift stores and Facebook Marketplace are gold mines for this kind of project. Old step stools, side tables, or cube storage units can all turn into climbing steps or platforms for your kitten playground for indoor cats. Just factor in a bit for sandpaper, paint or stain if you want it to look nicer, and a tube of strong construction adhesive to secure fabric and rope where you don’t want visible screws.
One more thing to plan for is wall mounting hardware and anchors. That’s the part you really don’t want to cheap out on because it keeps your cat safe and your walls intact. Even with good anchors though, you’re still in budget territory compared to buying a premade cat tree or wall system that can easily hit $200 or more for something decent.
Q: How do I design a safe but fun indoor playground for cats without taking over my whole living room?
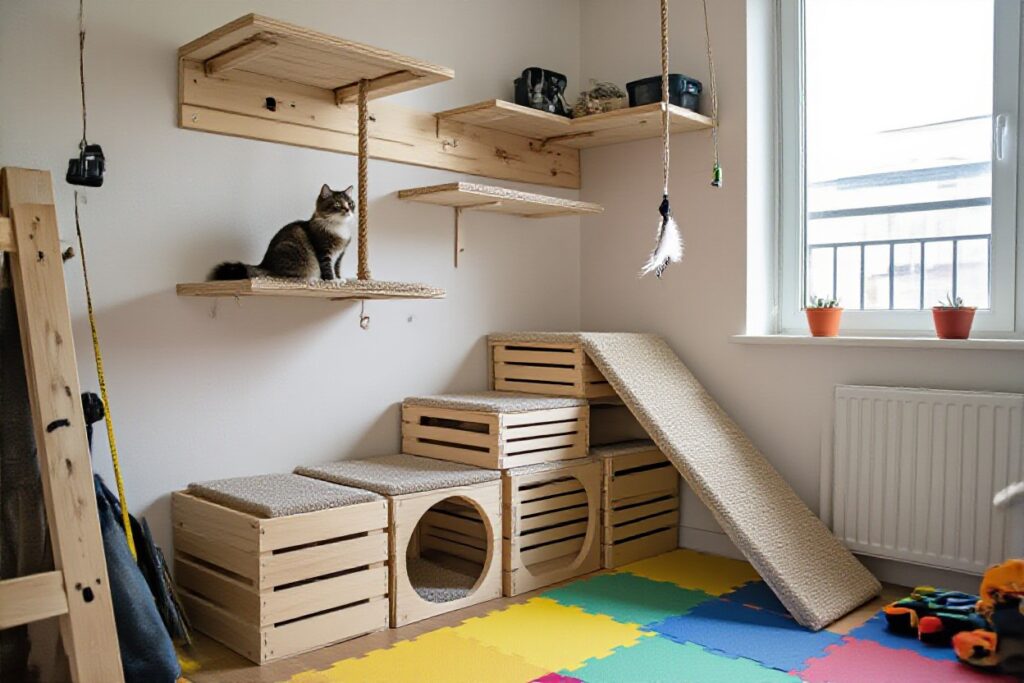
A: Working in a small space is totally doable if you think vertical instead of just floor level. Cats naturally love to climb and perch up high, so your best move is turning one wall or one corner into a mini cat zone with shelves, steps, and a couple of cozy spots to nap. That way your living room still looks like a human lives there too.
Start by picking a “cat wall” or corner where there’s not a ton of traffic and no fragile decor nearby. From there, sketch a simple path: maybe a low shelf, then a slightly higher one, then a perch near a window if you have it. You want them to be able to go up, across, and back down without any big scary gaps, especially if you have a kitten or a senior cat.
Surface material matters more than people think. Plain wood can be slippery, so adding carpet squares, old bath mats, or non-slip drawer liners on top of shelves gives them grip and makes landings softer. For cats that get the zoomies, you’ll be happy you did this when they launch themselves like tiny rockets across the setup.
Safety is all about secure mounting and sturdy pieces. Use wall anchors that match your wall type (drywall anchors, masonry anchors, etc.) and check that each shelf can handle at least 15-20 pounds, even if your cat is smaller. Then do a quick “wobble test” with your hands on every piece before letting your cat climb – if it feels sketchy to you, it will feel sketchy to them and they’ll avoid it or worse, try it once and get scared.
Q: What DIY elements should I prioritize in a step-by-step build to keep my indoor cat play area engaging long-term?
A: Building an indoor cat play area isn’t just about putting up a few shelves and calling it a day. If you want your cat to actually use it week after week, you need a mix of climbing, scratching, hiding, and playing built into the design. Think of it like creating a little “circuit” they can run through in different ways instead of one boring platform.
Step one, give them a clear entry point. That might be a low ramp made from a plank covered in carpet, a sturdy ottoman, or a cube shelf they can hop onto. Once they’re on that first level, add at least two more reachable platforms so they have a reason to keep moving instead of just sitting there like a fluffy bookend.
Step two, add scratching in at least two spots. Wrap a table leg or a vertical post with sisal rope, or glue a cut-to-size cardboard scratching pad onto a vertical surface. Putting scratching surfaces near sleeping or viewing spots fits their natural behavior and helps your couch survive longer, which is always a plus.
Step three, build in some “interactive” pieces. Simple stuff works best: a dangling toy from the underside of a shelf, a DIY tunnel using a collapsible laundry hamper, or a fabric curtain hanging over one platform to make a hidey-hole. When you rotate toys every couple of weeks – swap the dangly toy, move a tunnel, shift a bed – the same indoor playground for cats suddenly feels new again.
Final step, give them at least one safe, chill zone at the top. A small bed, folded blanket, or box with a cut-out entrance on the highest perch becomes their little throne. Cats love to survey their kingdom from above, and if they associate that spot with peace and safety, they’ll keep coming back to your DIY setup instead of your kitchen counters.


")