There’s no reason your first aquarium has to turn into a cloudy disaster, you can absolutely keep clear water and happy fish if you treat the tank like a tiny living world, not just a glass box on your shelf. You’ll learn how to do simple weekly checks, clean without wrecking your cycle, and avoid deadly ammonia spikes that can wipe out your fish fast. So if you want bright, active fish and not a smelly chore, you’re in the right place – the basics are easier than you think, as long as you stay consistent.
Getting Started with Your Fish Tank
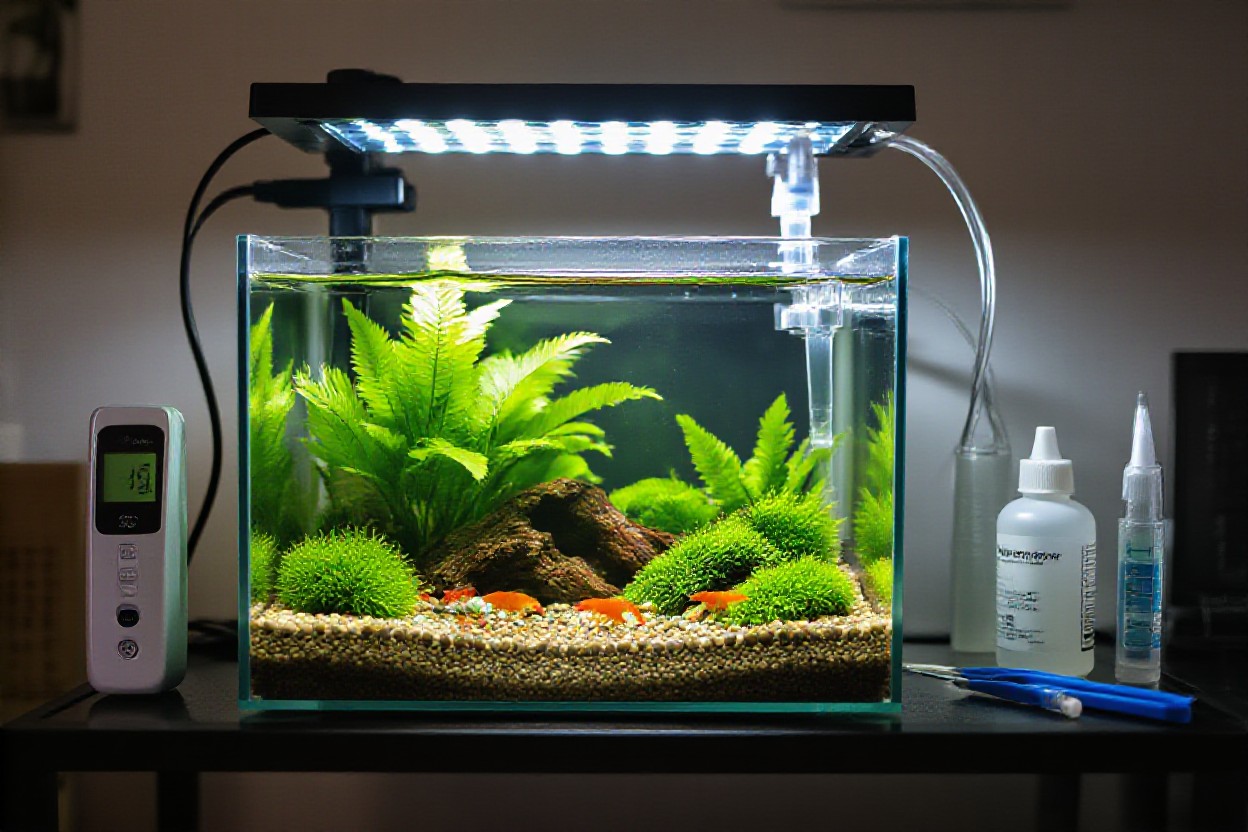
Starting an aquarium is a bit like setting up a tiny life-support system in your living room, every piece has a job that keeps your fish alive. You’re not just picking pretty decor, you’re building stable water chemistry, strong filtration, and enough space so waste doesn’t spike to scary levels. Good gear and a smart layout up front make algae, cloudy water, and sick fish way less likely. Once you’ve nailed the basics, weekly cleaning turns into quick, easy routines instead of disaster control.
What Size Tank Should You Actually Get?
Going bigger than you think sounds backwards for a beginner, but a 20-gallon tank is way easier to keep clean than a tiny 5-gallon. More water means waste and toxins get diluted, so pH and ammonia don’t swing wildly every time a fish poops or you feed a bit too much. You also get room for a proper filter and heater, which keeps the whole system more stable and way more forgiving when you’re still learning the ropes.
Choosing the Right Filter: What You Need to Know
Picking a filter isn’t just about the brand name, it’s about how much water it can actually move and clean. Aim for a unit that turns your full tank volume over at least 4 times per hour, so a 20-gallon tank should have a filter rated around 80 gallons per hour. Hang-on-back filters are perfect for most beginners, they’re easy to clean, you can see what’s going on, and they give you mechanical, chemical, and biological filtration in one simple box.
Here’s where a lot of new fish keepers get tripped up: the filter media is not disposable like a paper towel, it’s where your beneficial bacteria live and actually eat toxic ammonia. Swapping cartridges every week nukes that bacteria and can trigger ammonia spikes, cloudy water, and random fish deaths. Instead, you rinse sponges and bio-rings in old tank water during water changes, keep the plastic frame, and only replace carbon when it’s exhausted or if you’re removing meds. That way your filter stays powerful, your water stays stable, and maintenance becomes a 5-minute job instead of an emergency fix.
What the Heck Does “Cycling the Tank” Mean?
Cycling the tank is just a fancy name for growing bacteria that turn deadly fish waste into safer compounds, and it has way more impact on water clarity than any cleaning gadget. In a proper cycle, ammonia from poop and leftover food is converted to nitrite, then finally to nitrate, which you remove with regular water changes. With a liquid test kit, you literally watch ammonia and nitrite spike, then drop to zero, and that’s when the tank’s finally ready for a full fish load.
Because cycling is basically biology class in a glass box, it usually takes 3-6 weeks without shortcuts, especially in cooler rooms. You can speed it up by adding bottled bacteria from a trusted brand, seeding with media from a healthy established tank, and feeding a tiny pinch of food daily to keep the bacteria fed. The key sign you’re cycled is this: you add a bit of ammonia from fish food, test 24 hours later, and both ammonia and nitrite read 0 ppm while nitrate slowly climbs. Once you hit that point, cleaning is simpler, fish act normal, and you’re not chasing random water problems every weekend.
Daily Habits You Shouldn’t Skip
Daily habits are what quietly keep your tank stable, even when life gets busy. You’re basically doing quick health checks: fish behavior, water clarity, temperature, and gear. Spending just 3 to 5 minutes a day helps you catch problems before they snowball into disease outbreaks or sudden fish deaths. And when you stick to a simple routine, you’ll find cleaning days are easier, your water smells fresher, and your fish actually live longer instead of fading out after a few months.
Feeding Your Fish: What’s the Right Amount?
Feeding should feel tiny, not generous. Aim for what your fish can eat in about 30 to 60 seconds, once or twice a day, so there’s almost no food hitting the gravel. If they’re grabbing food aggressively then slowing down, that’s your stop sign. Extra flakes rotting in the substrate quickly spike ammonia and make your filter work overtime, so it’s always safer to feed a little less and adjust slowly than to overdo it on day one.
Equipment Check: How Often Should You Peek?
Quick gear checks really save you from nasty surprises, like waking up to a cold tank or a dead filter. Every day, take 20 seconds to confirm the heater light is on, the filter output still looks strong, and the thermometer sits in your target range (for many tropical fish, that’s roughly 24 to 26°C / 75 to 79°F). Any sudden drop in flow, weird rattling, or a silent air pump is your cue to act fast before water quality tanks overnight.
So here’s what that daily peek actually looks like in real life: you walk by the tank, check that the filter outlet is rippling the surface, listen for the usual hum, and scan the thermometer. If you see the filter flow has slowed by half, you might rinse the intake sponge in old tank water on your next maintenance day, because that usually means gunk is building up. A heater stuck at 22°C in a tropical tank can stress fish within hours, and a dead filter can push ammonia above 0.5 ppm in a stocked beginner tank. Catching those changes early basically buys your fish a safety net.
Is Partial Water Change Really Necessary?
Partial water changes are the quiet hero of clear, healthy tanks. Swapping just 20 to 30 percent once a week pulls out dissolved waste, extra nitrate, and the invisible gunk your filter can’t grab. Water that looks “clean” can still stack up nitrates over 40 ppm, which slowly stresses your fish, dulls colors, and makes them way more vulnerable to ich and fin rot. Regular small changes beat giant, stressful cleanups every single time.
What really surprises most beginners is how fast nitrates creep up in a small tank, especially anything under 20 gallons, even if the water looks crystal clear. A simple habit like testing once a week and doing a 25 percent change when nitrates flirt with 20 to 40 ppm keeps things stable and your fish acting normal instead of hiding in corners. You’re not just diluting “dirt” either, you’re also refreshing minerals and buffering capacity that help pH stay steady, which means less pH crash, fewer stressed fish, and way fewer emergency Google sessions at midnight.
Cleaning Your Fish Tank Like a Pro
Most new aquarists think a “deep clean” means stripping the tank bare, but that actually stresses fish and wrecks your biofilter. What you really want is a regular, gentle routine that pulls out gunk without nuking the good bacteria. Aim for 20-30% water changes weekly on a normal stocked tank, using a gravel vac, glass cleaner and a soft algae pad, so you keep things sparkling clear without shocking your fish.
Step-by-Step: Turning Off Equipment Before You Start
| Why You Need To Power Down | What You Actually Do |
|
Lots of beginners leave everything running and then wonder why their heater cracks or filter runs dry mid-clean. When water levels drop, exposed heaters can overheat and filters can suck air, which is bad for both fish and gear. You protect your setup by shutting things off in a specific order so nothing runs dry or overheats while you work. |
First, you switch off the heater so it can cool while still submerged. Next, you turn off filters, powerheads and air pumps that might run dry as you lower water. Finally, you unplug any lights if they’re in the way of access. Once you’ve refilled to normal level, you plug everything back in, heater last so it’s fully covered. |
Siphoning: How to Do It Without Making a Mess
Most people think siphoning equals dirty water all over the floor, but if you set it up right the only thing that moves is gunk from gravel to bucket. You just need a gravel vacuum, a bucket sitting lower than the tank and a bit of practice starting the flow without getting a mouthful of tank water. Once it’s going, you target the dirtiest spots and keep the hose end in the bucket so nothing splashes back on you or the floor.
What really helps is working in small sections, about a quarter of the substrate each week, instead of trying to scrub the entire floor in one go. You push the gravel tube straight down into the substrate, then lift slightly so debris shoots up while heavier gravel drops back down – you’ll actually see the waste swirling away. Keep an eye on your bucket and stop siphoning once you’ve removed around 20-30% of the water, or earlier if your fish start acting stressed. If your hose slips or starts to twist, just pinch it closed with your fingers for a second, adjust, then let the flow restart, no flood, no panic.
Cleaning Glass: What’s the Best Method?
A lot of beginners attack algae with kitchen scrubbers, which is how tanks get scratched and sometimes even contaminated with soap residue. You’re way better off using a dedicated algae magnet, razor scraper for glass tanks or plastic blade for acrylic, plus a soft sponge that’s aquarium-only. Work in slow vertical passes, clean the inside first, then wipe the outside with a vinegar-and-water mix so you get crystal-clear glass without damaging the panels.
What makes the biggest difference is using the right tool for your tank material, because a single bad scrub can leave permanent haze on acrylic. You start with the algae magnet for daily film, then bring in a scraper for stubborn green spot algae that laughs at softer pads. Stuck diatoms around the sand line? Tilt the scraper slightly and take short strokes so you don’t dig into the substrate and send grit flying. Finish by drying the outside with a microfiber cloth, since paper towels can leave lint and tiny scratches that slowly ruin that clean, HD look.
The Lowdown on Filter Maintenance
Ever notice how your water starts to look tired even when your fish seem fine? That’s usually your filter hinting it needs a bit of love. You’re not just clearing gunk, you’re also protecting the beneficial bacteria that keep ammonia and nitrite near 0 ppm. A well-kept filter means fewer emergencies, clearer glass, and fish that actually show their best colors instead of hiding in the corners.
How Often Should You Clean Your Filter?
So how do you figure out when it’s time to crack open that filter? In most beginner tanks, a gentle clean every 2 to 4 weeks keeps flow strong without wrecking your bacteria colony. You can use the filter’s output as a clue – if the flow slows down or you see debris blasting back into the tank, it’s due. Just don’t scrub it every few days or you’ll end up with cloudy water and stressed fish.
What’s the Right Way to Rinse Filter Media?
Ever pulled out your filter sponge and wanted to attack it under the hottest tap water possible? Hold back. You want to rinse media in a bucket of your tank water during a water change, gently squeezing or swishing until the worst brown sludge is gone but the sponge still looks a bit stained. That “dirty” look is actually good – it means your bacteria are still hanging on and doing their job.
When you rinse, think “dirty but not disgusting.” You’ll scoop out 1-2 gallons of aquarium water, dunk the sponge or ceramic rings, then squeeze or swirl them a few times until the water turns nasty and you can actually see the media again. Avoid soap, super hot water, or super aggressive scrubbing because that stuff can nuke the nitrifying bacteria that keep ammonia and nitrite from spiking. If you’ve got multiple media types, only clean one type per week so the tank doesn’t lose too much bio-power in one go.
When to Replace Filter Cartridges?
Ever see “replace monthly” on the box and wonder if it’s just a sales trick? You usually don’t need to toss the whole thing that often. The white floss layer clogs first, so swap or rinse that when flow drops, but keep the older sponge or bio-media in place for at least 2-3 months. If the cartridge is falling apart, smells rotten, or won’t rinse clear at all, that’s your sign it’s actually time to replace.
Instead of changing everything at once, treat filter parts like a relay team. You might cut the old cartridge in half, keep the “seasoned” half in the filter, and run it next to a fresh piece for 2-3 weeks so bacteria can migrate over gradually. Activated carbon is the bit that really needs more regular changing, usually every 4 weeks if you’re using it, because it stops adsorbing toxins and starts acting like just another clogged pad. Whenever you do a full cartridge swap, test ammonia and nitrite for a few days so you catch any mini cycle before it nails your fish.
Water Quality 101: What You Absolutely Need to Know
More than 80% of beginner tank problems come from poor water quality, not the fish themselves, so your job is basically to keep the water stable and clean. You’re aiming for clear water that doesn’t smell bad, with 0 ppm ammonia, 0 ppm nitrite and nitrates under about 40 ppm. That means using a decent test kit weekly, doing small, regular water changes and never overfeeding just because your fish look “hungry”. Stable, boring water is what keeps fish alive for years.
Setting the Right Temperature: Why It Matters
| Setting the Right Temperature: Why It Matters |
A swing of just 3-4°C in a day can seriously stress fish, so your heater and thermometer are your silent MVPs. Tropical fish usually sit happy around 24-26°C, while goldfish prefer cooler water near 18-21°C, so you can’t just pick a random number and hope for the best. You want slow, gentle changes, not big jumps, and you should always match new water temperature to the tank when you do water changes. |
pH Levels: What Do They Mean for Your Fish?
| pH Levels: What Do They Mean for Your Fish? |
Most community fish do well in a pH between about 6.5 and 7.8, so you’re usually fine if you keep it steady in that range. Big swings are what hurt, not tiny differences, so chasing a “perfect” number with lots of chemicals often does more harm than good. Weekly testing is your early warning system and if your pH suddenly drops, it can signal dirty water or filter issues long before your fish start gasping. |
Because pH controls how ammonia behaves, it quietly affects everything in your tank, including how toxic waste is to your fish. Soft water with low buffering (low KH) can let pH crash overnight, so you want to test KH too if your readings bounce around or your tap water is naturally soft. Instead of endlessly dumping pH adjusters, it’s usually smarter to work with your tap water, stock fish that fit that range and keep things stable with regular small water changes and a good cleaning routine that doesn’t nuke your filter bacteria.
Ammonia, Nitrite, Nitrate: The Holy Trifecta Explained
| Ammonia, Nitrite, Nitrate: The Holy Trifecta Explained |
Even a tiny 0.25 ppm of ammonia or nitrite can burn gills, while nitrates are safer but should still stay under about 40 ppm for long term health. Your filter’s bacteria convert ammonia to nitrite, then nitrite to nitrate, so those readings tell you if the tank is actually cycled or just “wet with fish in it”. You want ammonia 0, nitrite 0, nitrates going up slowly over time, then you knock nitrates down with water changes. |
In a new tank, you’ll see ammonia rise first, then nitrite, then finally nitrate, which is basically your sign the bacteria are settling in and starting to pull their weight. If you clean the filter too aggressively in tap water, or replace all media at once, you can wipe out those bacteria and suddenly ammonia spikes again, which is why gentle rinsing in tank water is such a big deal. Whenever you see any ammonia or nitrite above 0, cut feeding way back, do partial water changes and treat it like an urgent fix, not something to “wait and see” on.
Common Blunders New Fish Keepers Make
With all the viral Instagram aquascapes floating around lately, it’s easy to copy the look but miss the basics, and that’s where new fish keepers usually stumble. You’ll see the same few issues over and over: overfeeding, cramming in too many fish, and cleaning way too aggressively. Each of these can wreck your cycle, spike ammonia above 0 ppm, and leave you wondering why your “clean” tank keeps killing fish. If you dodge these rookie mistakes, you’re already ahead of half the hobby.
Seriously, Don’t Overfeed Your Fish!
In almost every beginner tank crash thread on Reddit, someone eventually posts a photo of a pile of uneaten flakes rotting on the gravel. You might think more food equals happier fish, but extra food just turns into ammonia, nitrite, and nasty cloudy water. Aim for what your fish can finish in about 30 seconds to 1 minute, once or twice a day, and skip a day weekly. Your filter and your water tests will absolutely thank you.
Overstocking: What Happens if You Go Overboard?
Those TikTok “instant community tank” clips make it look normal to dump 20 fish into a tiny 10 gallon, but your filter can’t keep up with that kind of waste load. When you overstock, ammonia and nitrite can spike from 0 to lethal levels in a day or two, even with a decent filter running. Fish get stressed, start hiding, show clamped fins, and are way more likely to get ich or fin rot. If you’re not testing weekly and adding fish slowly, you’re basically flying blind.
With stocking, the boring slow approach beats the exciting crash every time: research adult sizes, use a simple rule like 1 inch of small fish per gallon as a loose starting point (not a law, just a guide), and add new fish in small batches, maybe 2-3 at a time in a 20 gallon. Give the bacteria in your filter at least a week or two to catch up before the next batch, and watch your test kit like a hawk – if ammonia creeps above 0 or nitrite shows any color at all, pause stocking. You’ll also want to think about territory and behavior, because a single aggressive fish in a crowded tank can start fights that leave nipped fins, infections, and a cycle of deaths that people blame on “bad luck” when it was really just too many fish stuffed in too fast.
Cleaning Everything at Once: Why That’s a Bad Idea
In a lot of “help, all my fish died after cleaning” posts, the story is the same: full water change, scrubbed glass, brand new filter media, and gravel rinsed under the tap. What you’ve actually done there is wipe out most of your beneficial bacteria in one go. That bacteria is what keeps ammonia and nitrite at 0, so if you nuke it, the tank basically has to recycle from scratch. Rotate what you clean, keep some old filter media, and stick to partial water changes so the good microbes stay put.
When you space out your cleaning, the tank stays stable and you stay out of trouble: rinse only part of the filter media in old tank water, vacuum half the substrate this week and the other half next week, and keep water changes in the 25-40% range unless there’s an emergency. Tap water with chlorine or chloramine will kill bacteria in seconds, which is why blasting your whole filter under the faucet is such a tank killer. Treat dechlorinated water as your default for any rinsing, and if you ever need to replace filter media, overlap old and new for a few weeks so bacteria can colonize the fresh stuff instead of leaving your fish in a biological ghost town.
Planning a Stress-Free Schedule
Once you’ve got the basics down, a simple maintenance schedule stops your tank from turning into a weekend project you dread. You’re not trying to babysit the glass 24/7, you’re trying to spread jobs out so you stay ahead of algae, waste, and filter gunk. A lightweight plan means you catch issues early, keep water stable, and your fish barely notice you working on their home. The goal is less panic-cleaning, more quick, confident check-ins that fit around real life.
Here’s a Handy Weekly Routine
Each week, aim for a quick 15-30 minute session instead of a 2-hour marathon. Do a 20-30% water change, vacuum a different section of the substrate, and gently wipe the front glass only. Rinse filter sponges in old tank water, never under the tap, so you keep your good bacteria alive. You can also test ammonia, nitrite, and nitrate once a week, just to make sure nothing weird is brewing behind the scenes.
Monthly Tasks: What You Can’t Forget
Every 4 weeks or so, you’ll deal with the deeper stuff that quietly builds up even in a “clean” tank. That means checking your filter media for clogging, inspecting airline tubing and heater function, and cleaning light covers so algae and dust don’t cut your PAR by 20-30%. Rotate which decor you lift and swish in old tank water so you’re not nuking all the biofilm at once.
On a more detailed level, monthly is when you look for slow drift: is your pH creeping, are nitrates now always at 40 ppm instead of 10-20, has your heater shifted from 25°C to 27°C without you noticing? You can lightly squeeze older filter sponges, replace only 1 section of media at a time, and clean impellers so flow stays strong. Never replace all media in one go, or you risk a mini-cycle that slams your fish with ammonia. This is also a good moment to prune plants harder, remove dying leaves, and re-seat loose rocks or wood before they cause scratches or collapses.
Seasonal Changes: Do You Need to Adjust Anything?
As seasons flip, your tank quietly feels it even if your room looks the same. In summer, room temps can push water several degrees higher, so you might need extra aeration, a fan, or to lower your heater setpoint by 1-2°C. In winter, heaters work harder, so double-check actual water temp with a thermometer, not just the dial. Light duration may also need a tweak if algae suddenly spikes as days get brighter.
Diving a bit deeper, seasonal shifts can mess with your tap water too, especially in cities that tweak treatment chemicals a few times a year. So it’s smart to test your tap every few months for pH, KH, and chloramine so your dechlorinator dosage and acclimation still make sense. You might shorten photoperiod by an hour during bright summer months to keep algae in check, or bump it in winter if your plants look sluggish. And if your home swings from super dry heating to humid summer air, evaporation and salinity in brackish setups can change faster, so topping off with plain dechlorinated water becomes a bigger deal.
Surefire Tips for Keeping Your Fish Happy
Ever wonder why some tanks just feel alive and others look kinda sad even when they’re clean? You keep your fish happiest by pairing stable water quality with simple, repeatable habits like weekly 20% water changes, gentle gravel vacuuming, and not overfeeding that eager school of tetras. Small tests with a cheap aquarium test kit give you early warnings so problems never snowball. Perceiving tiny changes in fish behavior – hiding, clamped fins, fast breathing – helps you fix issues before they turn into floating disasters.
The Importance of Tank Décor
Ever thought about how your tank décor feels from your fish’s point of view? You want a mix of open swimming space and tight hidey-holes: caves, driftwood, and plants where shy fish can duck out of sight and drop their stress levels. Real or fake plants both work if you rinse them properly and avoid sharp plastic edges. Perceiving décor as part of your fish’s mental health toolkit, not just “pretty stuff”, will keep them way more relaxed and active.
Companion Fish: Who Gets Along with Who?
Ever picked fish just because they looked cool, then watched chaos break out a week later? You keep the peace by matching temperament, size, and water needs: peaceful schooling fish like neon tetras or rasboras, a calm bottom dweller like a corydoras group, and maybe one centerpiece fish that isn’t a bully. Avoid mixing fin-nippers with long-finned species like fancy guppies or bettas. Perceiving your tank like a tiny neighborhood, not a random mix, stops stress and silent deaths.
When you’re planning tank mates, it really helps to think in zones – top, middle, bottom – so everyone has their own lane and you don’t get constant turf wars. So you might run something like 8 neon tetras in the middle, 6 corydoras on the bottom, and a single dwarf gourami up top, all happy in soft, slightly acidic water. Charts from big brands like Aqueon or Fluval list compatible species, but you still double-check for outliers like aggressive male bettas that just won’t share. Perceiving every new fish as a long term roommate, not a decoration, makes you way more cautious about what you drop into that water.
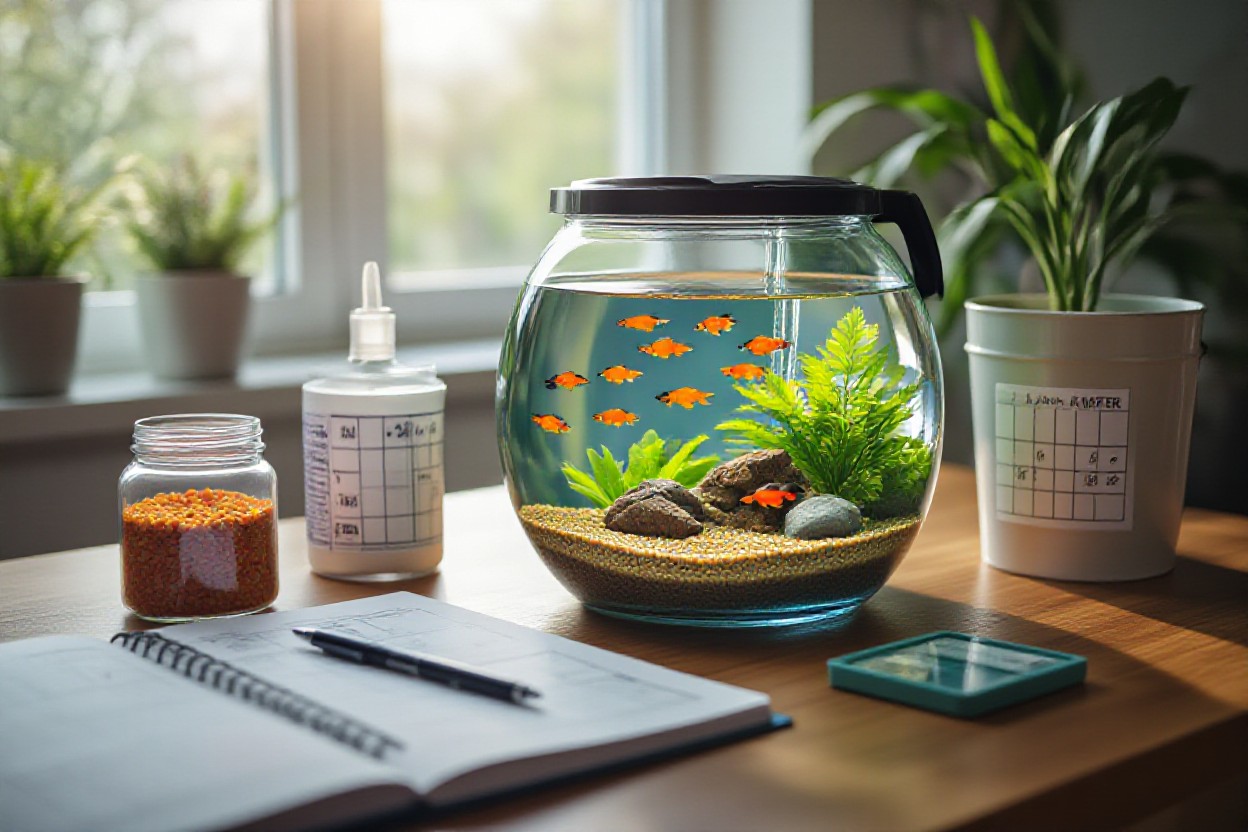
Keeping It Consistent: Why Routine Matters
Ever notice how tanks that get “whenever I feel like it” care always seem a bit off? You keep things stable by locking in a simple maintenance routine: same time of day feeding, weekly 15-25% water changes, and filter checks every 2-4 weeks so flow never drops. Fish absolutely love predictability, and your beneficial bacteria do too. Perceiving your schedule as part of the ecosystem, not an optional chore, keeps parameters from swinging all over the place.
When you stick to a routine, you catch small issues before they punch you in the face as cloudy water or sick fish. So maybe every Sunday you test ammonia, nitrite, nitrate, log the numbers in your phone, then do that 20% water change and quick glass wipe-down, which honestly takes maybe 20-30 minutes. Because you’re repeating the same steps, you instantly spot weird stuff like slower filter flow or a fish hanging near the surface, and you can fix it while it’s tiny. Perceiving maintenance as many tiny, easy habits instead of one giant deep-clean day makes the whole hobby lighter and way more enjoyable.
Dealing with Common Fish Tank Problems
Some weeks your tank behaves perfectly, other weeks it feels like everything hits at once – cloudy water, weird algae, maybe a random fish death. You cut through chaos by treating each issue like a little checklist: test water, check gear, watch behavior, clean only what actually needs it. When you focus on fixing the cause instead of just the symptoms, your tank settles into a stable rhythm and your fish stay a lot safer.
Cloudy Water: What’s Wrong with My Tank?
Cloudy water usually means your tank is reacting to something you did recently – fed too much, cleaned too hard, or added new fish. In a newer setup, that white haze is often a harmless bacterial bloom that sorts itself out in a week or two if you stop messing with everything and just test ammonia, nitrite, and nitrate. Do small 20% water changes, clean your filter sponge in tank water only, and never replace all filter media at once or you’ll crash your cycle.
Dying Fish: How Do I Diagnose the Issue?
Fish dying one by one is almost always a water quality issue, not bad luck, so you start with your test kit, not the medicine shelf. Check ammonia and nitrite first – anything above 0 means your fish are basically breathing toxins. Then watch for clues: clamped fins, gasping at the surface, rubbing on decor, spots, bloating, or rapid breathing. Fixing the environment fast with clean, conditioned water and better maintenance often saves the rest of your stock before you even think about meds.
When a fish dies, you don’t just scoop it and move on, you play detective. Count how long the tank’s been running, any new fish added in the last 2 weeks, and what you changed recently – filter, decor, food, even room temperature. Quarantining new fish for 2-4 weeks, feeding only what they eat in 30 seconds, and keeping nitrates under about 20-30 ppm massively cuts your losses. If multiple species are dying, suspect water or toxins; if it’s only one type, think disease or aggression. And take a photo of symptoms before the body goes – that little detail might be what helps you spot ich, fin rot, or internal parasites next time and act sooner.
Algae Overgrowth: Seriously, What Can I Do?
Algae going wild usually means your tank’s getting too much light, too many nutrients, or both, so you dial those back instead of buying random chemicals. Cut lights to about 6-8 hours a day, feed less so leftover food isn’t feeding algae, and keep nitrates under roughly 20 ppm with weekly 25-30% water changes. Scrape the glass, gently scrub decor, rinse your filter sponge in tank water, and you’ll see that consistent maintenance beats any “quick fix” algae product.
Algae problems feel endless until you realize it’s basically free plant growth in all the places you don’t want it. Start by figuring out what type you’re dealing with: green spot on glass often points to too much light, brown diatoms show up in newer tanks, and that soft green fuzz usually means excess nutrients hanging around. Using a cheap outlet timer to control your lights, adding fast-growing plants like hornwort or water sprite, and doing deeper gravel vacs in the “dirty” corners can turn things around in a couple weeks. And instead of overloading on algae eaters, treat them as helpers, not a solution – your routine and water test results are what actually keep algae from taking over again.
Do You Really Need a Water Conditioner?
Picture turning on your tap, filling your bucket, and thinking you’re done… then your fish start gasping at the surface. Tap water usually has chlorine or chloramine, both of which can burn delicate gills in minutes. A basic water conditioner instantly neutralizes those chemicals so your weekly water changes don’t become a slow disaster. If you’re using city water and skipping conditioner, you’re basically rolling the dice every time you top off or clean your tank.
What Does a Water Conditioner Do Anyway?
Most beginner-friendly conditioners tackle three jobs at once: they remove chlorine and chloramine, bind heavy metals like copper, and often protect slime coats with added aloe or polymers. Some “complete” formulas also detoxify ammonia and nitrite for a short time, which can really help if your tank is still cycling. You’re not making tap water magical, you’re just making it safe and stable enough for fish that literally can’t escape it.
Choosing the Right Product: How to Decide?
Start by checking your local water report online or on your city’s website, because that tells you if you’re dealing with just chlorine or also chloramine. Simple dechlorinators might be fine for chlorine-only water, but most beginners are safer with a broad-spectrum conditioner like Seachem Prime or API Tap Water Conditioner that handles chlorine, chloramine, and heavy metals. Go for liquids with clear dosing (like 1 ml per 10 gallons) so it’s easy to measure during quick water changes.
When you’re staring at a shelf of bottles, focus less on the marketing fluff and more on the label details: does it list chloramine specifically, does it mention binding ammonia, does it give an exact dose per gallon, not some vague capful? You want a concentrated product that treats a lot of water in a tiny dose, so a 100 ml bottle might treat 1,000 gallons or more, which is way cheaper long term. For small tanks, pick a conditioner that has a syringe or drop-count dosing so you don’t accidentally overdose a 5 gallon by “eyeballing” a capful. And if you’re keeping sensitive species like shrimp or wild-caught fish, stick to conditioners that list no added medications or dyes, just pure dechlorination and detox.
Will It Hurt My Fish? Debunking Myths
A lot of beginners worry that using too much conditioner will instantly wipe out their fish, but with common brands you’d usually have to overdose by 5-10x before you see real problems. Most reputable products are designed with a safety margin, since nobody hits the ml mark perfectly every time. What actually hurts fish more often is skipping conditioner completely, using old “pond” products not meant for aquariums, or mixing random chemicals trying to “fix” water on your own.
Stories you see online about conditioner “killing” a tank almost always trace back to something else: uncycled filters, massive overcleaning, or big water changes done with cold tap straight from the faucet. Conditioners from well known brands are tested on sensitive species at several times the recommended dose before they ever hit shelves, so regular slight overdosing when you’re in a rush isn’t the villain here. The bigger risk is chaining products together – like using a slime coat booster, ammonia detox, and heavy metal remover all at once – which can mess with oxygen levels and stress fish. If you stick to a single, trusted conditioner and follow the label, you’re giving your fish a safety net, not a threat.
DIY Fish Tank Hacks You’ll Love
Cool Decor Ideas That Won’t Break the Bank
You know that moment when your tank looks kind of bare and lifeless? Grab a few smooth river stones from a garden center, scrub them with hot water, and stack them into little caves your fish can dart through. Plain terracotta pots, rinsed well, make great caves too. You can even use cheap vinyl stickers on the outside glass for a fun backdrop, so you get a stylish tank without wrecking your budget.
Budget-Friendly Cleaning Hacks
When your glass is getting cloudy every few days, you don’t need fancy tools to fix it. A simple magnetic algae scraper under 10 bucks saves you from sticking your whole arm in the tank, and a clean, unused toothbrush gets into those tight filter corners. Old, clean towels become your splash guards and drip catchers. You cut down mess, save time, and keep water clearer for longer without buying a ton of pricey gear.
For quick weekly touch ups, you can use a turkey baster to blast debris off plants and decor so your filter actually grabs it instead of letting it rot. A DIY gravel vacuum made from vinyl tubing and a plastic bottle works almost like the store-bought ones, pulling waste out of the substrate while you siphon water into a bucket. If you pre-mark a line on the bucket at 25% and 30%, you hit consistent water changes every time, which keeps your parameters stable and your fish way less stressed.
Homemade Fish Food: Is It Worth Trying?
When you’re staring at pricey food tubs at the pet store, homemade mixes suddenly look pretty tempting. Blending shrimp, spinach, peas and a bit of gelatin can give you a nutrient-dense gel food you slice into cubes and freeze. It can be cheaper long term, and you control every ingredient. But you’ve got to avoid seasoning, fats and random leftovers, or you risk adding pollution and extra waste to your water really fast.
If you do experiment, start by swapping only 1 or 2 feedings per week and watch how your fish behave and how your test results look the next day. Uneaten homemade food can break apart quickly, so you need to siphon it out within 10-15 minutes or it’ll spike ammonia. Many beginners still keep a high quality commercial pellet as their main staple, then use homemade food as an occasional treat, which gives you variety without turning your tank into a cloudy soup.
Want to Grow Live Plants? Here’s What to Know
That first time you see your fish weaving through real plants instead of plastic, it kind of hits you that your tank looks like a tiny river scene, not a toy. Live plants help you keep clear, stable water, soaking up waste like nitrate so you do fewer emergency cleanups. You also get better oxygen levels, calmer fish, and fewer algae outbreaks. If you’re worried it’s all high-tech gear and fertilizers, don’t be – there are super easy beginner plants that survive just fine in basic setups.
The Benefits of Live Plants for Your Tank
When your test kit suddenly shows nitrates creeping up, live plants can act like a natural filter that quietly fixes the problem in the background. They use fish waste as fertilizer, which supports cleaner, safer water and makes your filter’s job easier. Many beginners notice that shy fish hide less and show better color when they can dart through real leaves. You also get less algae growth, because plants grab the nutrients algae wants before it can take over the glass.
Choosing the Right Plants: Not All Are Equal
A lot of new keepers grab random plants from the store, then wonder why everything melts into mush within a week. Some species sold as “aquarium plants” are actually terrestrial plants that slowly die underwater, wrecking your water quality as they rot. The easiest picks for beginners are hardy types like Java fern, Anubias, and Java moss, which tolerate low light and simple setups. You get fewer headaches when you match plants to your lighting, tank size, and how much maintenance you actually want to do.
So when you’re standing in front of that plant wall, you want to think more like a strategist than a shopper. Low light tank with a basic LED? Go for slow growers such as Java fern, Anubias, or Cryptocoryne, they handle missed doses of fertilizer and less-than-perfect water without falling apart. High light, no CO2, and no plan usually equals algae chaos, so avoid fast, light-hungry stems like Rotala or delicate carpeting plants for now. Ask staff which plants stay under 8-10 inches, which ones are true aquatic plants, and which can be glued to wood or rock so you aren’t constantly replanting the same stems every weekend.
Basic Care Tips for Thriving Tank Plants
After a couple weeks of live plants, you start noticing small details like new leaves popping up or roots grabbing onto driftwood, and that’s how you know things are actually working. Stable lighting (around 6-8 hours per day) plus a simple all-in-one liquid fertilizer once or twice a week is usually enough for beginner-friendly species. Weekly trims stop plants from shading each other and rotting at the bottom, which helps you keep that clean, open swimming space for your fish. Any time you see leaves melting or turning yellow, it’s a sign to check light, nutrients, or flow instead of just tossing the plant.
- Use a timer to keep light duration consistent and reduce algae.
- Start with a basic all-in-one fertilizer at half dose, then adjust.
- Keep gentle water flow so nutrients reach all leaves.
- Trim dead or melting leaves weekly so they don’t rot in the tank.
- Any sudden yellowing or holes in leaves often point to low nutrients or unstable water.
Once you get into a rhythm with plant care, it feels a lot like normal tank maintenance, just with scissors in the mix. Short, regular trims stop big stem plants from blocking the filter output and dumping dead leaves everywhere, which keeps your filter media from clogging so fast. Gravel vacs should be a bit lighter around rooted plants, but you can still swirl gently to pull up trapped waste that fuels algae. If growth stalls, look first at light intensity and photoperiod, then at your fertilizer schedule, instead of panicking and buying more gear. Any time you add new plants, quarantine if you can and double check for snails or pests so you don’t import a whole new problem into your carefully balanced tank.
- Do small, regular water changes to keep nutrients balanced for plant growth.
- Use sharp aquarium scissors for cleaner cuts and faster regrowth.
- Gently stir the top layer of substrate around roots to prevent dead zones.
- Watch for algae on leaves and wipe it early before it spreads.
- Any plant that constantly melts or rots is probably the wrong species for your setup, not your failure.
The Art of Fish Breeding (If You’re Up for It!)
A lot of beginners think fish will just magically breed if you toss a pair in a tank, but breeding that actually works is more like a careful science project. You need rock-solid water quality, stable temperature, and a plan for where the babies will go so they don’t overcrowd your aquarium. Some species lay hundreds of eggs at once, which can trash your filters if you’re not on top of maintenance. Start slow, take notes, and treat breeding as an optional side quest, not your first main goal.
Is Breeding Right for You? Here’s How to Decide
People often think breeding is a cute way to “save money” on new fish, but in reality it usually increases your maintenance and costs. You need spare tanks, extra filters, and time to do more frequent partial water changes, sometimes daily for small fry. If you’re still fighting cloudy water or struggling with your weekly 25% water change, hit pause on breeding for now. Once your main tank stays stable for 2-3 months straight, then you’re in a safer spot to experiment.
What Are the Best Fish to Start With?
New breeders often jump straight into rare or super delicate fish, but you’re way better off starting with hardy, proven species like guppies, platies, or zebra danios. These guys handle small beginner mistakes, breed readily in clean, well-filtered community tanks, and don’t demand fancy equipment. If your tap water runs slightly hard and alkaline, livebearers like guppies are basically made for you. Keep the adult stock low, keep the water clean, and they’ll usually do the rest.
What really makes these starter species so forgiving is how chill their breeding requirements are compared to more sensitive fish. Guppies and platies give birth to live young, so you skip the fragile egg stage completely, and a simple breeding box or dense floating plants like hornwort often gives enough cover for fry to survive. Zebra danios will scatter eggs everywhere, so if you use a spawning mop or marbles on the bottom, you can save a surprising number from getting eaten. Once you can consistently raise a batch of these easier fish without ammonia spikes or weird illnesses, then you can slowly level up into egg layers that need tighter control of pH, temperature, and water changes.
Tips to Care for Fry: They Need Love Too!
Most people assume fry can just live in the main tank and “figure it out”, but tiny fish are basically moving filter test kits – they crash fast in bad water quality. You’re aiming for super clean but very gentle filtration, like a seasoned sponge filter bubbling away in a bare-bottom tank. Feeding needs are picky too: 3-5 tiny meals of baby brine shrimp, crushed flakes, or powdered fry food, with small siphon cleanups so the extras don’t rot. After a few weeks of steady growth and active swimming, you can slowly acclimate the strongest fry back into your main community tank.
- Dedicated fry tank with a sponge filter and heater keeps babies safe and cuts down on stress.
- Frequent partial water changes of 10-20% using pre-warmed, dechlorinated water keep toxins like ammonia near zero.
- Micro-sized foods such as infusoria, baby brine shrimp, and finely crushed flakes match their tiny mouths.
- Hiding spots with moss, floating plants, or plastic breeding grass reduce fry losses from hungry adults.
- Slow, careful acclimation back to your main tank prevents shock from different temp or water chemistry.
After you get into the rhythm of feeding small but often and pairing that with easy, consistent cleaning, you’ll notice fry growth explode and survival rates jump, all without wrecking the balance in your main display tank.
Final Words
Taking this into account, keeping a fish tank in good shape is less like high-tech science and more like doing small, steady chores that quietly add up. You test the water, clean a bit each week, feed properly, watch your fish – and all those little habits slowly turn into instinct.
So if your tank isn’t perfect right away, that’s fine, you’re learning. Just stick to the basics, stay curious, and tweak things as you go.
FAQ
Q: How often should I clean my fish tank and what exactly should I do each week?
A: Picture this: you sit down to watch your fish and the glass looks a little hazy, bits of food on the gravel, filter humming a bit louder than usual – that’s your tank begging for a simple weekly routine. For most beginner tanks, a 20-25% water change once a week is the sweet spot, no full tear-down, no mega scrub, just a light tidy-up that keeps everything stable.
Each week, use a gravel vacuum to suck up gunk from the substrate while you remove that 20-25% of water. Wipe the inside glass with an aquarium-safe sponge, rinse filter sponges in old tank water (never under the tap or you’ll kill the good bacteria), and top the tank back up with dechlorinated, temperature-matched water so your fish don’t get shocked.
Every month or so, you can do a slightly deeper clean: trim plants, gently swish decorations in old tank water, and check the filter media for clogs. Skip full tank strip-downs unless there’s a serious problem, because completely gutting the tank can crash your beneficial bacteria and that often leads to cloudy water and stressed, sick fish.
Q: Why does my tank water keep getting cloudy or green, and how can I fix it without starting over?
A: Cloudy or green water usually means the tank’s little ecosystem is out of balance, not that you need to rip everything out and start from scratch. New tanks often get milky or cloudy because the beneficial bacteria are still building up – that’s called the nitrogen cycle – so if the tank is young, a bit of cloudiness can just be part of it settling in.
For cloudy water in an established tank, check if you’re overfeeding, because extra food rots and feeds bacteria like crazy. Feed only what your fish finish in about 1-2 minutes, keep up those weekly 20-25% water changes, lightly vacuum the gravel, and test water for ammonia, nitrite, and nitrate so you can see what’s actually going on instead of guessing.
Green water is usually algae having a party, often from too much light or too many nutrients. Cut tank lights to about 6-8 hours a day, move the tank away from direct sunlight, clean the glass, pull out any visible algae, and keep up with regular water changes – and if nitrates are always high, you might need fewer fish, more live plants, or a bit less food going into the tank.
Q: What basic equipment and habits do beginners need to keep fish healthy long-term?
A: New fish keepers often grab a tank, some gravel, and a few decorations, then find out the hard way that gear and habits matter way more than the fancy castle in the middle. At minimum, you want a properly sized filter, a heater for tropical fish, a thermometer, a water conditioner to remove chlorine, and a simple liquid test kit for ammonia, nitrite, nitrate, and pH.
Daily, just do a quick visual check: are the fish swimming normally, fins open, colors bright, no gasping at the surface, no weird spots or patches? Also glance at the filter flow, temperature, and water level, and scoop out any uneaten food after a few minutes so it doesn’t rot and mess with water quality.
Weekly, stick to a consistent routine: small water change, gravel vacuum, glass wipe, and filter check. And before you even add new fish, research their adult size, how many gallons they really need, and whether they get along with your current crew, because good stocking choices plus steady maintenance is what makes a tank look clear and stay that way without constant drama.


")