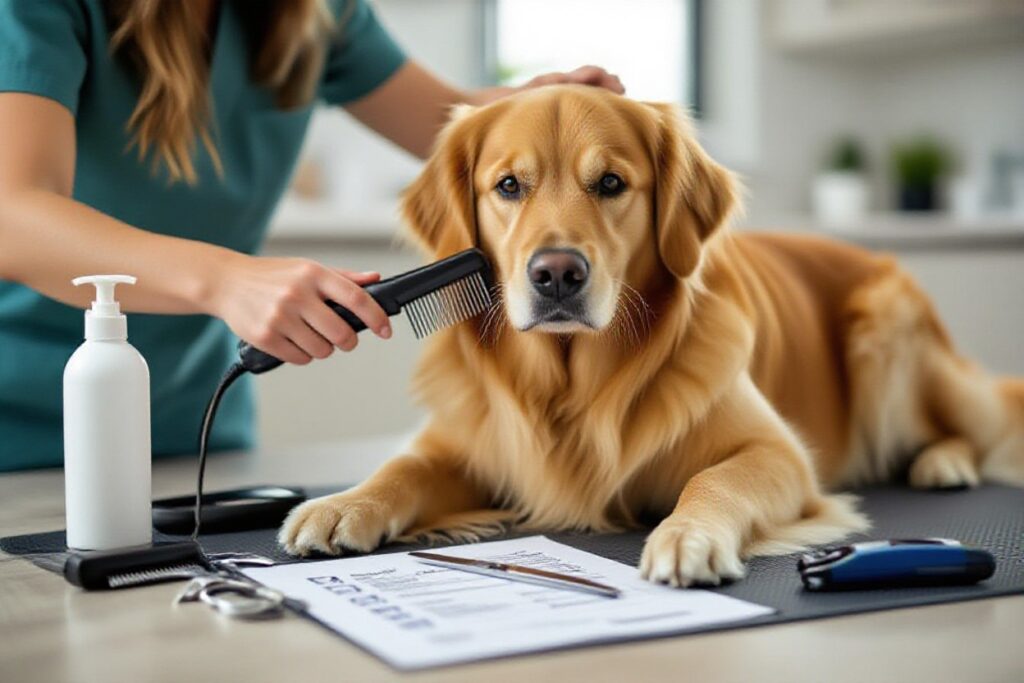
With the right at-home grooming routine, you’re not just keeping your dog pretty, you’re protecting their skin, coat, and overall health, which honestly saves you stress and cash in the long run. When you learn a few simple, safe grooming habits, you catch issues early – weird lumps, sore spots, itchy patches – before they turn into big vet bills. You’ll also make bath time and brushing way less of a wrestling match, because your dog starts to trust the whole process.
General Grooming Rules Every Owner Should Know
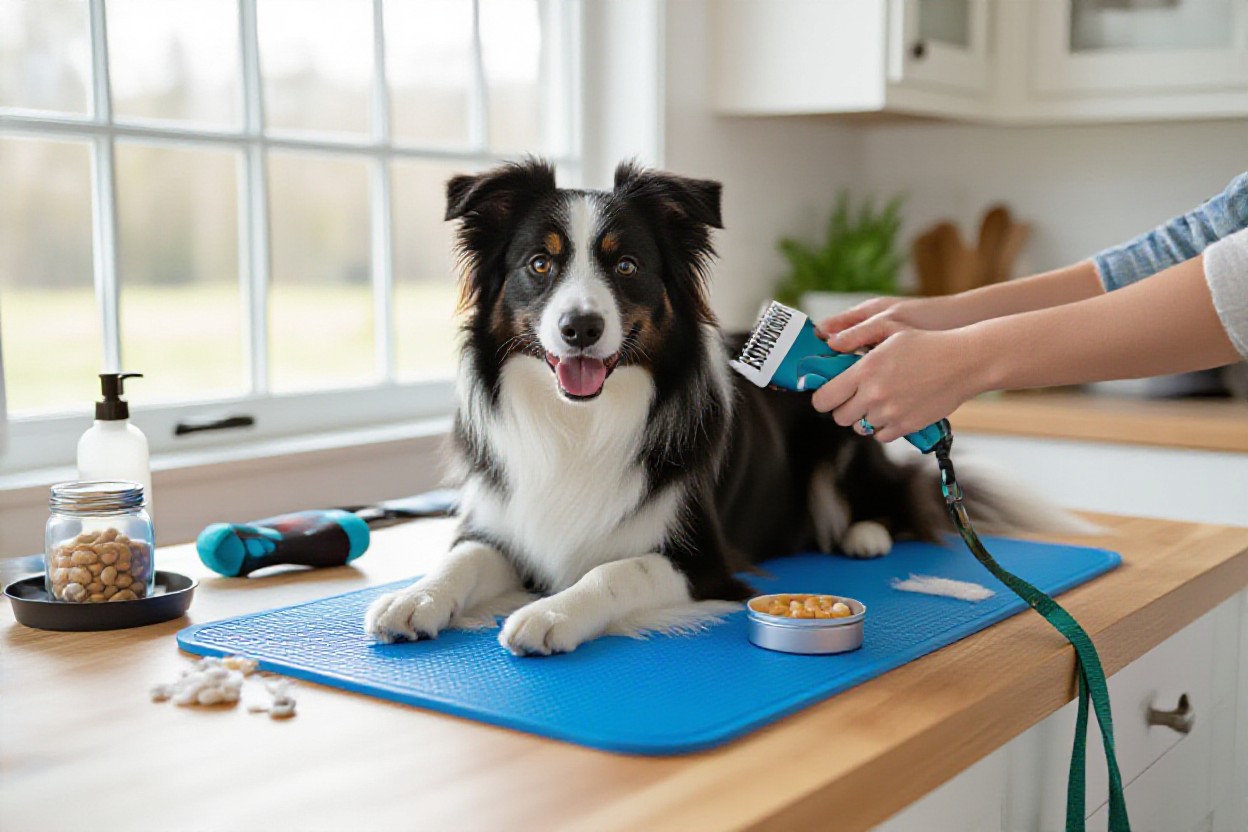
Your dog’s first trim at home can go from spa day to wrestling match in about 3 seconds if you skip the basics, so you want a few simple rules locked in before you grab the clippers. Things like using the right tools, working on dry, tangle-free fur, and never shaving down to pink skin keep grooming safe. You’ll also want good lighting, non-slip footing, and calm energy from you, because your dog is reading every tiny cue. Get those in place and the fancy diy dog grooming tips suddenly feel way easier.
Start Slow and Steady
Your dog doesn’t care that you watched 10 grooming videos on YouTube – if the whole thing feels weird, they’re out. So you start tiny: a few brush strokes, a quick nail touch, one pass of the clipper on the lowest-noise setting. Stop before your dog gets fidgety, not after, so they log it as “boring and safe” instead of “scary and endless”. Over a week or two, those baby steps stack up into full grooming sessions without the drama.
Keep Those Sessions Short, Seriously!
Your dog’s attention span is not built for 90-minute makeover marathons, especially when you’re just dialing in your best dog grooming tips at home. Aim for 5 to 15 minutes, tops, and cut it even shorter if your dog starts yawning, lip-licking or turning away. Quick wins keep the vibe positive, help you make fewer mistakes, and make it way more likely your dog will show up willingly next time.
What really matters here is ending on a good note, not finishing the whole job in one go, so think in chunks: today you only tackle brushing the back, tomorrow you trim just the paw fur, maybe nails the next day. Professional groomers do this with super anxious dogs too, breaking things into 3 or 4 micro-visits because cooperation always beats perfection. Short sessions also stop your hand from cramping so you’re less likely to slip with the scissors or over-trim nails when you’re tired and rushing the last 10%. Slow-burn progress is still progress.
Rewarding is Key – Here’s Why
Your dog’s doing the math every second: “Does grooming equal good stuff or bad stuff?” So you stack the deck with tiny, constant rewards – pea-sized treats, calm praise, a quick game with their favorite toy. Pay your dog for the boring stuff too, like just standing still or letting you hold a paw, not only for the big “after” moment. Over a few sessions, their brain starts going, “Oh, clippers out means snack time,” which is exactly what you want.
Think of it like tipping a really good babysitter – the better the payment, the happier they are to come back. Soft, high-value treats like cheese or freeze-dried liver turn those weird grooming sounds into background noise because your dog is focused on the payoff instead. And if your dog gets overwhelmed, you can pause, feed a few treats just for sitting calmly, then quit for the day, which keeps grooming paired with safety and good feelings instead of stress. Over time, that reward history is what gives you a dog who trots into the bathroom like it’s their personal spa.
Coat Care Tips That Make a Difference
Most people think coat care is just about keeping your dog looking cute, but regular grooming actually keeps skin healthier, cuts down on allergies, and helps you spot issues early. When you’re doing DIY dog grooming at home, focus on the basics: consistent brushing, gentle detangling, and smart shedding control. After you lock in these habits, you’ll notice less fur on your couch and a lot more shine in your dog’s coat.
- Regular brushing improves circulation and coat shine.
- Gentle detangling protects sensitive skin.
- Shedding tools reduce loose hair by up to 90%.
Brushing – What’s the Right Direction?
Many owners think you can just brush any which way, but brushing against the grain on a sensitive dog can make them hate grooming fast. You generally want to brush in the direction the coat naturally grows, section by section, using short strokes so you’re not dragging on the skin. After a few minutes, do one light pass against the coat with a slicker brush to lift dead hair, then finish with a quick smooth-down in the natural direction.
Detangling Gently – No One Likes a Pull!
A lot of people go straight at a knot with a brush, and that’s exactly how you end up with a dog that bolts at grooming time. Start by working on small sections, hold the hair between your fingers above the knot to protect the skin, then use a detangling spray and a wide-tooth comb from the ends upward. After the tangle loosens, switch to a slicker brush for a quick tidy so the mat doesn’t come back two days later.
Most stubborn mats show up in sneaky spots like the armpits, behind the ears, under the collar, and right where the harness rubs, so you’ll want to check those first. You can lightly split a big mat into smaller bits with the tips of your fingers or a mat splitter tool, always moving parallel to the coat, not hacking straight into it. If the knot is tight to the skin, it’s safer to snip it out with blunt-tipped grooming scissors and a comb as a barrier, or honestly just ask a groomer so you don’t nick your dog. For best dog grooming tips at home, think slow and steady detangling – fast and rough usually ends with sore skin and a stressed-out pup.
Shedding Solutions That Actually Work
Some owners think shedding is all or nothing, but you can seriously cut it down with the right routine and tools. Use a de-shedding tool or undercoat rake 1-2 times a week on double-coated breeds, always on dry fur, and limit each session to about 10-15 minutes to avoid irritation. After a warm bath with a , blow-drying on cool while brushing can release an insane amount of loose hair before it hits your floors.
Shedding control really kicks in when you stack a few simple habits together instead of relying on one magic brush. You’ll get the best results if you combine weekly de-shedding, daily quick brushing in heavy seasons like spring and fall, and a diet with enough omega-3 fatty acids to support skin health. One 2019 study found dogs on omega-3 supplements had visibly better coat condition in just 8 weeks, which means less flaky skin and less loose fur drifting around your house. For practical diy dog grooming tips, think of shedding work like vacuuming: short, regular sessions beat one giant cleanup every month.
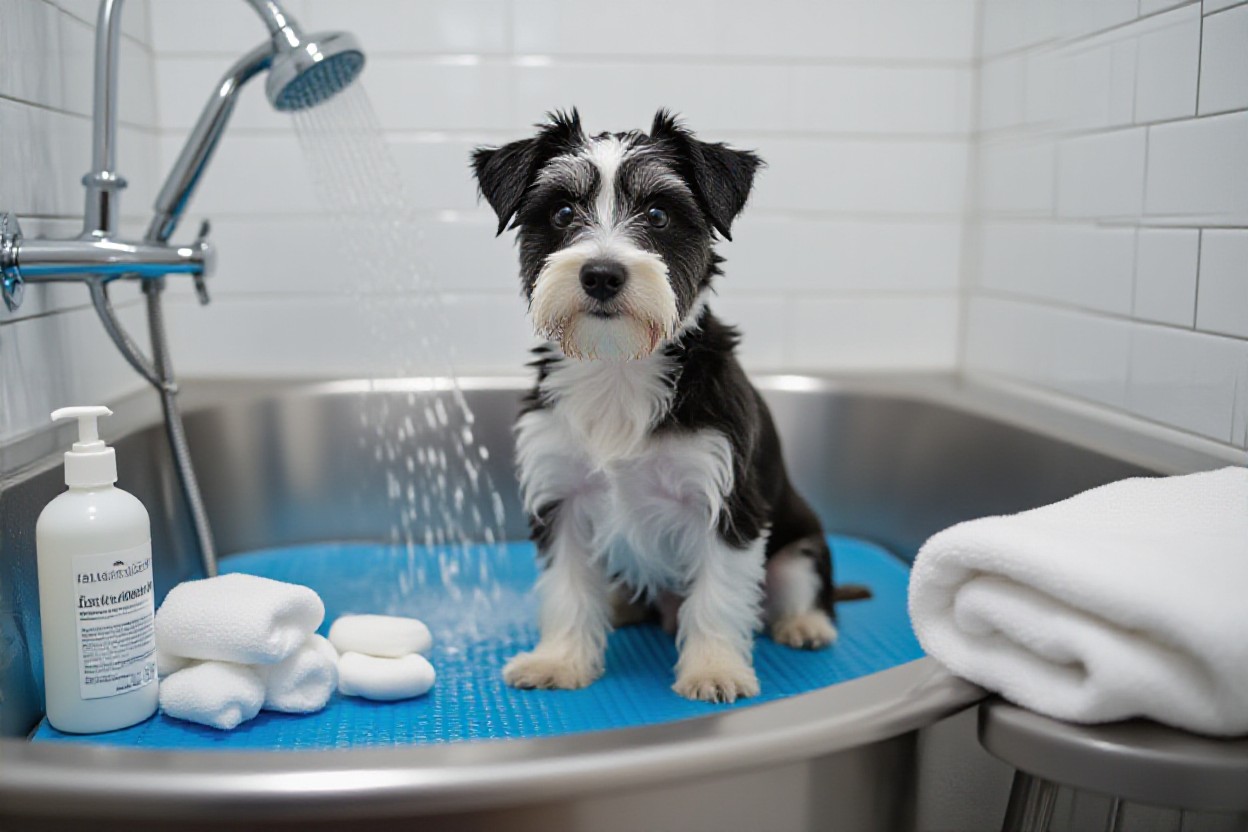
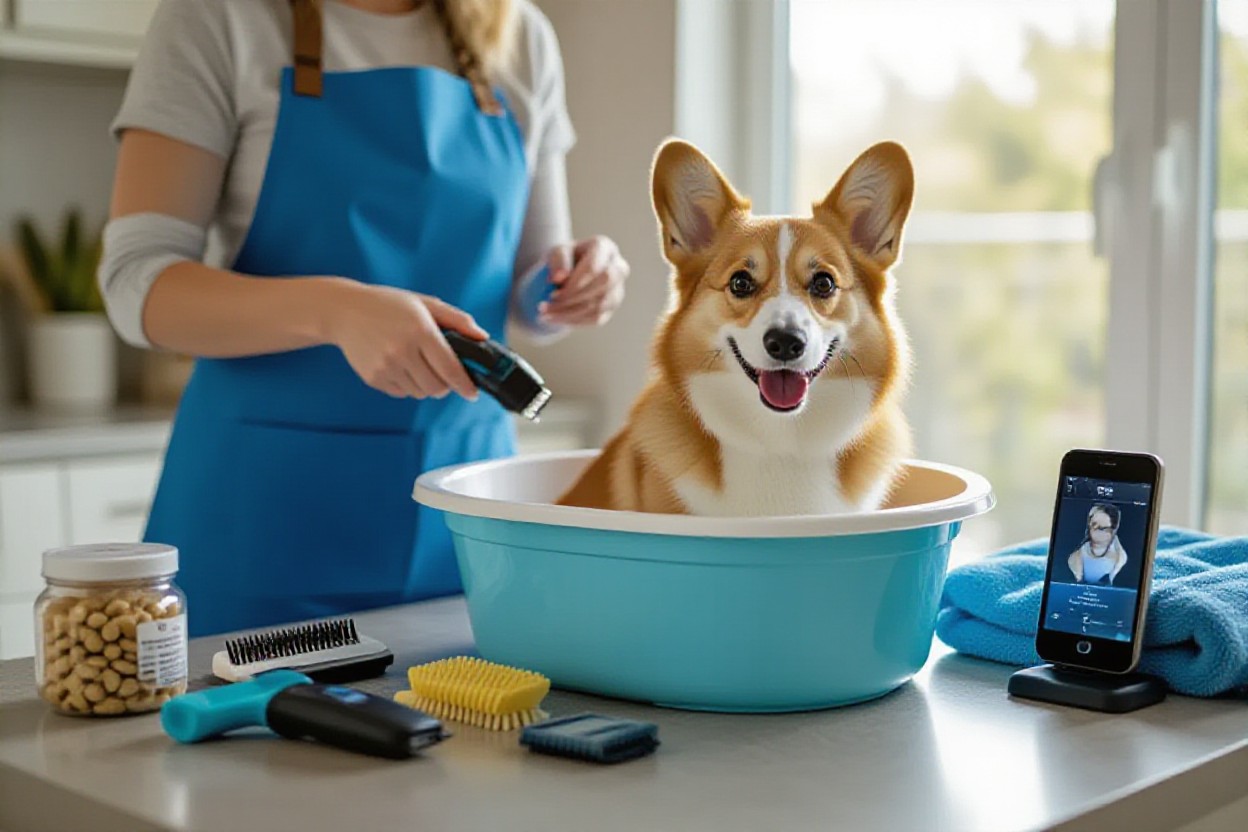
Bathing Tips for a Stress-Free Experience
Most dogs don’t hate baths, they hate surprises, so set up everything first: a lukewarm water temp, your dog-safe shampoo, and a stack of old towels within arm’s reach. Use a sprayer on low pressure or a plastic cup and avoid blasting water directly into eyes or ears. Keep the bath under 10 minutes for small breeds and 15 for large ones so your dog doesn’t get bored or chilly. The calm, steady pace helps your DIY grooming session feel like a mini spa day instead of a wrestling match.
- Lukewarm water to keep your dog comfy and avoid skin irritation
- Low-pressure rinsing around the face and ears to prevent fear and infections
- Short bath sessions so your dog doesn’t get overwhelmed or over-chilled
- Prepped supplies within reach to keep the whole process smooth and quick
Non-Slip Surfaces – Safety First, Right?
Wet paws on slick tubs are a recipe for a doggy wipeout, so drop a non-slip mat or even a folded towel in the tub before you start. Your dog instantly feels sturdier, which lowers stress and cuts the risk of joint tweaks, especially in seniors. A grippy surface lets you focus on actually washing instead of catching your dog mid-slide. The simple fix of extra traction turns bath time into something you both can actually get through without drama.
Use a Calm Voice – Trust Me on This
Your voice is basically your secret grooming tool, so keep it soft, low, and steady from the moment the water turns on. Short phrases like “easy” or “you’re ok” paired with slow breathing help your dog mirror your energy instead of spiraling. Pair that with gentle petting behind the ears or under the chin and you get a dog that actually starts to relax. The more often you use this calm voice routine, the quicker your dog will settle in future baths.
A calm voice isn’t just about being nice, it literally changes how your dog’s brain reacts to bath time – studies on canine stress show lower heart rates when guardians speak in slow, warm tones. So you’ll want to pick one or two bath-only words, like “spa time” or “wash up”, and say them the same way every single session. You’re basically building a little audio cue that tells your dog, “This is weird, but it’s safe.” Over a few weeks, you’ll notice the shaking at the start of the bath drops, the tail unclenches faster, and your dog starts checking in with your face more, waiting for your next cue instead of panicking.
Gradual Water Introduction – The Key to No Drama
Most dogs freak out because you go from zero to full shower mode, so start with slow, gentle water at their feet and work upward. Let your pup sniff the sprayer or cup first, then wet paws, then legs, then chest, saving the head for last. Short 5-second pauses between each area give your dog time to process what’s happening. The patient, step-by-step approach beats forcing it every single time and makes each future bath way easier.
Gradual water introduction works especially well for rescues or dogs that had one bad bath and never forgot it, because you’re proving nothing scary happens when the water starts. Start with just filling the tub an inch or two while giving treats, no actual bath, for the first session or two. Once your dog stands there without trying to bolt, you level up to light splashes, then a tiny trickle from a handheld sprayer pointed at the wall first, then slowly angled to their body. The more you break the process into tiny, predictable steps, the closer you get to that magical “no drama” bath day.
Nail and Paw Care Tips You Can Handle
Just like you wouldn’t walk around with painful shoes, your dog shouldn’t deal with overgrown nails or rough paws either, and this is one of the easiest best dog grooming tips at home you can master fast. Use a clipper or grinder labeled for dogs only, aim to trim every 2-3 weeks, and stop if you see a tiny gray dot in the center of the nail – that means you’re close to the quick. The more consistently you do light trims, the more that sensitive quick recedes and the safer each session gets.
- Work in bright light so you can spot the quick before you nip it.
- Keep styptic powder or cornstarch nearby in case you cut too short.
- Use lots of tiny rewards to build a positive association with paw care.
- Check paw pads for cracks, burrs, or stuck gravel every grooming session.
- File sharp nail edges lightly so they don’t snag carpets or scratch your skin.
- The safest approach is steady, small trims instead of big dramatic cuts.
Getting Your Pup Used to Paw Handling
Think of this like teaching a handshake – you’re just helping your dog get comfy with you holding each paw for a few seconds at a time, no tools yet, just calm contact and snacks. Touch the leg, then the paw, then gently spread the toes for one second, treat, release, repeat. The more reps you squeeze into normal cuddle time, the more your dog starts to think paw handling is just another kind of petting, which makes every future DIY nail trim way less of a battle.
Small Trims Make a Big Difference
Kind of wild how cutting off just 1-2 millimeters of nail can change how your dog stands, but it really does, especially if nails have been clicking on the floor for months. Shorter nails help your dog shift weight properly onto the toe pads, which is a big deal for seniors or big breeds. The real win for your diy dog grooming tips toolkit is that quick, light trims every 1-2 weeks are safer, faster, and way less intimidating than tackling overgrown nails all at once.
When you actually sit down to trim, aim the clipper so you’re cutting at a slight angle that follows the curve of the nail, not straight across, and for dark nails use the “shave, don’t chop” rule – take off a sliver, check the center, then another if it’s still chalky. Because that inner quick will slowly recede with frequent small trims, you can turn scary talons into neat salon-level nails over a month instead of in one nerve-wracking session, and if you prefer grinders, do 2-3 seconds per nail at a time so heat doesn’t build up and spook your dog.
Checking Paw Pads – Don’t Skip This!
More damage comes from stuff stuck in the pads than most owners realize, especially if you walk on hot pavement, icy sidewalks, or rocky trails, so make a habit of flipping each paw over during grooming. Run your fingers between every toe, look for cracks, redness, or tiny pebbles wedged in, and trim any long fur around the pads so it doesn’t mat or collect salt. The quick 30-second pad check you add to your at home routine can literally stop small issues from turning into limping, licking, and vet bills.
During that check, press gently on each pad like you’re testing bread dough, which helps you catch hidden soreness your dog might hide when adrenaline’s pumping on walks, and if the pads feel dry or rough, you can use a dog-safe balm 2-3 times a week to keep them supple without making them greasy. The big red flags are deep cuts, oozing, or a sudden change in how your dog places a paw on the ground, because those can point to burns, foreign objects, or infections that really do need a vet instead of another DIY fix from your grooming kit.
Grooming for Sensitive or Anxious Dogs
Studies suggest around 20-30% of dogs show anxiety during grooming, so if your pup shakes or hides, you’re not alone. You’ll get much further by keeping sessions short, quiet, and predictable: same spot, same tools, same calm voice. Try soft background music, a non-slip mat, and super gentle handling so your dog feels safe, not trapped. Over a few weeks, that “nope” reaction can turn into a dog that actually trots over when you grab the brush.
High-Value Treats – Your Secret Weapon
One simple trick that works with most nervous dogs is using high-value treats they only get during grooming. You might use tiny bits of chicken, cheese, or store-bought soft training treats – something that makes your dog’s eyes light up. Pair every brush stroke or nail touch with a treat so grooming starts to predict good stuff. You’re basically turning “uh oh” into “oh yes, snack time”.
Taking Breaks – It’s Okay to Pause
Behavior pros often say stressed dogs need a break every 3-5 minutes, and that totally applies to grooming at home. If your dog starts panting hard, lip licking, or trying to slink away, hit pause. Just stop, drop the tool, and let them wander off or sniff around a bit. Short, relaxed sessions always beat one long battle that freaks them out.
When you lean into breaks properly, grooming turns into a series of mini wins instead of one big showdown that fries your dog’s nerves. You might only trim 2 nails, take a 2-minute break for a sniff and a treat, then come back for 2 more – it feels slow, but you’ll avoid creating long-term fear which is way harder to fix later.
Watch for subtle stress signals like pinned-back ears, yawning when they’re not tired, or that whale-eye glance where you see the white of the eye. Those are your early clues to pause before your dog boils over into growling or snapping. And when you stop right as they’re coping ok, not when they fully lose it, you quietly teach your dog that grooming never goes past what they can handle.
Desensitisation – The Slow and Easy Way
Studies on desensitisation show that tiny, repeated exposures can flip a dog’s fear into tolerance in just a few weeks. For grooming, that might mean touching paws for 2 seconds, then treating, instead of forcing a full nail trim. You just stack micro-successes: touch, reward, stop. It feels almost too simple, but this slow drip approach works better than any “get it done” marathon session.
Think of desensitisation like teaching your dog a new language: short, clear lessons beat cramming every time. You might start by just placing the brush on your dog’s back for one second, treat, then walk away – no actual brushing yet, which feels weirdly easy but that’s the point.
As your dog relaxes, you add one gentle stroke, then two, always staying below the level where they start flinching or trying to escape. The moment you see tension spike, you scale it back again. Over days, those tiny steps snowball into full grooming sessions that look totally normal, even for a dog that used to bolt at the sight of the clippers.
Time-Saving Grooming Hacks for Busy Owners
One thing every busy owner figures out fast is that you don’t need marathon grooming days to keep your dog in great shape. You just need smart, bite-sized habits that stack up over the week. Think 5 minutes while coffee brews, 3 minutes before a walk, a quick brush after work – it all adds up. When you treat grooming like part of your routine instead of a big project, your dog stays cleaner, smells better, and you avoid those pricey emergency mat-shaving vet visits.
Combine Grooming with TV Time – Win-Win!
Plenty of owners swear their dog’s best brush-outs happen during Netflix time, because you’re relaxed and your dog copies that energy. Grab a slicker brush, a soft grooming glove, or nail file and just work in slow, gentle strokes while you watch your show. Keep treats on the coffee table and reward every calm minute. Within a few weeks, your pup will start trotting over when you hit play, like, “Cool, spa night?”
Mini Sessions Throughout the Week – You’ve Got This!
Some dogs handle three 3-minute sessions way better than one 30-minute battle, and that’s exactly what you’re aiming for here. Do a quick eye and ear check on Monday, a light brushing on Wednesday, then a paw and nail check on Friday – total time might be 15 minutes for the whole week. Short, predictable routines lower stress and build trust, which means fewer wrestling matches and a dog that actually shows up willingly for grooming.
With mini sessions, you turn grooming into background noise instead of a big scary event your dog dreads. You might do teeth brushing right after breakfast, then a 2-minute brush after your evening walk, then a paw wipe and quick nail look-over when you come in from the yard. Most behaviorists agree that frequent, low-pressure handling is one of the best ways to prevent grooming-related anxiety, especially in puppies and rescues. You’re basically teaching your dog, “This is no big deal, it’s just what we do.” Over time, you’ll notice less fidgeting, fewer tangles, and way fewer surprise vet notes like, “severe mats under armpits” that cost you extra to fix.
Tools That Make Life Easier – Seriously!
People who stick with at-home grooming almost always have a tiny toolkit that does 80% of the work for them. A self-cleaning slicker brush, a grooming glove, and nail grinders with safety guards can cut your grooming time in half compared to cheap, dull tools. Add no-rinse foam or spray shampoo for quick clean-ups and a non-slip bath mat so you’re not wrestling a sliding dog. When tools feel good in your hand and work fast, you’re way more likely to keep up with a DIY grooming routine.
Good tools might cost a bit more upfront, but they pay you back in time and fewer headaches. A quality slicker brush pulls out undercoat in a few passes instead of 20, and a quiet nail grinder can be the difference between a 30-second trim and a full-on meltdown. Many owners find that using a grooming glove on short-haired breeds picks up loose fur while you just pet your dog like normal, which is the easiest win ever. And when you pair these with small hacks – like storing everything in a caddy near your usual grooming spot – you remove every excuse to skip your best dog grooming tips at home routine, because everything’s right there, ready to go.
Common Grooming Mistakes to Avoid
One day your dog looks spotless, the next he’s itchy, knotty, and giving you the side-eye like, “what did you do?” A few simple grooming slip-ups can undo all your hard work and even cause problems like hot spots or infections. To keep your best dog grooming tips at home actually working for you, watch out for over-bathing, harsh products, and sneaky little mats that turn into big headaches fast.
Over-Bathing – Too Much of a Good Thing?
That “fresh from the bath” smell is addictive, but if you’re bathing your dog every week just because he rolled on the lawn, you’re probably overdoing it. Most healthy dogs only need a bath every 4-8 weeks, sometimes even less. Too many baths strip natural oils, leading to itchy skin, dull fur, and more shedding, which is the exact opposite of what you want from your diy dog grooming tips.
Harsh Products – Not Worth the Risk
Your dog’s not a tiny, hairy human, so using your own shampoo or random cleaning products is a big no. Harsh stuff with strong fragrances, alcohol, or human-grade ingredients can trigger redness, burning, and long-term skin issues. Always reach for gentle, pH-balanced dog shampoos that are made specifically for their skin, even if the people products are already sitting in your shower.
One of the quickest ways to wreck a grooming session is grabbing whatever’s under the bathroom sink and hoping for the best. Human shampoos usually sit around a pH of 5.5, while your dog’s skin is closer to neutral, so that “smells amazing” product can quietly dry out their coat, break the skin barrier, and make them itchy for days. And when you toss in things like tea tree oil at the wrong concentration, or super strong whitening shampoos left on too long, you risk chemical burns and intense irritation. If your dog licks their fur afterward – which they will – those harsh ingredients also end up in their stomach. So keep it simple: stick to vet-approved, dog-specific formulas, patch-test new products on a small area, and skip anything that makes your own eyes water or hands feel tight after rinsing.
Ignoring Small Mats – They’re Sneaky!
That tiny tangle behind your dog’s ear looks harmless, but give it a week and it can tighten into a painful knot pulling at their skin every time they move. Little mats in armpits, tail bases, and collar areas trap moisture, dirt, and even fleas, and they’re way harder to fix once they fuse together. Catching them early with a slicker brush is faster, kinder, and way cheaper than a full shave-down at the groomer.
Small mats are like that “just one” dish in the sink that somehow turns into an overflowing pile overnight. A pea-sized knot can spread as your dog runs, rolls, and gets damp, and soon you’ve got a tight, felted patch that tugs skin every step they take. In bad cases, groomers find raw, smelly skin and even maggots hiding under big mats, which sounds dramatic until you’ve smelled it once. So instead of wrestling with a giant mess later, slide your fingers into high-friction zones a few times a week – behind ears, inner thighs, under harness straps – and gently pick apart any tiny tangles with a comb or detangling spray. Those 2 minutes of “maintenance mode” are what actually make your at-home grooming feel easy instead of like a full-on rescue mission.
Grooming Tools You Actually Need
You probably need way fewer grooming tools than Instagram makes you think. For most DIY dog grooming tips to actually stick, you can get great results with 4 basics: a good brush/comb, gentle shampoo, a towel or dryer, and simple nail clippers. That’s it. Fancy deshedding gadgets and five types of scissors can wait. Start small, buy quality, and you’ll save cash, avoid stressing your dog, and still get that “just left the groomer” vibe at home.
Brushes and Combs – What’s Best for Your Dog?
Your dog’s coat type decides everything here. Short-haired dogs usually do best with a soft bristle brush or rubber curry brush, while fluffy or double-coated breeds often need a slicker brush plus a metal comb to catch tangles hiding underneath. Curly coats, like poodles or doodles, really need that slicker + comb combo or you’ll get mats fast. If you’re not sure, google your breed and “best brush type” and match what pros use.
Shampoos and Conditioners – The Good Stuff
Your own shampoo is out. Dog skin sits at a different pH, so using human products can cause itching, dandruff, even infections. Go for a mild, dog-safe shampoo labeled “soap-free” or “pH balanced” and avoid heavy perfumes that only impress humans. Sensitive, allergy-prone, or puppy skin usually does best with oatmeal, aloe, or hypoallergenic formulas. Conditioner is optional but a total game changer for longer coats that tangle every time your dog blinks.
What really matters with shampoo and conditioner is how you use it, not just what you buy. You should always dilute concentrated shampoos first (a 1:4 ratio works for most) so they rinse out easier and don’t leave residue that makes your dog itchy 24 hours later. Work product all the way down to the skin, especially on thick coats, then rinse for twice as long as you think you need – leftover shampoo is one of the top reasons dogs start scratching after a bath. Conditioner should go mainly on the body and tail, lighter on the belly, and almost none on the face or paws so things don’t get slippery or greasy. And if your dog has skin issues, talk to your vet before grabbing any “medicated miracle” bottle off the shelf.
Nail Clippers – Don’t Get Anything Too Scary!
Gigantic, heavy-duty nail clippers just make you nervous and your dog even worse. For at-home trims, a simple pair of sharp, medium-size scissor clippers works for most dogs, while smaller breeds often do best with compact guillotine-style clippers. Skip cheap, dull metal that crushes instead of cutting – that pressure hurts and makes your dog hate nail day. If your dog is black-nailed or wiggly, keep styptic powder nearby so a small mistake doesn’t turn into a panic.
What most people don’t get told is that nail clipping is 80% setup, 20% cutting. You want bright light, a non-slip surface, and your dog settled in a comfy spot before you even pick up the clippers, otherwise every tiny sound freaks them out. Start by just touching the paws and tapping the clippers near the nails for a few sessions, then clip only 1 or 2 nails at a time and pay with treats like you’re tipping generously. Cutting tiny slivers every 1 to 2 weeks is safer than taking a huge chunk monthly, especially on dark nails where you can’t see the quick. If your dog panics at the sound of clippers, a quiet nail grinder might be easier, but you still need to go slow because friction heat can sting if you rush.
The Real Deal About Grooming Frequency
With at-home grooming trending on TikTok and YouTube shorts, it’s easy to think you should be brushing your dog every single day and doing full spa days every weekend. In reality, most pets do best with a predictable, light routine: quick brushing 2-4 times a week, nails every 3-4 weeks, and a full bath every 4-8 weeks, depending on coat type. The magic is consistency, not marathon sessions that leave both you and your dog exhausted.
How Often Should You Be Grooming?
Short-haired pups like Boxers might just need a 5-minute brush twice a week, while doodles or Shih Tzus usually need daily brushing and trims every 4-6 weeks to avoid painful mats. Active, outdoorsy dogs often need more frequent baths than couch potatoes, but bathing more than every 2 weeks can dry out skin unless you’re using a super gentle dog shampoo. Aim for a routine that fits your dog’s coat and lifestyle, not what Instagram says looks cute.
The Signs Your Dog Needs Grooming
Mattes behind the ears, that faint “doggy” smell, or nails clicking loudly on your floors are classic signs your dog is overdue for some grooming love. You might also spot eye gunk crusting up, paw fur spreading like fuzzy slippers, or greasy, dull-looking coat instead of a soft shine. When you notice your dog licking or chewing the same spot a lot, there’s a good chance tangled fur or dirty skin is bothering them more than you think.
When you start paying attention, the red flags are pretty obvious: you see small knots turning into tight mats in just a week or two, especially in friction spots like armpits, tail base, and under the collar. You hear that “tap tap tap” of nails on tile and suddenly realize it’s been a month since the last trim. A healthy coat has a light shine and feels soft – when it feels sticky, waxy, or smells a bit sour, that’s your cue. And if your dog shuffles away from brushing or flinches when you touch certain spots, those hidden tangles can actually be painful, so you want to tackle them before they get worse.
Seasonal Coat Changes – Keep an Eye Out!
Twice a year, usually in spring and fall, many dogs go into full “fur explosion” mode and suddenly your black leggings are a lost cause. During these shedding seasons, you might need to bump brushing to daily for 5-10 minutes with a slicker brush or de-shedding tool, especially for double-coated breeds like Huskies or Labs. Regular, gentle brushing during these weeks hugely cuts down on loose hair and itchy skin, plus it keeps your vacuum slightly less overwhelmed.
When seasons flip, your dog isn’t just being dramatic – their coat is literally switching gear to handle new temps. Spring often means that fluffy winter undercoat starts blowing out in clumps, and if you don’t stay on top of it, all that trapped hair can cause hot spots and dandruff-like flakes. In fall, you might notice thicker, denser fur popping up along the back and thighs, which is your sign to grab an undercoat rake and do short, frequent sessions instead of one hardcore brushing marathon. With double-coated breeds especially, you never want to shave them down for heat; smart, steady de-shedding at home does a way better job at keeping them comfy without wrecking their natural insulation.
Dealing with Grooming-Related Behavior Issues
Runs, growls, zoomies – behavior problems can turn your best dog grooming tips at home into chaos fast, so you want a simple plan before the clippers even come out. Short, calm sessions, high-value treats, and clear cues keep grooming from feeling like a fight and more like a weird little spa day. When you break things into tiny steps and watch your dog’s body language, you catch stress early and avoid bites, panic, or long-term aversions to grooming.
Fear or Aggression During Grooming – What to Do
When your dog stiffens, growls, or air-snaps at the brush, that’s not them being “bad” – that’s fear talking, and pushing harder usually makes it worse. Switch to very short, low-pressure sessions, pair every brush stroke or nail touch with high-value treats they only get for grooming, and stop before they escalate. If you’re seeing real lunging or multiple warning bites, it’s time to call a trainer or vet-behaviorist, not power through it at home.
Helping Overly Curious Dogs Focus
Wiggly, nose-everywhere dogs aren’t being rude, they’re just convinced grooming is the most interesting thing that’s ever happened in your kitchen. Use a lick mat smeared with peanut butter, a stuffed Kong, or a long-lasting chew to keep their brain and mouth busy while you clip or brush. That way your diy dog grooming tips actually work, and you’re not wrestling a furry noodle that keeps trying to inspect the scissors.
For extra help with those overly curious pups, set up a whole mini routine that makes focus easier. You might always groom in the same low-traffic spot, lay down a non-slip mat, and bring out the same “grooming only” treat toy, so your dog quickly learns this setup means stand still and snack. Some owners even use a short leash clipped to a sturdy point, giving you just enough control without a full wrestling match. Combine that with a simple cue like “stay” and you’ll notice sessions dropping from 30 chaotic minutes to 10 calm ones pretty fast.
Teaching Basic Commands for Grooming Ease
Simple commands like “sit”, “down”, “stay”, and “paw” turn grooming from a chase scene into a quick checklist, especially when you’re trying to follow the best dog grooming tips at home. Practice those cues away from grooming first, then slowly add the brush or clippers while rewarding like crazy. Over time your dog starts offering those positions on their own, which means faster paws, cleaner bellies, and way fewer accidental nicks.
To make those grooming commands really stick, train them in tiny, boring sessions long before you pull out scissors or nail clippers. Ask for “stand” on a bath mat, treat, release, repeat, then later add a gentle brush stroke or a quick paw touch. You can even create special phrases like “chin” for resting their head in your hand or “side” for lying on their hip so you can reach tricky spots. Once those cues are rock solid, diy dog grooming tips suddenly feel realistic instead of like a circus act in your living room.
When to Call in Professional Groomers
Some grooming jobs just stop being a simple DIY project and start feeling like you’re wrestling a furry alligator in the tub. When your dog’s coat, nails, or skin issues get beyond what you can realistically handle in your bathroom, that’s your cue to bring in a pro. Professional groomers have tools, training, and techniques that keep your dog safer and less stressed, especially for tricky breeds, senior dogs, or pups with medical needs.
Signs Your Dog Might Need a Pro
When brushing turns into a battle with thick mats you can’t separate with your fingers, it’s time to call a groomer. Other red flags are super long nails that click loudly on the floor, strong odor even after a bath, irritated or flaky skin, ear gunk that keeps coming back, or a dog that shakes, growls, or hides every grooming session. If you’re hesitating with the scissors or clipper because you’re scared to hurt your dog, that alone is a sign you need backup.
Grooming That’s Too Much for You – No Shame!
Some tasks just aren’t worth you white-knuckling your way through at home, especially if your pup is anxious, wiggly, or over 60 pounds of pure muscle. Heavy matting, sanitary trims, tricky face trims around the eyes, and anal gland expression are jobs where a pro can literally save your dog pain. There’s zero guilt in tagging out when your DIY dog grooming tips hit their limit – it simply means you care about safety more than pride.
When your clippers start snagging, your dog’s panting hard, or you’ve already been at it for 45 minutes and you’re only halfway through, that’s not a fun at home grooming session anymore, that’s stress for both of you. Pros use grooming tables with no-slip surfaces, high velocity dryers, and multiple blade sizes so they can get through dense double coats and tight poodle curls without overheating the skin or causing razor burn. They’re also trained to spot problems while they work – things like hidden hot spots, embedded burrs, yeast infections in the ears, or cracked nails that could split to the quick. So instead of pushing through and hoping for the best, you can make a smart call: do the easy maintenance at home, then let a groomer handle the tough, risky, or gross stuff.
Finding the Right Groomer for Your Furry Friend
Start by asking your vet, trainer, or local dog group for names, then stalk their Instagram or Google photos to see real before-and-afters on dogs that look like yours. Good groomers are happy to answer questions about drying methods, kennel time, and how they handle anxious dogs. You want clear pricing, proof of vaccinations required, and policies that feel dog-first, not rushed-assembly-line. If your gut feels off during a tour, trust it and keep looking.
When you’re ready to pick someone, book a low-stress visit first – maybe just a bath, brush, and nail trim – instead of a full makeover so your dog can warm up to the new place. Ask how many dogs they handle per day, what products they use on sensitive skin, and whether you can request crate-free or express appointments for nervous pups. Pay attention to small details: are the floors clean, dryers not blaring at max volume, staff actually talking kindly to the dogs? A solid groomer will keep notes on your dog’s preferences, like “hates feet touched” or “needs breaks”, and will work with your at home routine so all your best dog grooming tips at home fit nicely with their professional care.
My Take on Grooming as Quality Time
Ever notice how your dog watches you like you’re the most interesting show on Netflix? Grooming taps right into that. When you treat brushing, nail trims, and DIY touch-ups as shared rituals instead of chores, your dog starts to lean into it – literally. That quiet 10-15 minutes with your hands on their coat can lower both your stress levels and slowly turn grooming from “ugh, task” into “hey, this is our thing.”
Turning Grooming into Bonding Moments
What if grooming felt like a spa date instead of a wrestling match? Start with small, low-pressure sessions: 3-minute brush while you watch TV, one paw of nails after a walk, quick face wipe before bed. Pair every step with calm praise and top-tier treats and your dog begins to link your DIY grooming with safety, touch, and comfort – not just clippers and suds.
The Benefits of Regular Grooming Together
Why does grooming together matter so much for you and your dog? Because consistent hands-on time helps you spot issues early – lumps, ticks, red patches, ear gunk, overgrown nails – before they turn into pricey vet visits. You also build a shared routine your dog can predict, which reduces stress and makes all your at-home grooming sessions smoother over time.
On a practical level, those regular DIY grooming sessions save you money, but they also quietly train your dog to accept handling everywhere: paws, tail, ears, muzzle. That pays off at the vet, the pro groomer, even during emergencies when someone else has to touch them. Over a few weeks you’ll notice subtle stuff too – softer coat from consistent brushing, less shedding on your couch, cleaner paws that don’t track as much dirt, nicer smell. Most owners underestimate how 10 minutes twice a week can transform both coat health and trust, but you feel it when your dog starts trotting over as soon as you pick up the brush.
Seriously, Enjoy the Process!
What if grooming day was something you actually looked forward to? Put on a podcast, sit on the floor, and treat it like hanging out with your dog, not ticking off a to-do list. Use tools you actually like holding, choose products that smell good to you, and keep sessions short enough that you both leave wanting just a bit more instead of counting the seconds till it’s over.
So much of the vibe comes from you – if you’re tense, rushing, or annoyed, your dog reads that instantly and the whole thing turns into a standoff. When you slow down a little, talk to them like you would a friend, crack a dumb joke while you trim one nail at a time, grooming stops feeling like a test and more like a ritual. Over time, those tiny moments of “good job, buddy” plus a treat and a scratch behind the ear stack up and grooming becomes one of the most reliable ways to recharge your bond, not drain it.
FAQs – The Questions You’re Dying to Ask
One minute you’re just trying to trim a paw, the next you’re Googling a million grooming questions at 11:30 pm. These quick answers keep your DIY dog grooming on track, help you avoid hurting your pup, and stop minor mistakes from turning into expensive vet visits. Think of this like your cheat sheet for the stuff you secretly worry about but don’t always ask out loud.
“How often should I groom my dog at home?”
Your grooming schedule really depends on coat type: short-haired dogs can usually get by with a good brush 1-2 times a week and a bath every 4-6 weeks, while doodles or long coats often need brushing daily or at least 3-4 times a week plus trims every 4-8 weeks. Nail trims usually land around every 3-4 weeks, ears get checked weekly, and quick once-over inspections fit perfectly into your normal cuddle time.
“What are signs that grooming is hurting my dog?”
Your dog might be hurting if you see sudden flinching, yelping, lip licking, whale eye, refusing to put weight on a paw, or they start snapping when you touch a specific spot. Red or hot skin after clipping, quicked nails that bleed, or constant licking of one area after grooming are big red flags too. If their behavior changes from relaxed to panicked the second you touch the same area, that’s your sign to pause and reassess.
Picture this: your dog is fine while you brush their back, but the second you get near one ear they freeze, lick their lips, and their breathing speeds up – that’s not attitude, that’s discomfort. Pain signs can be subtle, like a tiny flinch when the clipper hits a mat, or really obvious, like a sharp yelp when you trim too short and hit the quick. You’ll also notice they may hide after grooming, avoid you, or guard their paws or tail. When you spot these reactions, stop, go slower, use softer tools (like a slicker brush instead of a harsh comb), and if the skin looks swollen, hot, very red, or bleeding, that’s vet territory, not DIY territory.
“Why does my dog hate grooming so much?”
A lot of dogs don’t actually hate grooming, they hate how it’s done – loud clippers, rushed handling, or past bad experiences at a groomer or vet. If your pup only freaks out when the nail clippers appear, it’s probably linked to a previous painful quick. Some breeds are just more sensitive to touch, noise, or restraint, and if grooming only happens when they’re already matted or tangled, it’s always uncomfortable, so of course they think it’s the enemy.
Think about the first time someone dragged a brush through a knot in your hair – you didn’t forget that, and your dog doesn’t either. When grooming only shows up once a month, with clippers buzzing, bath water splashing, and you wrestling with mats, your dog learns, fast, that “grooming time = chaos”. Noise-sensitive dogs, herding breeds, and anxious rescue pups are especially likely to protest, growl, or try to bolt. You can flip that script by turning grooming into short, frequent sessions with treats, calm praise, and easy wins, like a 30 second brush followed by a snack, so your dog starts thinking, “Oh, this part’s not so bad actually”.
Final Words
As a reminder, taking your time to learn these best dog grooming tips at home really pays off, because your dog feels better and you save a chunk of money too. When you keep up with simple stuff – brushing, quick checks, gentle baths, tidy nails – you make grooming a calm little routine instead of a wrestle every few months, right?
So use these diy dog grooming tips as your go-to checklist, tweak them for your pup’s personality, and keep practicing.
Your goal isn’t perfection – it’s a clean, comfy dog who actually trusts you with the clippers and the brush.