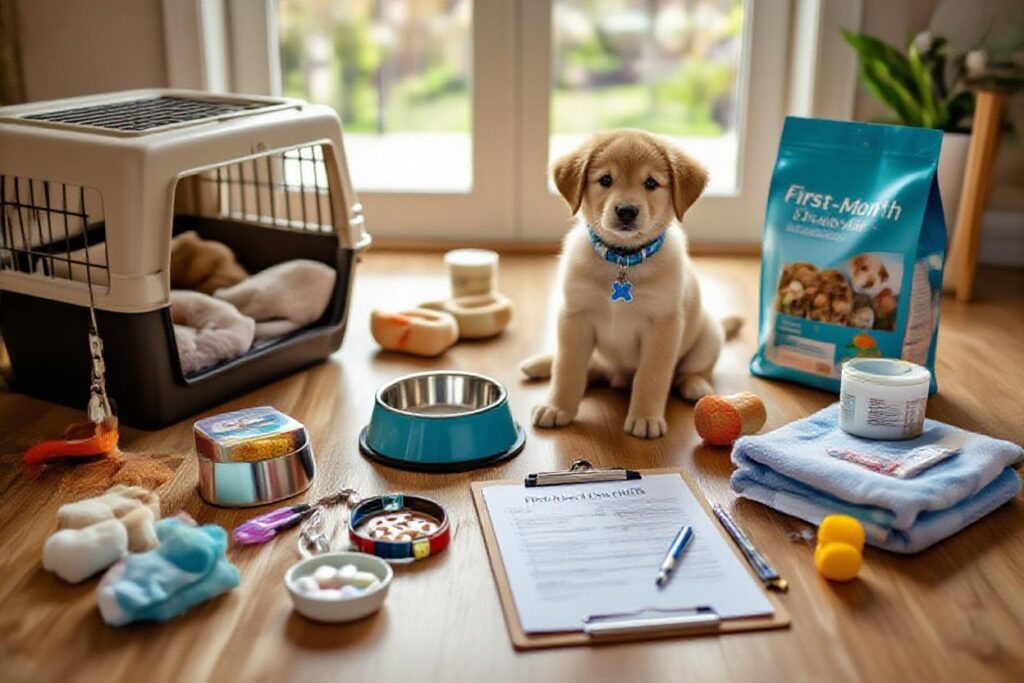
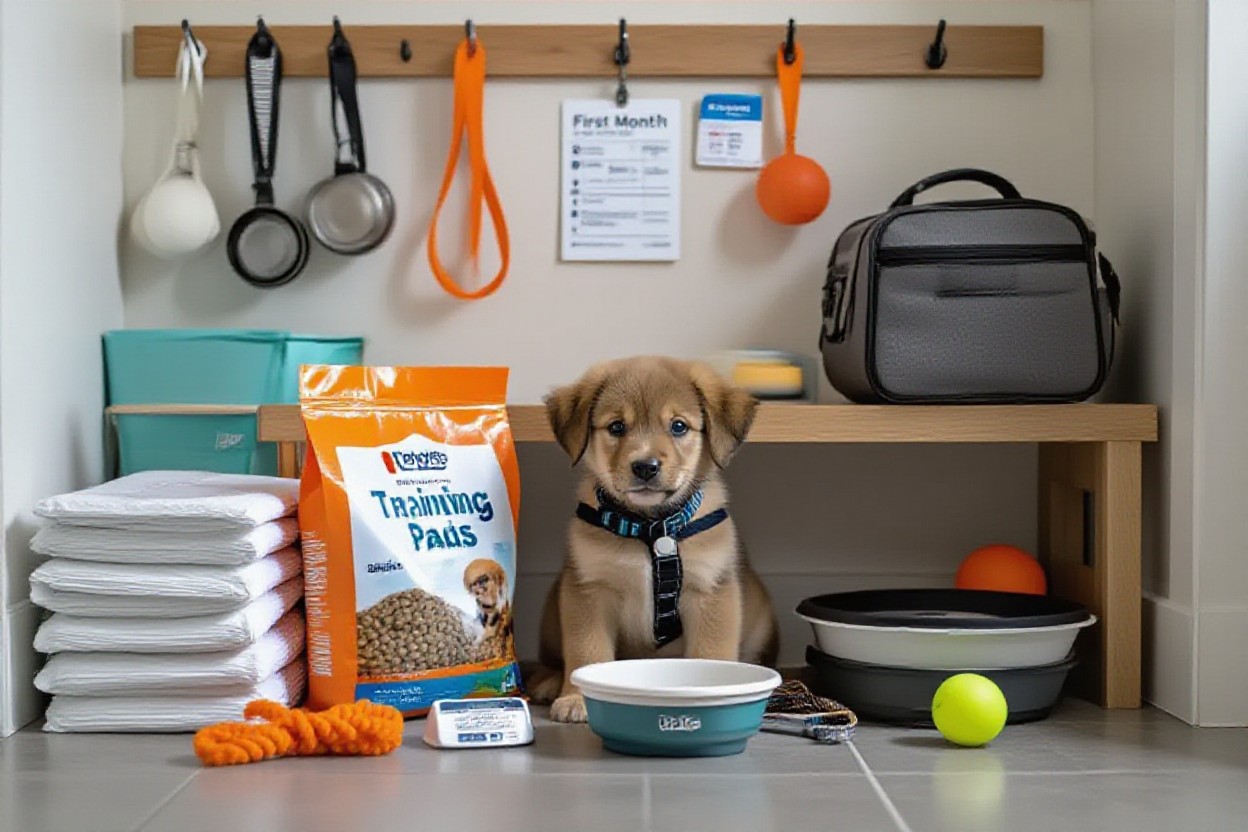
Here’s the Lowdown on Must-Have Items for Your New Pup
Ever notice how those first 30 days feel like a blur of excitement, chaos, and Amazon boxes? You’re not just buying stuff, you’re building a starter kit that keeps your pup safe, fed, entertained, and actually sleeping at night. So instead of guessing, you’ll tick through a simple checklist that covers daily care, training, health, and comfort – all the things you’ll touch 10 times a day without even thinking. This tight little setup keeps you from late-night “what do I need” panics.
What Makes the Cut: Types of Items You Need
What really earns a spot on your first-month checklist when you’ve got limited budget and zero patience for junk that breaks? You focus on categories that actually impact your pup’s safety, behavior, and routine – not just what looks cute in a haul video. So the gear that makes the cut is stuff you’ll use multiple times a day, that supports training from day one, and that saves you from preventable vet visits or chewed furniture. This is how you build a smart kit, not a cluttered closet.
- Dog crate sized for adult weight, with divider
- Harness and leash set for daily walks and potty trips
- Slow feeder bowl for fast eaters and digestion
- Training treats and clicker for daily sessions
- Chew toys and puzzle feeders for mental exercise
| Safe sleep & confinement | Crate with secure latch and washable pad for naps, nights, and travel |
| Feeding setup | Sturdy stainless bowls, airtight food bin, and a measured scoop |
| Walks & potty breaks | Well-fitted harness, 4-6 ft leash, and plenty of poop bags |
| Training gear | High-value treats, treat pouch, and a simple clicker |
| Health & cleanup | Enzymatic stain remover, brush, nail file, and basic first-aid items |
A Sneak Peek at What’s Coming Up
So what does this checklist actually walk you through over the next 30 days? You’re about to see exactly which items to buy in week 1, which can wait till week 3, and how to use each one in real life – like how a single $15 baby gate can save you hours of supervision. Expect plug-and-play routines for feeding, crate training, and potty success, plus example shopping lists broken down by budget. This next part turns a vague “what do I need?” into a clear, printable action plan you can literally stick on your fridge.
You’ll also get quick mini-guides for each category so you’re not just told what to buy, you see how it fits into your daily rhythm. For example, you’ll learn how to rotate 3-4 toys to cut boredom, how many poop bags you’ll likely burn through in a month, and what size crate actually works for a growing pup. You’ll even see sample schedules that tie all these must-have items together, so your new gear isn’t just sitting pretty in a corner – it’s doing real work for you and your dog.
Before the Furball Arrives: What You Gotta Do
You’ll be shocked how much smoother those first 48 hours feel when you’ve prepped like a bit of a maniac ahead of time. Map out your pup’s potty area, decide the no-go zones, and set up a safe sleeping spot before the leash ever clicks on. Add your vet’s number and a 24/7 emergency clinic to your phone, plus a local poison hotline. Prepping your home now means fewer panicked Google searches at 2 a.m.
Seriously, Don’t Skip This Pre-Arrival Checklist
Start with safety: plug outlets, tuck away cables, and stow cleaning products behind doors your pup can’t nudge open. Then, pick a feeding station and set bowls down where spills won’t wreck your floors. Prep a small “landing zone” with crate, bed, toys, and potty supplies all in one spot so you’re not hunting for stuff mid-accident. The more you stage now, the calmer your dog’s first night will be.
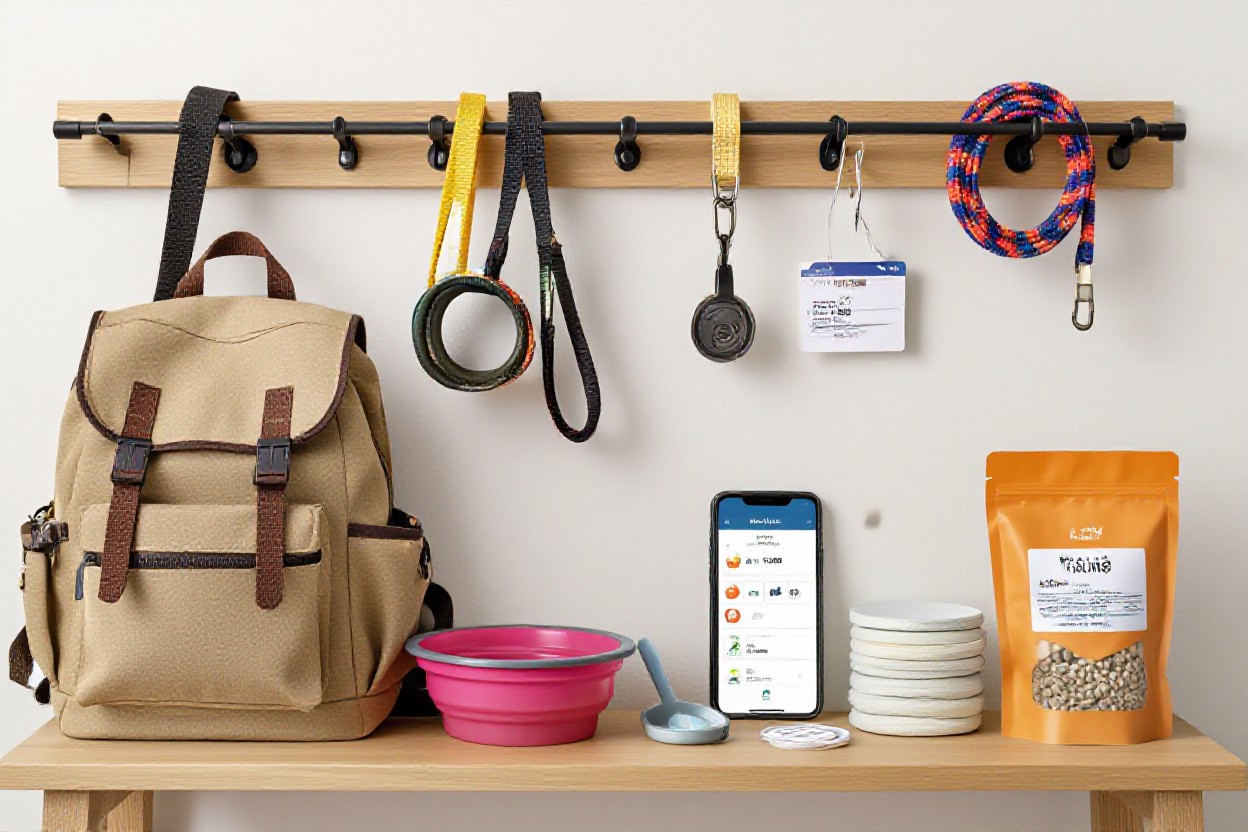
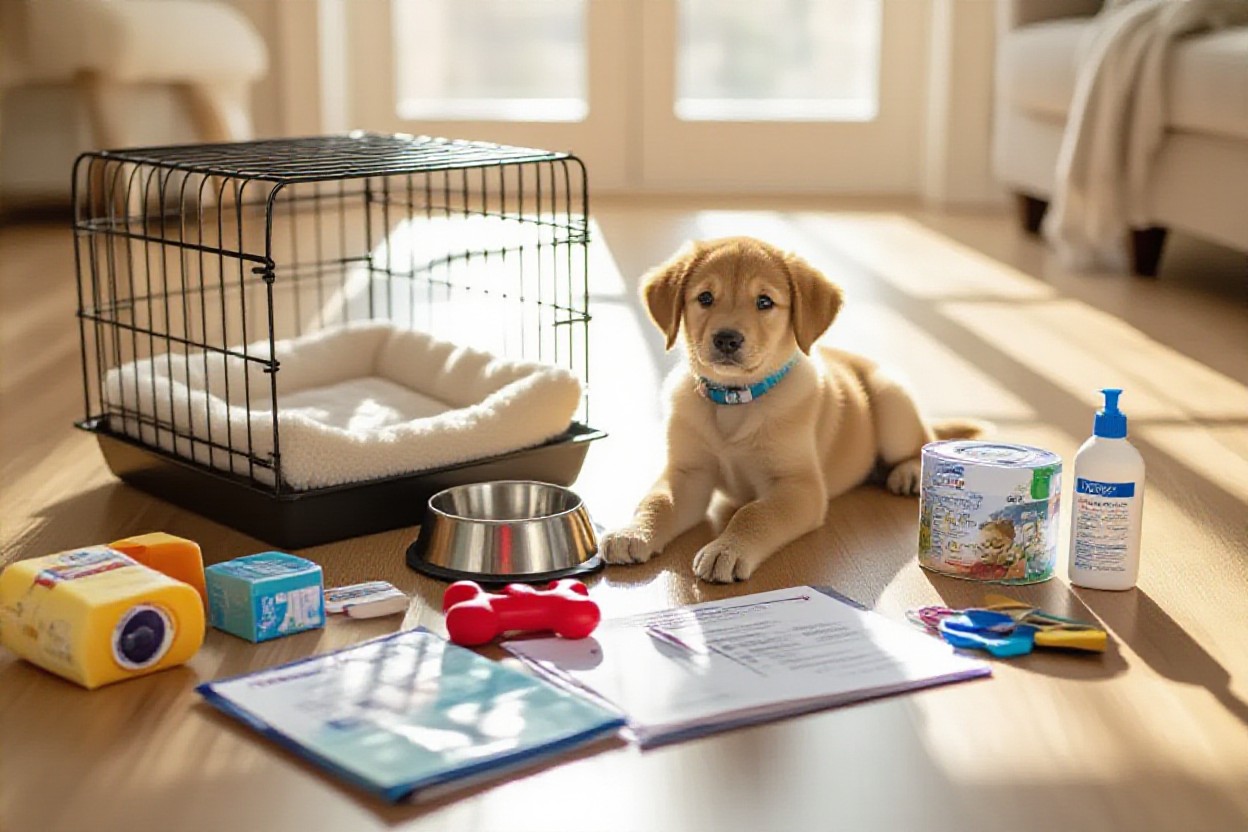
Shopping Smarter: Gear That Should Be On Your Radar
Instead of impulse-buying half of Petco, you want a lean, hard-working starter kit: 2 collars (in case one breaks), a flat leash, ID tags, and a crate sized so your pup can stand and turn but not use one corner as a toilet. Grab 2 food bowls, 1 water bowl, and at least 3 types of chew toys to see what your dog actually likes. Stick to necessarys for the first 30 days, then upgrade based on real life, not TikTok.
What most new owners don’t realize is that buying less but better gear saves you money and drama in the first month. Prioritize a sturdy 4-6 ft leash over a retractable one (vets and trainers see a ton of injuries from those), get a basic nylon collar plus a backup, and choose a crate with a divider so it can grow with your pup instead of replacing it in 3 months. For comfort, start with one washable bed and 2 blankets rather than five fluffy things that can’t survive the washing machine. And toss in a handful of cheap, squeaky toys along with 1-2 high quality chews like bully sticks or a rubber food puzzle – you’re testing what actually keeps your dog busy before you blow your budget.
Week 1: Getting a Grip on Settling In
Think of week 1 like moving a toddler into a new apartment – you’re setting up safe, predictable routines so your dog can exhale a bit. You’ll lean heavily on your crate or pen, safe sleep spots, feeding schedule, and toilet routine to cut chaos. Aim for simple patterns: same feeding times, same potty area, same sleep setup. It feels repetitive, but that boring consistency is exactly what helps your pup relax and start trusting that you’ve got things under control.
Reliable Sleep Spots: Where Should Your Pup Snooze?
Instead of letting your pup pass out wherever they crash, you’re better off choosing 1-2 dedicated sleep zones from day one. A crate beside your bed at night plus a comfy bed or mat in the living area covers most homes. Add a firm, washable bed, a light blanket, and one safe chew for wind-down time. Use the same spot for naps and bedtime so your dog starts to associate that area with calm, quiet, off-duty vibes, not playtime.
Feeding Time! What You’ll Need to Make Mealtime Smooth
Rather than winging it, set up a simple feeding station with two stainless steel bowls, a non-slip mat, a scoop, and a sealed food container. Feed in the same spot, at the same 2-3 times each day, so your dog knows when the goods are coming. Keep fresh water topped up, wipe bowls daily, and log portions in your first-month checklist. That tiny bit of structure now saves you from guesswork, begging, and upset tummies later.
What really helps in week 1 is treating meals like a mini training session, not just “dump kibble and walk away”. Measure portions with a dedicated scoop, split daily food into 2-3 meals, and use 10-20 pieces from each meal as rewards for sits, name recognition, and coming when called. If you’re switching foods, do a slow transition over 7 days (75/25, then 50/50, then 25/75) to avoid explosive poop and late-night yard trips. And keep a simple note in your checklist: what they ate, when, and how their poop looked – that one line can help your vet pinpoint issues in minutes.
Toilet Training Basics: Really, Let’s Talk About This
Instead of hoping your pup “figures it out”, you’ll want a toilet plan from day 1: a designated potty area, enzyme cleaner, plenty of paper towels, and a simple log. Head out every 2-3 hours, plus right after sleep, play, and meals. Use the same cue word, same spot, same praise. Indoors, supervise like a hawk or use a crate/pen so accidents are fewer, smaller, and easier to clean without turning your rug into the bathroom forever.
What speeds toilet training up massively is treating it like a science experiment, not a guessing game. Take your pup to the same outdoor patch every single time, stand mostly still, give a quiet “go potty” cue, then calmly praise and pay them with 2-3 tiny treats the second they finish. If nothing happens in 5 minutes, head back in, use the crate or leash for 15-20 minutes, then try again. Accidents indoors get zero drama – just blot, use an enzyme cleaner, and move on. Track times in your first-month checklist for 3-5 days and you’ll usually spot a pattern, which lets you pre-empt accidents instead of reacting to them.
Week 2: Routines, Boundaries, and a Little Fun
Your second week usually feels like that moment where you realize, “oh, this isn’t a vacation, this is my life now” – in a good way. You start tightening up feeding times, potty breaks, and short training sessions so your dog stops guessing and starts predicting. That predictability is what kills most problem behavior before it ever starts. This is the week you set boundaries about where your dog can go, when play stops, and how walks actually work, so the rest of your month is a whole lot less chaotic.
Leash Walking Tools: What Actually Works?
You know that cartoon of a human being dragged down the street by a dog? That’s week 2 without the right gear. At minimum you want a 4-6 foot leash, a flat collar with ID, and ideally a well-fitted front-clip harness to cut pulling by 30-50% for most dogs. Skip retractable leashes right now – they teach your dog that pulling pays. Keep a pouch of pea-sized treats and reward at your side like a metronome every 3-4 steps.
Crate Training: Why You Should Consider It
You know that 10-second window when you leave the room and your dog finds the couch, the shoes, and the trash? That’s where a crate quietly saves your sanity. A properly sized crate (your dog can stand, turn, lie down, but not pace) becomes a safe little bedroom, not a jail cell. In week 2, you use it for short daytime naps, feeding, and calm downtime so your dog learns to switch off, instead of shadowing you 24/7.
Start super small: 3-5 minute hangs in the crate with a stuffed Kong, door open, then closed, then open again – all very boring, very predictable. Feed at least one full meal per day in there so your dog goes, “oh, this is the snack room”. If your dog is howling, you moved too fast, so dial back to one step they actually handle well. Nighttime? Try the crate beside your bed for the first week or two so you can catch early potty cues and your pup doesn’t panic in a silent hallway. Over a month, that crate becomes your go-to backup plan when kids visit, the plumber comes, or you just need 20 minutes of peace without worrying about chewable cables.
Seriously, Enrichment Toys Are a Game Changer!
One of my clients tracked it: 15 minutes of sniffing and puzzle play bought them a 2-hour nap from their hyper 5-month-old. That’s the math you want in week 2. Start with simple lick mats, snuffle mats, and beginner puzzle toys you can stuff with part of your dog’s daily kibble plus a smear of wet food or yogurt. Rotate 3-4 toys instead of dumping a toy mountain, so each one stays exciting and your dog works their brain, not just their teeth.
Think of enrichment toys as your “I need to answer emails” button. Load a Kong with frozen kibble and broth, or scatter 1/4 cup of food into a snuffle mat, then let your dog hunt instead of pacing, whining, or chewing furniture. Because sniffing and licking lower heart rate, these toys can actually help with mild anxiety, especially during short absences or crate time. Use their daily food allowance, not endless extras, so you’re not overfeeding while you’re keeping them busy. Mix it up: one day a cardboard box with scrunched-up paper and treats, another day a slow feeder bowl. Variety keeps your dog engaged and makes your daily checklist feel way more manageable.
Week 3: The Nitty-Gritty of Health and Grooming
By week 3, you’re not just keeping your dog alive, you’re actually shaping how healthy and comfortable they’ll be for years, so this is when grooming, parasite control, and routine vet care move from “nice to have” to non-negotiable parts of your checklist.
Brushes, Shampoos, and Nail Clippers – Oh My!
Grooming gear suddenly matters a lot, because the right brush and shampoo can cut shedding, itching, and stink by half. Grab a brush that matches your dog’s coat type, a puppy-safe, pH-balanced shampoo, and nail clippers or a grinder. Aim for quick brush sessions 3 times a week, baths every 3 to 4 weeks, and tiny nail trims every 7 to 10 days so you never hit the quick.
Let’s Chat Fleas and Ticks: What You Should Know
Parasite prevention jumps up the list in week 3, especially if your pup goes on grass, trails, or lives with other pets, because a single untreated flea can lay up to 50 eggs a day in your home. Talk to your vet about an age-appropriate flea and tick product, then actually put the refill dates in your calendar so you don’t miss a dose and end up dealing with bites, tapeworms, or tick-borne diseases like Lyme.
What most new owners don’t realize is that you almost always spot the problem too late – by the time you see adult fleas, there’s usually a whole life cycle partying in your carpet, bedding, and under your baseboards. So you want a product that kills adults but also interrupts eggs and larvae, and you want it applied on time, every time. If you live in a high-risk area, your vet may even suggest year-round protection plus a quick tick check after every hike, paying extra attention to ears, between toes, and under the collar where ticks love to hide. One skipped month can undo months of protection, so build it into your first-month checklist just like feeding and walks.
Basic Vet Checkups: Why They’re a Big Deal
Routine vet visits might feel overkill when your dog “looks fine”, but that 20-minute exam is where your vet catches subtle issues long before they blow up. In this first month, you’re usually lining up vaccines, a stool test for worms, a heartworm plan, and a baseline weight so you know what “healthy” looks like for your dog.
During a basic checkup, your vet listens to the heart and lungs, checks teeth, ears, skin, joints, and even your dog’s body condition score, which is basically a 1-9 scale of too skinny to too chunky. That quick once-over can flag things like early ear infections, heart murmurs, or dental problems that you’d probably miss at home. You also get a chance to ask about food amounts, safe chew toys, and behavior red flags, which saves you a ton of guessing. So when you map out your first 30-day checklist, locking in that first full vet visit is one of the highest-value boxes you can tick.
Week 4: Figuring Out What’s Working (And What’s Not)
With all the viral “aesthetic dog setups” floating around TikTok right now, week 4 is when you figure out what actually works in real life at 6 a.m. in your kitchen. You’re not guessing anymore – you’ve got 3 weeks of data. Now you tweak your setup, gear, and routine so they work for your real dog, not the imaginary one you planned for. Anything that’s annoying you daily goes on the upgrade-or-replace list.
Time to Assess: Are You Missing Anything?
By this point you can pretty much walk through your day and spot gaps: no mat by the door for muddy paws, not enough poop bags so you keep running out at 10 p.m., only one leash that’s always misplaced. Check your first-month checklist again and highlight every item you’ve used daily, weekly, or not at all, then add backup basics like a second food bowl, extra ID tag, and a spare collar for emergencies.
Upgrade Alerts: When It’s Time for Better Gear
Right now a lot of trainers on Instagram are talking about “frustration triggers”, and your gear is often one of them. If your flat collar slides off, or your leash burns your hands on every squirrel lunge, it’s upgrade time. Swap flimsy stuff for sturdier, well-fitted gear that makes walks calmer and safer. Prioritize a secure harness, a 4-6 ft leash, and a comfy bed that actually fits your dog’s size and sleep style.
When you’re deciding what to upgrade, start with anything that makes you mutter under your breath at least twice a day. That cheap retractable leash that tangles around every lamp post? Replace it with a solid 6 ft nylon or biothane leash so you’ve got predictable control. A harness that rubs behind the elbows needs a better-fitting Y-front or step-in style, ideally with at least two points of adjustment. If your dog Houdini-slips out of collars or harnesses even once, treat that as a non-negotiable safety upgrade. And for indoor gear, trade thin, noisy metal bowls for a heavy ceramic or stainless set with a non-slip mat if your dog skids them all over the floor – small upgrades like that quietly fix daily annoyances.
Sharing My Experience: Lessons Learned
From working with dozens of new dog owners, I’ve seen the same pattern: the first shopping haul looks great on paper, then week 4 exposes what you actually use. Most people end up with 20% of items doing 80% of the work, so don’t feel bad if half your “must-haves” are now collecting dust. Treat it like a test run and refine your list for the long haul.
When I mapped this out with a client last year, she realized she never touched the fancy puzzle feeder she bought, but used her $10 treat pouch on every single potty break and training session. That insight changed her buying habits overnight. She canceled a big toy haul and instead invested in a better harness, a second crate for the bedroom, and higher-value training treats that actually held her pup’s focus around other dogs. Your own “lessons learned” list should guide what you buy next month – not the ads, not the aesthetic, just what’s making life easier or harder in your actual home.
The Essential Printable Checklist
Ever wish you could just print a list, slap it on the fridge, and know you’ve got your first 30 days covered? This is that list. Your printable dog checklist keeps feeding gear, bedding, health items, and training tools in one place so you’re not scrambling at 9 p.m. for nail clippers or poop bags. Use it as a simple tick-box system: daily, weekly, and one-time buys, all laid out so you can track what’s prepped and what still needs a quick Amazon run.
Home Must-Haves: Don’t Forget These Items
Ever walked through your house and thought, “What could my pup get into in 5 seconds flat?” This part of the checklist covers baby gates, non-slip rugs, a crate, and at least 2 washable beds, plus food and water bowls that are the right size and height. Add extra phone chargers to your list too, because chewed cables happen. Toss in a pet-safe cleaner, enzyme spray, and a stash of poop bags so your home doesn’t slowly turn into a landmine zone.
Health and Grooming Gear: Keep Your Pup Fresh
What belongs in your pup’s version of a bathroom cabinet? On your checklist, you’ll see dog-safe shampoo, a slicker brush, nail clippers or a grinder, ear cleaner, a toothbrush, and canine toothpaste, plus a basic first-aid kit with vet-approved items. Include flea and tick prevention for your region, a digital thermometer, and your vet’s emergency number printed right on the sheet so you’re not scrolling frantically when something feels off.
When you’re filling out this grooming and health section, think in terms of weekly habits, not just stuff. You’ll likely brush a long-haired dog 3-4 times a week, while short-haired breeds might only need 1-2 light sessions, so jot notes beside each tool on how often you’ll use it. Add checkboxes for ear checks, paw inspections, and teeth brushing, because problems like ear infections or cracked nails often start tiny and are easy to miss. And if your pup hates baths, you might list waterless shampoo or grooming wipes as backup options so you’ve got a plan B that doesn’t end with you drenched and your dog zooming around the house.
Training Tools You Can’t Ignore
What’s actually worth buying for training and what’s just Instagram fluff? Your list should highlight a flat buckle collar, well-fitted harness, 4-6 foot leash, long line, treat pouch, and pea-sized high-value treats, plus 1-2 clickers if you’re using marker training. Add sticky notes or a small whiteboard to track cues like “sit,” “stay,” and “come,” because consistency across your household will shape your dog’s behavior more than any fancy gadget.
When you’re mapping out this training section, think in very real-life terms: you’ll probably use 20-40 tiny treats in a single 5-minute session, so your checklist should include bulk treats and even a “reorder by” date so you don’t run out mid-week. Write in a few simple goals – like 3 recall sessions per day, 5 minutes of leash practice, and 1 short crate training session – right next to the tools you’ll use. That way, your leash, harness, and long line aren’t just clutter in a basket, they’re tied directly to habits you and your dog are actually building, day after day.
FAQ: Your Burning Questions Answered
At some point you stare at your cart, your bank account, and your new dog and think… what actually matters right now? This is where you sift the nice-to-haves from the non-negotiables, so you don’t blow your budget in week 1 and still keep your pup safe, healthy, and actually happy in real life, not just in cute Instagram posts.
Do I Really Need Everything on Day One?
You really only need a safe place to sleep, proper food, 1-2 sturdy bowls, a flat collar with ID tag, a basic leash, poop bags, and a vet appointment on the books. Stuff like fancy toys, outfits, or matching storage bins can wait. If an item directly protects your dog’s health or safety in the first 48 hours, it belongs in your cart now, everything else is just bonus.
What Can Wait? Building My Budget Over Time
Plenty of things can sit on a 30-day wishlist so your wallet can breathe. Extra harnesses, puzzle toys, grooming tools beyond a basic brush, backup beds, slow-feeder bowls, and bulk training treats can roll in later. Aim to upgrade in layers: first safety, then comfort, then enrichment. That way you’re not dropping $400 in one night just because a TikTok haul said you should.
One smart move is to make a “Month 1 upgrade list” and group items by week: harness and long line in week 2, nail clippers and shampoo in week 3, puzzle toys and a second bed in week 4. You might also find your dog hates the $40 toy style you were about to stockpile, so testing 1 at a time actually saves cash. Track what you really use daily for 7 days – bowls, crate, 1-2 toys, training treats – and let that usage drive your spending instead of impulse buys.
How Do I Know If My Pup’s Happy?
You’ll see it in their body language long before you see it in perfect obedience. A relaxed, softly-wiggly body, loose tail swishes, eager interest in you, eating well, and being able to settle for at least 30-60 minutes a few times a day are all green flags. If your dog can nap after play, take treats, and bounce back quickly from small frustrations, you’re on the right track.
Pay attention to the small stuff: does your dog choose to hang out near you even when nothing fun is happening, or do they constantly pace, pant, or whine? Happy pups usually have soft eyes, normal breathing, and a goofy “play face” when they bow or invite you to tug. Track patterns for a week – energy spikes, sleep, appetite, interest in training – because consistent curiosity plus good rest is a better happiness metric than any one super-excited zoomie session.
Making the Most of Training Time
Short, focused training sessions will do more for your new dog in 30 days than marathon drills that leave you both fried. Aim for 5-10 minute bursts, 3-5 times a day, pairing high-value treats with clear, simple cues. You’re basically building a tiny daily habit stack: potty break, quick training, calm praise, repeat. Within a few weeks, your pup will start offering sits and eye contact on their own because that’s what has paid off the most.
Step-by-Step: Basic Commands Your Pup Should Learn
| Checklist Item | What You Actually Do |
|---|---|
| Sit |
Hold a treat to your pup’s nose, then move it up so their butt naturally hits the floor, say “sit” once, then reward fast. Do 5-10 reps, 1-2 times a day, and you’ll usually see a reliable sit in under a week. |
| Stay |
Ask for sit, show your hand like a stop sign, say “stay,” then take just one step back. If your dog holds position for 1-2 seconds, mark and reward. Slowly add distance and time – tiny increases, lots of success. |
| Come |
Start indoors on a short leash, say your dog’s name, then “come” in a happy voice as you step backward. When they move toward you, pay with top-tier treats or a toy. Make this cue a jackpot every time, no matter what. |
| Leave it |
Place a treat in your closed fist, let your dog sniff and paw, then wait. The moment they back off or look away, mark and give a different treat from the other hand. You’re teaching that ignoring temptation gets the reward. |
The Pros & Cons of Training Tools
Training tools can make things smoother, but they’re not magic wands. A flat collar and well-fitted harness with a 6-foot leash will cover 90% of what you need in month one. Clickers, treat pouches, and long lines can speed up results if you use them correctly, while harsh tools like prong or shock collars can spike fear and confusion. Your goal is simple: gear that helps your dog understand you faster, not gear that scares them into listening.
When you actually compare tools side by side, you start seeing why trainers harp on “least intrusive, minimally aversive” methods. A front-clip harness, for example, often cuts pulling by 30-50% overnight because it changes the leverage, not because it hurts. A clicker gives you laser-accurate timing at about 60 clicks a minute if you wanted, but if that feels fiddly, your voice marker (“yes!”) works too. What you really want to avoid in this first month is anything that relies on pain or startle – those might stop a behavior fast, but they also chip away at trust, and rebuilding that can take months.
My Take on Training Classes vs. Home Training
Group classes give you built-in structure and real-world distractions, while home training fits better into your actual messy schedule. In a 4-6 week puppy class, you get pro eyes on your handling, plus safe socialization with other dogs and humans. At home, you can run five 5-minute sessions a day without commuting, focusing on your specific issues like barking at the window or rough play. For most new owners, the sweet spot is a mix: one good class, then daily short, fun practice in your living room.
When you look at outcomes, that combo approach wins most of the time. Owners who only rely on class often see their dog behave like an angel in the training hall… then fall apart in the kitchen, because they never practiced there. On the flip side, people who only train at home sometimes hit a wall with distractions – your dog nails “sit” in the quiet hallway but blanks at the park. So use class for coaching, questions, and controlled chaos, then treat home sessions like your lab where you tweak, test, and repeat until your pup can actually use those skills in daily life.
Bonding with Your New Best Friend
Bonding is what turns all those first-month checklist items into an actual relationship, not just a shopping trip. You build trust in tiny moments – quiet couch time, silly play in the yard, calm praise when your dog checks in with you. Every treat, every walk, every cuddle is teaching your dog that you are their safe place, which is the real goal behind all the gear you bought.
Fun Ways to Connect: It Doesn’t Have to Be Hard
Simple stuff works best: 5-minute training bursts with your new treats, gentle tug with that sturdy toy you picked, or a sniffari walk using your fitted harness. You can even hand-feed part of their kibble so they link you with good things. The key is short, light, and consistent so your dog thinks, “hanging out with you is the best part of the day”.
Activities That Bring You Closer
Daily routines from your checklist double as bonding time if you do them with intention. Use grooming tools for quick massage sessions, pair mealtimes with calm eye contact, and turn potty breaks into mini training games with those high-value treats. Every shared activity tells your dog they’re part of your team, not just a guest in your house.
For example, while you use that new brush, talk softly, go slow around sensitive spots, and reward every bit of relaxed body language. During walks, let your dog sniff for 10-15 seconds at interesting spots before gently moving on, using your chosen cue so they learn to follow your lead. Even basic crate time can build connection if you toss in a stuffed Kong, sit nearby for a few minutes, and keep your voice calm. Over the first 30 days, these tiny habits stack up into real, rock-solid trust.
Why Patience Is Key in This Process
New dogs typically take around 3 days to decompress, 3 weeks to settle into a routine, and up to 3 months to fully relax, so patience isn’t optional. You might see accidents, barking, or clinginess at first, but slow responses, gentle corrections, and predictable schedules help your dog feel safe. That steady, calm approach is what turns early stress into long-term security.
When your dog ignores a cue or chews the wrong thing, use it as data, not a disaster: adjust the environment, manage with baby gates, or shorten training sessions to 2-3 minutes. Give them extra time to process new sounds, visitors, and walks in busy areas, and always pair scary stuff with treats or distance. Because you’re playing the long game here, you focus less on “perfect” behavior in week one and more on creating a pattern where your dog learns that nothing bad happens when they’re with you, even if they mess up.
Traveling with Your New Companion
Road trips with your dog feel way more fun than hauling groceries home, but they do need a bit of planning from day one. You’ll want travel gear dialed in before that first vet visit across town or weekend getaway, so you’re not scrambling for a leash or poop bags at a gas station. A few smart upgrades now keep your backseat cleaner, your pup safer, and your stress level way lower.
Must-Have Items for Travel: What You’ll Need
Short drives to the vet or long hauls to visit family all start with the same basic kit: a secure harness, a travel-safe leash, and a crash-tested crate or seat belt. Toss in a non-spill water bowl, a small container of your dog’s regular food, and a couple of chew-safe toys so your pup has something familiar. This way you’re covered for delays, traffic, and surprise messes without digging through your entire trunk.
Car Safety Tips: Keeping Your Pup Secure
Even a 10 minute drive can turn sketchy fast if your dog is loose in the car, and at 30 mph an unrestrained 20 pound dog hits with the force of a 600 pound object in a sudden stop. You’ll want a crash-tested harness or secured crate, locked into the back seat, plus window management so there’s airflow but no leaning halfway out. This setup keeps your dog off your lap, away from airbags, and a lot safer if traffic goes sideways.
- Crash-tested harness that clips to a seat belt, fitted snugly but not restrictive
- Sturdy, ventilated crate sized so your dog can stand, turn, and lie down comfortably
- Rear-seat barrier or hammock to block access to the front and protect upholstery
- Partial window opening or locked climate control to prevent escape or debris injuries
- Visible ID tag and microchip so a loose dog in an accident can be identified quickly
Think of car safety like a child car seat situation, not a “they’ll just curl up on the floor” hope-and-pray plan, because in real crashes unrestrained dogs get launched into windows, dashboards, even other passengers. You’re aiming for one secure zone in the back seat or cargo area where your dog can’t become a projectile, can’t climb into your lap, and can’t bolt when a door opens. Test the setup on 5-10 minute drives at first, watch how your dog handles corners and braking, and adjust straps until there’s zero slack. This small upfront hassle gives you a predictable routine every time you get in the car, and your dog learns that buckling in is simply part of going anywhere fun.
How to Prepare for a Road Trip Together
Longer trips with a new dog are basically regular drives with more pit stops, so you’ll want a plan before you hit the highway. Pack a small travel bag with food, meds, vet records, and a roll of poop bags, then map rest breaks every 2-3 hours for quick walks. This rhythm keeps your dog’s bladder, energy, and anxiety in check while you stack up the miles.
Planning a road trip with your dog starts a few days before you ever touch the ignition key, not that morning when you’re already loading the car. You’ll want to pre-portion meals into containers, freeze a couple of lick mats or Kongs, and screenshot vet records in case a clinic needs proof of vaccines on the fly. Because new dogs can get car-sick or stressed, schedule a 20-30 minute practice drive first with the full setup, watch for drooling, whining, or pacing, and talk to your vet about motion sickness meds if needed. This extra bit of prep means when you finally roll onto the highway, both you and your dog know the routine, and the trip feels like an adventure instead of a four hour science experiment.
Socialization: The Real Deal About Making Friends
Scroll through TikTok for 5 minutes and you’ll see puppies at breweries, farmers markets, even Target parking lots, so it’s easy to think more is always better. In reality, you want controlled, positive experiences, not chaos. Focus on short sessions, 5-15 minutes tops, where your dog can observe, sniff, retreat if needed, then try again. That slow, steady exposure in the first 30 days is what builds confident, stable behavior for the long haul.
Why Socializing Is a Big Deal
Instead of picturing “puppy party,” think “life-skills class” for your dog. Good socialization between 8-16 weeks can cut behavior problems by up to 70% according to several vet behavior studies. You’re not just teaching your pup to like other dogs – you’re teaching them that wheelchairs, kids on scooters, delivery drivers, and vet clinics are all safe. That payoff shows up later when your dog recovers quickly from new or scary stuff.
Pros and Cons of Puppy Playdates
Those Instagram-perfect puppy piles can be awesome, but only if you treat playdates like a training tool, not free-for-all chaos. You want size-matched, vaccine-safe dogs, 10-20 minute meetups, and at least one human who can calmly step in if things get too wild. Used this way, playdates become social practice plus impulse-control training, not just zoomie time.
Pros and Cons of Puppy Playdates
| Pros | Cons |
|---|---|
| Builds dog-dog communication skills that you can’t teach alone. | Risk of rough play or bullying if dogs aren’t well matched. |
| Great outlet for energy, so your puppy is calmer for training later. | Can accidentally reward pushy or rude behavior if no one intervenes. |
| Helps prevent fear and reactivity toward other dogs later. | Possible exposure to illness if vaccines or health status are unknown. |
| Teaches bite inhibition during play, which is huge in the first month. | Over-arousal can lead to nipping, humping, or bad habits sticking. |
| Gives you real-time chances to practice recall and name response. | Busy, uncontrolled groups make it hard for your dog to focus on you. |
| Builds your confidence reading dog body language and stress signals. | Other owners may not step in, leaving you to manage every situation. |
| Short, planned playdates can fit easily into a 30-day checklist. | Scheduling with compatible dogs takes extra time and coordination. |
When you treat playdates like mini training sessions, everything changes. You set a time limit, keep leashes handy for breaks, and watch for loose, bouncy bodies vs stiff, hard stares. Any time your pup looks overwhelmed, you give them a quick “sniff break” or scatter a few treats on the ground so they reset. That balance between fun and structure is what keeps playdates safe, confidence-building, and actually useful.
Breaking Down Dog Parks: Are They Worth It?
Dog parks look amazing on Reels, but if you talk to most trainers, you’ll hear a cautious “it depends” pretty fast. For a brand-new dog in their first month, a crowded off-leash park is often too intense, too fast. You’re better off treating dog parks like a future option, not a day-one imperative, and focusing now on quiet observation from outside the fence instead.
For the first 30 days, think of dog parks as a classroom you watch from the hallway, not a place you walk straight into. Park in the lot, sit with your dog, and just let them watch for 5-10 minutes while you feed tiny treats for calm behavior. You’ll quickly spot red flags: dogs body-slamming nervous pups, owners scrolling on their phones, no one calling their dog out of trouble. When you eventually go in months from now, that early observation helps you decide which parks, which times, and whether it’s even worth it for your particular dog.
Keeping Your Home Safe
Most accidents with new dogs happen in the first 30 days, not outside, but inside your own house. So you treat your place like a curious toddler is moving in, except this one has sharper teeth and zero impulse control. You check cords, plants, trash, tiny choking hazards and anything your pup could pull, chew, or swallow in 5 seconds flat. Your goal is simple: nothing dangerous at nose level, and nothing that could turn into an emergency vet visit at 2 a.m.
Puppy-Proofing 101: What to Look For
Start by getting down on the floor at puppy-eye level – it sounds silly, but it works every time. You’ll suddenly notice loose cables, fallen pills, dropped food, plastic wrappers, and that one mystery sock under the couch. Block access to trash cans, laundry baskets, and cleaning supplies, and swap toxic plants like lilies for pet-safe options. If it looks chewable, shred-able, or swallowable, assume your pup will try… and move it out of reach.
Safety Gear That’s Actually Necessary
Instead of buying every gadget TikTok throws at you, you focus on a few workhorse safety items that actually keep your dog out of trouble. Think sturdy baby gates, a snug breakaway collar with an ID tag, a secure harness that fits properly, and a basic pet first-aid kit. Add non-slip rugs if you’ve got slick floors and a crate or playpen to give your pup a safe “home base” when you can’t watch them.
What really matters with safety gear is how well it fits into your daily routine, not how fancy it looks on Instagram. A gate that actually latches every single time will save you more stress than some high-tech camera you rarely check. Go for a harness that sits flat on the chest and shoulders so it doesn’t rub or choke when your pup suddenly lunges at a squirrel. And keep a simple first-aid kit stocked with vet-approved antiseptic, gauze, tweezers, and your vet’s emergency number taped inside – that one detail alone can shave minutes off a panic moment.
Common Hazards to Avoid: Seriously, Watch Out!
The sneakiest dangers are usually the everyday things you don’t even think about: xylitol in sugar-free gum, grapes on the counter, meds on the nightstand, or a chicken bone in the trash. Laundry pods, vape juice, and certain crucial oils can all be highly toxic to dogs, even in tiny amounts. Keep toilet lids closed, secure windows and balconies, and tie up blind cords so your pup can’t get tangled. If it could poison, choke, burn, or trap them, it needs a new home.
What throws most new owners off is that it only takes a few seconds for a bored pup to find trouble you didn’t realize existed. A single ibuprofen tablet left on the coffee table, or one broken toy with loose stuffing, can turn into a full-on emergency. So you develop little habits – closing doors, tucking away cables, using covered trash cans in the kitchen and bathroom. Any time you bring something new into the house, from houseplants to snacks, you quickly check if it’s dog safe, because prevention is way cheaper than that surprise $800 vet bill.
How to Handle Common Challenges
Some of the hardest first-month moments are actually tiny problems that repeat 20 times a day until you’re ready to scream, so you tackle them with simple systems, not sheer willpower. You lean on consistent routines, clear house rules, and a few backup tools like puzzle toys and baby gates to keep your sanity intact. And when you track progress over 7, 14, 30 days, you’ll see that what felt like chaos at first is actually your dog learning how to live in your world.
What to Do When Your Pup Won’t Stop Barking
Nonstop barking usually means your dog is bored, scared, or has learned that noise gets your attention, so you respond with structure, not yelling. You start by meeting their exercise needs, then teach a reliable “quiet” cue with treats the second they pause. Because even 3-second silences add up, you reward those heavily, manage triggers with curtains or white noise, and avoid accidentally reinforcing barking by talking back to it.
Tackling Chewing: Tips to Save Your Shoes
Chewing is your dog’s way of surviving teething, stress, and sheer boredom, so you don’t stop it, you redirect it. You puppy-proof like a parent of a crawling toddler and stack the deck with chew toys that feel better than your sneakers. Then you rotate 3 to 5 options, swap in frozen Kongs for tough days, and quietly remove anything off-limits instead of turning it into a chase game.
- Chew toys that match your dog’s size and bite strength (nylon, rubber, or rope)
- Frozen Kongs stuffed with wet food or peanut butter to soothe teething gums
- Puppy gates or pens to block off closets, shoe racks, kids’ stuffed animals
- Bitter spray on furniture legs and baseboards as a backup deterrent
- After a week of consistent redirection, most puppies start choosing approved items on their own, which makes your whole house feel a lot less like a chew toy graveyard.
Chewing problems calm down fastest when you think like a detective, not a drill sergeant, and figure out why your dog is targeting specific things. You might notice they go for leather shoes right before bedtime or attack chair legs after long crate time, which tells you they need more mental work or a calmer wind-down. So you build a mini routine: quick potty break, 10 minutes of training, then a high-value chew in a quiet spot. After a couple of weeks of that pattern, most owners report fewer destroyed items and a dog that actually seeks out their “legal” chews first.
Dealing with Accidents Like a Pro
House accidents aren’t a sign your dog is stubborn, they’re a sign the schedule or supervision has holes, so you tighten the system. You track potty breaks on your phone, take puppies out every 1 to 2 hours, and reward outdoor pees with tiny, high-value treats within 2 seconds. And inside, you clean messes with enzymatic cleaner only, quietly interrupt mid-pee if you catch it, then calmly hustle them outside to finish.
Cleaning technique matters way more than most people think, because if your dog can still smell urine, that spot becomes their unofficial bathroom. You hit accidents with an enzymatic cleaner that breaks down odor at a chemical level, then air dry instead of scrubbing like mad. Because pairing that with a boring, 10-second potty trip and a jackpot treat for outdoor success rewires their brain pretty fast. After a consistent 10 to 14 days of this, many families go from three accidents a day to one or none, which is a massive win in month one.
Final Words
Taking this into account, you now have a solid first-month game plan that keeps your new pup safe, comfy, and totally set up for everyday life. You’ve got your supplies, your routines, and your training basics all laid out like a proper checklist, so you’re not scrambling last minute or panic-buying random stuff.
Use this list as your go-to reference, tweak it to fit your dog’s personality, and keep it handy. Because when you’ve got the necessarys covered, you’re free to focus on the fun part.