Let’s Dive Into DIY Dog Grooming
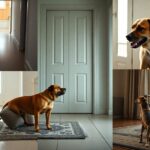
Your first real diy dog grooming at home session might feel a bit like giving a toddler a haircut in a windstorm, but it quickly turns into a routine you and your pup actually enjoy. As you learn to handle clippers, nail trimmers, and brushes, you start spotting subtle changes in skin, coat, and mood that a groomer might miss. That hands-on time is where you really keep your dog well-maintained, comfortable, and genuinely happy.
Why Grooming at Home is a Game Changer
That moment your dog stops shaking at bath time and just leans into you is when you realize how powerful diy dog grooming at home can be. You control the water temp, the pressure, the tools, the whole vibe, so your dog isn’t rushed through a noisy salon. Over a few sessions, you start catching mats early, noticing itchy spots, and tweaking your routine so your pup stays calm, safe, and clean on your terms.
How It Can Save You Serious Bucks
One trip to a pro groomer can run 60 to 120 dollars depending on your dog, and that adds up fast when you go every 4 to 8 weeks. With diy dog grooming at home, you invest once in decent tools and then your monthly cost basically tanks. That means more money for high quality food, better toys, or even a savings buffer for vet care, while your dog still looks fresh, tidy, and well cared for.
Think about a medium sized doodle getting groomed every 6 weeks – you’re easily dropping 700 to 1000 dollars a year on salon visits. With a solid clipper set, slicker brush, nail grinder, and a couple of good shampoos, you might spend 150 to 250 dollars upfront, then just a bit on refills. Over 2 years, that can mean hundreds of dollars saved, all while you refine your skills and customize length, style, and frequency exactly to your dog’s lifestyle, not a groomer’s schedule.
Building a Better Bond with Your Pooch
That first time your dog relaxes while you trim their nails instead of yanking their paw away, you feel the bond shift a little closer. During diy dog grooming at home, you’re touching paws, ears, tail, even those sensitive spots they usually guard. Bit by bit, your dog starts to trust that your hands mean comfort, relief, and routine, so grooming becomes a shared ritual instead of a stressful chore.
Picture this: you grab the brush and instead of hiding, your dog trots over and flops down because grooming time now equals gentle scratches, treats, and calm conversation. Repeating the same simple steps – brush, inspect skin, clean ears, quick nail check – teaches your dog that your handling is predictable and safe. Over time, that trust spills into vet visits, new environments, and daily life, making your diy dog grooming at home sessions a quiet training tool that strengthens your relationship from nose to tail.
What Tools You Gonna Need?
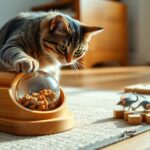
Most people think diy dog grooming at home just means a random brush and some shampoo, but your toolkit matters way more than that. You’ll want a basic setup: at least one good brush for your dog’s coat type, a slicker or comb for tangles, safe nail clippers, styptic powder for accidental nicks, dog-specific shampoo, a non-slip bath mat, and a couple of towels. Add in cotton balls for ears, a gentle ear cleaner, and maybe a grooming table or sturdy mat so your pup isn’t sliding all over the place.
The Right Brushes for Every Coat Type
People often grab any brush off the shelf, then wonder why their diy dog grooming at home turns into a fur disaster. Short-coated dogs usually do best with a rubber curry or grooming glove, while double-coated breeds (think Huskies) really benefit from an undercoat rake. Longer coats need a pin brush or slicker brush to get through those pesky tangles. Aim for brushing at least 2-3 times a week, because regular brushing spreads natural oils and seriously cuts down on shedding all over your couch.
Must-Have Nail Clippers and Combs
Nail care freaks a lot of owners out, but it’s way less scary when you’ve got the right gear in your diy dog grooming at home kit. Guillotine or scissor-style clippers both work, but scissor-style tends to give you more control, especially on thicker nails. Pair that with a metal comb to check for hidden mats behind ears, in the armpits, and under the collar. A simple slicker plus a sturdy comb can handle 90% of everyday maintenance on most dogs.
Because nails grow about 1-2 mm a week on average, you’re usually safe trimming every 3-4 weeks, but super active dogs on concrete may need less. Always keep styptic powder or cornstarch right next to you in case you nick the quick, no dramatic sprinting to the kitchen mid-groom. Clip small slivers at a time, especially on black nails where you can’t see the quick clearly, and watch for a darker dot in the center of the cut surface as your stop sign. With the comb, work in small sections, starting at the ends of the hair then moving toward the skin so you’re not ripping through tangles and freaking your dog out.
Shampoo and Other Bathing Essentials
A lot of owners grab human shampoo and call it a day, but your dog’s skin pH is different and that shortcut can cause itching, flakes, and infections. Go for a dog-specific shampoo, ideally labeled pH-balanced, and pick formulas for sensitive skin, whitening, or deodorizing only if your pup actually needs them. You’ll also want a slip-proof mat, a rinsing cup or handheld sprayer, cotton balls for lightly blocking water from the ears, and 2 towels – one to soak up water, one for a quick rub-down.
So once you’ve picked a shampoo, check the label for dilution ratios because some professional formulas are meant to be mixed 10:1 or even 16:1 with water, which actually saves you money long term. Always wet the coat thoroughly, apply shampoo away from the eyes, and rinse for at least 2-3 full minutes on medium-sized dogs – leftover product is one of the most common causes of post-bath itching. For diy dog grooming at home, a microfiber towel speeds up drying by a lot, and if you use a dryer, choose a pet-safe one on low heat and keep it constantly moving so you don’t create hot spots on your dog’s skin.
Getting Your Dog Ready for Grooming
Just like you wouldn’t jump straight into a marathon without warming up, you don’t want to probe diy dog grooming at home without getting your pup mentally ready first. You start by choosing a calm time of day, limiting distractions, and keeping early sessions super short – think 5 to 10 minutes. Layer in treats, praise, and a relaxed voice so your dog links grooming with good stuff, not stress. That simple prep work makes every nail trim, bath, and brushing session smoother and safer for both of you.
How to Acclimate Your Pup to Touch and Sounds
Instead of grabbing the clippers right away, you first teach your dog that touch is no big deal. Gently run your hands over their paws, ears, tail, and tummy for just a few seconds, then reward with a treat. Add in grooming sounds too – click the nail clippers, switch on the dryer across the room, play clipper noise at low volume. You want your dog thinking, “Oh, that weird sound? That means snacks and cuddles, cool.”
Short Desensitization Sessions – The Secret Sauce
Short sessions beat marathon grooming every single time, especially when you’re starting diy dog grooming at home. You might only tap each nail with the clipper or hold the brush on their coat for 3 seconds, then stop and reward. Quit while your dog is still relaxed, not when they’re squirming. Those tiny, positive reps stack up fast and make full grooming days way less dramatic.
With desensitization, you work in tiny doses that feel almost too easy for your dog – and that’s exactly the point. Maybe on day one you just touch the paw, day two you touch the paw and show the clipper, day three you tap the nail with the clipper without cutting anything. Each step should feel like a small win, not a battle. If your dog licks lips, turns away, or stiffens, you’re probably moving too fast, so you dial it back and make the next rep simpler.
Progress isn’t always linear, some days you’ll take a half step back, and that’s fine. As long as your dog finishes each mini session happy and eating treats, you’re teaching their brain that grooming is safe and predictable, not something to brace against in fear. That mindset shift is the real magic of short desensitization sessions.
Setting the Stage for Success: What You Need to Know
Before you even pick up a brush, your setup will either help you or work against you. Choose a non-slip surface, like a rubber mat or towel, so your dog isn’t sliding around and panicking. Keep your tools within arm’s reach – clippers, brush, treats, styptic powder – so you’re not walking away mid-session. And if your dog is sensitive, start in a quiet room away from kids, doorbells, or loud TVs to keep their stress level low and their focus on you.
Setting the stage right basically means you’re removing as many “uh oh” moments as possible before they even happen. For small dogs, a sturdy table with a non-slip mat can save your back and give you better control, while bigger pups often feel safer on the floor pressed against a wall so they don’t feel exposed on all sides. Good lighting matters too, especially for dark nails or long coats, since you need to actually see what you’re doing to avoid nicks or razor burn.
You also want a treat station prepped – pea-sized snacks in a bowl or a lick mat smeared with peanut butter can keep your dog invested in the process instead of plotting their escape route. When your gear is ready, your space is calm, and you know what step you’re doing first, second, third, you turn diy dog grooming at home from chaos into a simple, repeatable routine.
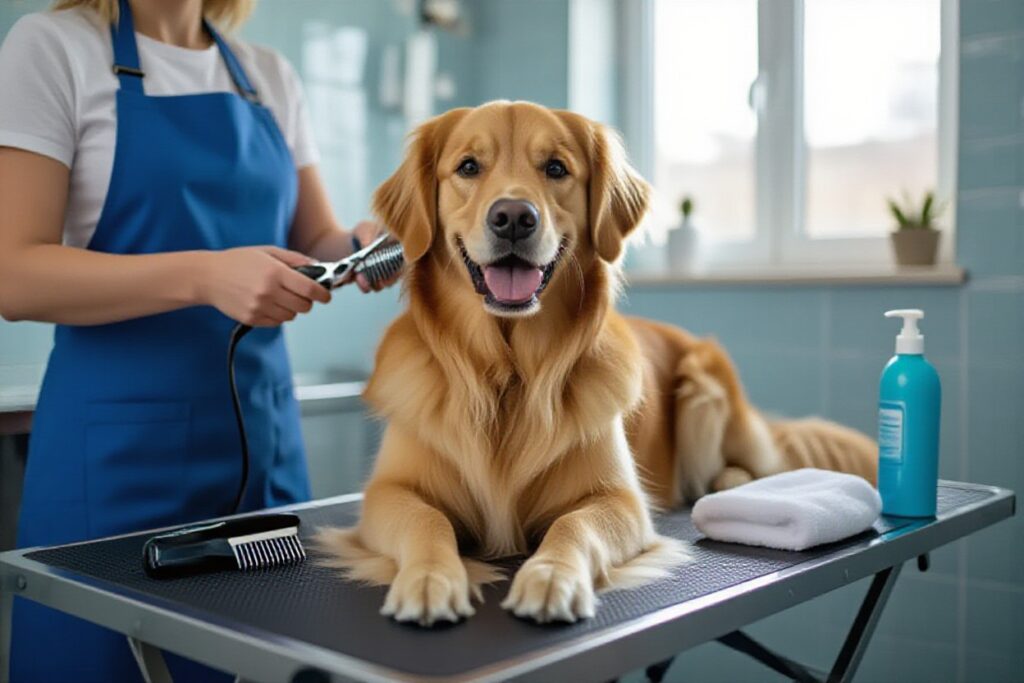
My Go-To Bath Routine for Pups
Ever wondered why some dogs stroll out of the tub calm and silky while others blast out like a wet tornado? My go-to bath routine keeps things chill and predictable: pre-bath brush, lukewarm water, gentle shampoo, then a thorough rinse that takes twice as long as you think it should. You build a pattern your dog can trust, which makes diy dog grooming at home for a well‑maintained and happy pooch feel more like a spa day than a wrestling match in the bathroom.
Pre-Bath Brushing: Why It’s Important
Have you ever tried washing a muddy rug without shaking it out first? Pre-bath brushing works the same way for your dog. You loosen dirt, remove loose fur, and gently tease out small tangles so they don’t tighten when wet. This step cuts your drying time by 20 to 30 percent and helps shampoo reach the skin evenly. It also gives you a quick health check for hot spots, fleas, or sore areas before you even turn on the water.
Getting the Water Just Right – Yes, It’s Important!
Think about the last time you stepped into a shower that was way too hot or icy cold – your dog feels that shock too. Aim for lukewarm water, roughly around 37 to 39°C (98 to 102°F), which is close to their normal body temperature. Test it on the inside of your wrist or forearm, not your hands, since your hands tolerate hotter temps. If your dog keeps trying to escape the tub, water that’s even slightly too hot or too cold is often the hidden reason.
Because dogs can’t say “hey, that’s freezing”, you have to read their body language instead. Shivering, tucking the tail, or stiffening when the spray hits usually means the water’s off. And if your dog suddenly starts panting, licking their lips, or clawing to climb out, it’s probably too warm. Adjust the tap in tiny increments, wait a few seconds, then retest on your wrist before it touches your dog again. For smaller pups or short coats, use a gentler spray or even a cup to pour water so the pressure doesn’t freak them out – especially around the head and ears.
How to Apply Shampoo and Rinse Like a Pro
Ever notice how groomers make it look effortless, like the shampoo just magically glides on and rinses out perfectly? You can do that at home by diluting your dog shampoo in a squeeze bottle, about 1 part shampoo to 4 parts water, so it spreads evenly without globs. Start at the neck, work down the back, then legs and tail, saving the head for last to reduce shaking. The real pro move: rinse until the water runs clear, then rinse one more full time to avoid itchy residue.
Because skin issues often start with leftover product, you want to treat rinsing like it’s the star of the show, not an afterthought. Massage with your fingertips (not nails) as you rinse, especially in dense coat areas like the neck ruff, pants, and under the tail where shampoo loves to hide. Avoid the eyes and inside the ears completely – use a damp cloth for the face instead, it’s safer and far less stressful. For diy dog grooming at home, this “extra rinse” habit alone can cut post-bath scratching and irritation in half, especially for sensitive or allergy-prone pups.
Nail Trimming Tips to Keep Your Pup’s Paws Happy
That moment when your dog clicks across the floor like they’re wearing tap shoes is your sign it’s time for a trim, and keeping those nails short protects joints, posture, and even your hardwood floors. Focus on using a proper dog nail clipper or grinder, good lighting, and lots of tiny treats so your pup links nail care to good stuff. Assume that with regular trims every 2-4 weeks, quicks recede and nail sessions get shorter, calmer, and way less dramatic.
- Dog nail health
- Safe nail trimming at home
- DIY dog grooming at home for a well‑maintained and happy pooch
- Nail grinder vs nail clippers
- Preventing overgrown nails
Finding the Quick – What You Need to Know
When you hold the paw and gently separate the toes, you want to spot the quick, since that’s the blood supply you really don’t want to hit. On light nails it’s that pink core, on black nails you look for a tiny gray or white dot in the cut surface and stop there. Assume that if nails are super long, you just take off tiny slivers every week so the quick slowly pulls back.
Trimming Techniques That Won’t Scare Your Dog
Instead of wrestling your dog on the floor, try sitting on the couch with them sideways to you so trimming feels more like cuddling than a vet visit. Work in slow micro-sessions of 1-2 nails at a time, feed a pea-sized treat after each clip or grind, and keep the clipper blades sharp so they don’t crush the nail. Assume that pairing every touch of the paw with food, praise, and your calm voice steadily rewires your pup’s brain from “nope” to “this isn’t so bad”.
For nervous pups, you might even spend the first 2-3 days in your diy dog grooming at home routine just touching their paws, tapping the clipper on each nail, and paying in treats like you’re handing out dollar bills. Some dogs do better with a nail grinder than clippers because the buzzing is less scary than the sudden snap, especially if you let them sniff it first and only run it for 1-2 seconds on each nail. Try the “3-second rule”: touch paw, trim or grind for 3 seconds max, then stop and reward, which keeps them from getting overwhelmed or wriggly. Over a couple of weeks, that tiny consistent pattern builds a dog that calmly lets you finish all four paws without turning it into a wrestling match.
Oops, Did You Cut Too Short? Here’s What to Do
That little yelp and sudden blood spot can make your stomach drop, but staying calm is your best tool when you nick the quick. Grab styptic powder, cornstarch, or even flour in a pinch, press it into the tip of the nail for 20-30 seconds, and keep your dog still so the clot can form. Assume that treating it like no big deal, then giving a quiet cuddle and a treat, helps your pup move on without building a long-term fear of nail trims.
If you do hit the quick, resist the urge to panic or apologize dramatically, because your dog reads your body language more than the tiny sting. Apply firm pressure with styptic powder or a styptic pencil, and if you don’t have those, pack cornstarch onto the nail tip and hold it there until the bleeding stops, which can take a few minutes. Most minor quick cuts look worse than they are, but you should clean any splatters, skip that nail for a week, and keep an eye out for excessive bleeding or limping that might warrant a quick vet call. Next time, trim in smaller slivers, use brighter lighting, and keep that paw supported so it can’t jerk at the last second.
Keeping Ears, Eyes, and Teeth in Check
With so many pet parents getting into diy dog grooming at home for a well‑maintained and happy pooch, vets are seeing fewer issues just from simple weekly checks. You don’t need fancy gear – your eyes, nose, and fingers do most of the work. Quick ear, eye, and tooth checkups can catch problems days or even weeks earlier, saving your dog a lot of pain and you a big vet bill. Think of this like a mini health scan that quietly runs in the background of your regular grooming routine.
Simple Ear Checks That Make a Difference
More people are learning that a 30‑second ear check can prevent those nasty infections that cost $150+ to treat, and you can absolutely do this yourself. Gently lift the ear flap and look for pale pink skin, a mild waxy look, and no strong smell. If you spot dark brown gunk, redness, swelling, or a yeasty odor, that’s vet time, not DIY. Use a vet‑approved ear cleaner on a cotton pad, never a cotton swab deep in the canal, and keep ears dry after baths.
Gentle Eye Cleaning Techniques – Seriously, It’s Easy!
With all the cute dog eye‑wipe videos going viral, it’s tempting to overdo it, but you actually just need a soft, calm routine. Use a clean, damp cotton pad (or gauze), wipe from the inner corner outward, and use a fresh pad for each eye. Tear stains on white dogs can build up fast, so a daily quick wipe keeps things tidy and avoids crusty buildup that can irritate the skin. If you ever see yellow or green discharge, squinting, or pawing at the eye, skip DIY and call your vet.
When you get into a rhythm with eye cleaning, you’ll notice tiny changes way sooner, which is exactly what you want for safe diy dog grooming at home. Warm water is usually enough, but you can use a vet‑approved eye wipe if your pup builds up gunk fast, especially brachy breeds like pugs and Frenchies with deeper skin folds. Keep your motions slow, talk to your dog, and stop if they jerk away hard – forcing it can scratch the surface of the eye. And if that eye suddenly looks cloudy or your dog hates bright light, that’s a strong sign to get a professional exam, not experiment.
Tooth Care Basics: Keeping That Smile Bright
Because pet dental care has blown up on social media, more owners are finally brushing, and dogs are keeping their teeth years longer. Start with a dog‑safe toothpaste (never human), a finger brush, and just 30 seconds of gentle circles on the outer surfaces. Aim for 2 to 3 brushing sessions per week, plus dental chews that carry the VOHC seal to help reduce plaque. If you notice heavy brown tartar, bloody drool, or really bad breath, that points to deeper disease that needs a proper dental cleaning at the vet.
Once you get past the first week of wiggling and licking, tooth brushing becomes one of the easiest diy dog grooming at home habits to keep going. Most dogs tolerate you doing the outside of the teeth only, which is where plaque builds up fastest anyway, especially on the upper back molars. Keep sessions short, praise a lot, and stop while your dog is still cooperating so they build positive associations instead of fighting you. And if your dog is over three and has never had a dental check, pairing your new routine with a professional cleaning can seriously reset their mouth health in your favor.
Grooming Frequency: How Often Should You Groom?
Studies show that most pet dogs need some kind of grooming every 1 to 4 weeks, and your routine really depends on coat type, lifestyle, and skin health. If your pup rolls in grass, swims a lot, or has allergies, you’ll be grooming more often than a couch potato pug. As a simple baseline, aim for weekly brushing, a bath every 3 to 6 weeks, and nail trims every 2 to 4 weeks so your diy dog grooming at home for a well‑maintained and happy pooch actually stays on track.
Short-Haired Breeds: The Low Maintenance Heroes
Many short-haired breeds do great with a quick brush just once or twice a week, which is a big win if you like low-effort grooming. Breeds like Boxers, Pugs, and Beagles still shed, so that rubber curry brush or grooming mitt will be your best friend. You’ll usually bathe these guys every 4 to 6 weeks, unless they find something disgusting to roll in, and that simple routine keeps their coat glossy and your home a bit less hairy.
Long-Haired Breeds: What You Should Know
Some long-haired dogs can start matting in as little as 24 to 48 hours if you skip brushing, so these coats need more frequent attention. You’re typically looking at brushing 4 to 7 times a week, plus trimming or tidying every 4 to 8 weeks if you’re doing diy dog grooming at home. That might sound like a lot, but it keeps painful tangles, hot spots, and expensive emergency grooms from popping up out of nowhere.
With long-haired breeds like Shih Tzus, Maltese, or Afghan Hounds, you’re basically managing fabric instead of fur, so your tools and schedule really matter. A slicker brush, metal comb, and a detangling spray are must-haves, and you’ll want short, relaxed sessions instead of marathon grooming battles. Try a quick daily brush on high-friction spots first – behind the ears, armpits, inner thighs, under the collar – since that’s where knots start sneaking in. And if you’re trimming at home, always work on clean, fully dry hair, taking off tiny bits at a time so you don’t accidentally turn your pup’s fringe into a crooked DIY haircut you’ll be staring at for months.
Double-Coated Breeds: The Grooming Challenge
Many double-coated breeds like Huskies and German Shepherds blow their coat twice a year, dropping what feels like an extra dog around your house. During those shedding seasons, you may brush daily to pull out the dead undercoat, then scale back to 2 or 3 times a week the rest of the year. Bathing every 4 to 8 weeks works well, but the real rule here is simple: you never shave a healthy double coat just to reduce shedding.
With double-coated dogs, your grooming goal is to move that dense undercoat out before it compacts into tight, itchy clumps that trap heat and moisture against the skin. A slicker brush plus an undercoat rake is usually the power combo, and you’ll want to work in layers, parting the fur and brushing from the skin outward rather than just skimming the top. During heavy shed, expect fur tumbleweeds and plan on shorter, more frequent sessions so your dog doesn’t get overwhelmed. And if you’re doing diy dog grooming at home for a well‑maintained and happy pooch, teach your dog to happily stand on a mat or table early on, because a calm double-coated dog is so much easier to work through than a wiggly one when you’ve got half a winter coat to pull out.
When to Call in the Pros
About 30% of dogs that come into grooming salons have issues that really shouldn’t be handled with diy dog grooming at home, and that’s where your trusted pro becomes part of your toolkit. When you see skin infections, mystery lumps, intense fear, or grooming sessions taking hours with everyone stressed, you’re not quitting… you’re being smart. A professional groomer or vet-groomer can spot medical problems early, use safer tools, and work faster so your dog stays comfortable, safe, and well‑maintained.
Wrestling with Mats? Here’s Why You Might Need Help
Studies show mats can pull hard enough on skin to reduce circulation in less than a week, which is why those tight clumps of fur are way more serious than just an aesthetic issue. When you’re doing diy dog grooming at home and you hit dense mats in armpits, behind ears, or under the collar that your comb just won’t pass through, that’s pro territory. A groomer with a safety‑tipped blade, dematting tools, and restraint systems can remove them without slicing skin or traumatizing your dog.
Dealing With Extreme Shedding – Pro Tips
Vet surveys suggest that heavy shedders like Huskies or Labs can drop up to a full grocery bag of hair during peak shedding season, and that’s exactly when diy dog grooming at home starts to feel like a losing battle. When daily brushing still leaves tumbleweeds of fur rolling across your floor, a pro can jump in with high-velocity dryers, specialty deshedding shampoos, and layered brushing that reaches right down to the undercoat. You get less hair on your furniture, less itch for your dog, and a cleaner, happier home.
- Deshedding treatment with coat-specific shampoos and conditioners to loosen impacted undercoat safely.
- High‑velocity dryer work to blast out dead hair without overheating or irritating the skin.
- Undercoat rakes and slicker brushes used in a pattern that avoids over-brushing hot spots and friction points.
- Skin and allergy checks so extreme shedding gets treated if it’s actually from diet issues, parasites, or infections.
After you see how quickly a pro can strip out that impacted coat in a single 60‑minute session, it becomes way easier to keep up with light brushing during your diy dog grooming at home routine instead of constantly vacuuming and feeling like you’re living in a fur storm.
Can’t Handle Difficult Behavior? Don’t Worry, It Happens
Roughly 1 in 5 dogs shows fear or aggression during grooming, so if yours growls, snaps, or panic-squirms, you’re absolutely not alone. When diy dog grooming at home turns into a wrestling match or you’re scared of hurting your dog (or getting bitten), that’s the moment to tag in a pro. Behavior-savvy groomers and vet teams use muzzles, calming techniques, meds when needed, and low‑stress handling so your dog can be cleaned up without escalating their fear.
Some dogs simply have a history you can’t fix in one bath – maybe they were mishandled before you got them or they’re just wired a little spicy and that’s okay. A solid groomer will break sessions into shorter visits, pair nail trims with high‑value treats, skip scary tools at first, and work with your vet if anti‑anxiety meds or sedation grooming is the safest option. Over time you can piggyback on that progress and slowly add more diy dog grooming at home, but letting a professional lead with safety, behavior reading, and stress reduction can protect both you and your dog from a very bad day.

FAQ Time: Your Burning Questions Answered
Ever find yourself halfway through diy dog grooming at home and suddenly wondering if you’re doing something totally off? This is where those nagging questions get cleared up, so you feel safer, more confident, and way less stressed. You’ll see what’s safe for your dog’s skin, what keeps grooming fear-free, and what actually makes life easier for both of you.
Can I Use Human Shampoo on My Dog? Let’s Clarify!
So that bottle of salon shampoo in your shower looks tempting, right? You really shouldn’t use it on your dog because human formulas are made for a pH around 5.5, while your dog’s skin sits closer to 7, which means human products can cause itching, dryness, and even infections. You’re much better off with a gentle, dog-specific shampoo, ideally labeled for sensitive skin if you’re just starting diy dog grooming at home.
What If My Dog Is Afraid of the Hairdryer?
Ever switch on the dryer and your dog bolts like you fired a starting pistol? That’s super common, because the noise, heat, and air blast can feel pretty intense. You’ll want to start with the dryer on the lowest heat and lowest airflow, kept at least a forearm’s length away, and only for a few seconds at a time while you feed tiny treats so your dog starts to pair the sound with good stuff instead of panic.
To go a little deeper, start by just turning the dryer on across the room for 5-10 seconds while your dog eats super tasty treats, then switch it off before they stress out. Next session, you move a bit closer, still not pointing air at them yet, and repeat over several short sessions, not one huge scary marathon. After that, you can let the warm air touch just one area, like the shoulder, while you keep the dryer moving so you don’t create hot spots. If your dog is tiny, flat-faced, or anxious, you might skip a handheld dryer entirely and use an absorbent towel plus a quiet, low-heat dryer box setup or air-dry in a warm room to keep things safer and calmer.
Should I Mat Train My Dog Before Grooming?
Have you ever tried to brush a dog that treats the brush like it’s made of lava? Mat training is simply teaching your dog to relax on a specific mat while you handle paws, ears, and coat, and yes, that absolutely helps before diy dog grooming at home. When your dog knows that “mat time” means treats, calm vibes, and predictable handling, grooming stops feeling like a surprise attack and more like a routine they understand.
To build that skill, start by tossing treats on the mat anytime your dog chooses to stand, sit, or flop there, no brushing yet, just good associations. Once they’re happily hanging out, introduce super short handling sessions: touch a paw, then pay with a treat; lift an ear, treat again; one light brush stroke, another treat. You want dozens of tiny, easy, 10-30 second sessions, not one giant “grooming day” that freaks them out. Over time, that mat becomes your grooming HQ, a portable little “chill zone” that tells your dog it’s safe, predictable, and worth cooperating for.

How to Tackle Shedding: Tips that Actually Work
When you’re finding fur on your coffee mug, car seat, and somehow inside closed cupboards, it’s time to tweak your diy dog grooming at home routine. Aim for brushing at least 3 times a week for short coats and daily for double-coated breeds like Huskies or Labs, using slow, gentle strokes so you’re not tugging skin. Add a high-quality omega-3 supplement (check with your vet) and keep baths to every 4-6 weeks. Knowing how to balance brushing, diet, and bathing keeps shedding manageable instead of maddening.
- Frequent brushing loosens dead hair before it hits your couch.
- Omega-3 fatty acids support healthy skin and reduce excess shedding.
- Overbathing can dry the skin and actually increase shedding.
- Stress and allergies often show up first as extra hair loss.
The Best Tools to Combat Shedding
On a practical level, your tools make or break how hairy your house gets. A slicker brush pulls out surface fluff, while a dedicated de-shedding tool (like a Furminator-style comb) reaches that dense undercoat on breeds such as German Shepherds and Goldens, but you’ll want to use it no more than once a week to avoid irritation. For short-haired dogs, a rubber curry brush in the bath can strip out piles of hair in minutes. Knowing which brush fits your dog’s coat type turns your diy dog grooming at home for a well‑maintained and happy pooch into a serious shed-busting session.
Seasonal Shedding: When to Expect It
Some weeks it feels like your dog is molting in slow motion, right? Most double-coated breeds blow their coats in spring and fall, often over 2-4 intense weeks, while indoor dogs under artificial light might shed lightly all year. You’ll notice tufts around the neck, hindquarters, and tail first, especially in breeds like Border Collies or Aussies. Knowing these cycles lets you plan extra brushing days so your diy dog grooming at home stays one step ahead of the fur storm.
During those heavy seasonal shed periods, you’ll want to increase brushing to daily sessions, even if they’re just 5-10 minutes. Start with a pin brush or slicker to lift the bulk, then follow up with a de-shedding rake in the direction of hair growth, especially on the thighs and rump where undercoat packs in hardest. Because temperature and daylight drive a lot of this, dogs that spend more time outdoors tend to have more obvious coat blows, while apartment pups may have a flatter but more constant shed cycle. If you suddenly see patchy bald spots instead of even thinning, skip the home fixes and get a vet to rule out parasites, thyroid issues, or allergies before continuing your routine.
Home Remedies That Might Just Help
Once you’ve handled the basics like brushing and nutrition, a few simple home tweaks can really stack the deck in your favor. Adding a tiny drizzle of fish oil or cold-pressed flaxseed oil to meals (often 20-40 mg/kg of EPA+DHA, vet approved) can support skin health, and a basic humidifier in winter helps keep dry indoor air from wrecking your dog’s coat. Gentle oatmeal-based shampoos soothe itchy skin that triggers more scratching and hair loss. Knowing which home remedies actually support your diy dog grooming at home for a well‑maintained and happy pooch keeps you from wasting time on myths that don’t work.
If you want to lean a little more into natural options, start small and track what actually changes. A weekly wipe-down with a slightly damp microfiber cloth before brushing can grab loose hair and dander so your brush works better and you’re not just flinging fur into the air. Some owners see a visible improvement after 6-8 weeks of consistent omega-rich oils in the diet, paired with switching from a harsh detergent shampoo to a mild, pH-balanced formula designed for dogs. Because every dog’s skin chemistry is different, introduce one tweak at a time and give it a couple of weeks so you can clearly tell if that home remedy is helping or if it’s just hype cluttering your diy dog grooming at home routine.
Grooming Anxiety: How to Help Your Nervous Pup
With more people trying diy dog grooming at home, anxious pups are becoming a hot topic, and it totally makes sense. Your dog suddenly has buzzing clippers, slippery tubs, and weird tools in their face – that’s a lot. You can make grooming feel less like a vet visit and more like a chill spa day by pairing every step with treats, slowing things down, and never forcing progress. Over time, your nervous pup starts to connect grooming with comfort, safety, and rewards, not fear.
Signs Your Dog is Stressed During Grooming
Early signs of stress during diy dog grooming at home can be pretty subtle, so you really want to watch closely. You might spot lip licking, yawning when they’re not tired, shaking off like they’re wet, or constantly turning their head away from the brush. More obvious red flags are tucked tails, whale eye (showing the whites), growling, or snapping. If you see any of this, that’s your cue to pause, dial things back, and make grooming easier, not push through.
Calming Techniques to Make It Smooth
Simple calming tricks can turn a stressful diy dog grooming at home session into something your dog actually tolerates, maybe even enjoys. You can use high value treats, slow feeder lick mats with peanut butter, or frozen yogurt smears so your dog associates clippers and brushes with snacks. Short 5 to 10 minute sessions, gentle praise, and letting your dog step away when they need a break all help lower their stress and build long term confidence.
One of the easiest techniques is desensitization: you just show your dog the brush, let them sniff it, then treat. Next day, brush once, then treat. Same with a clipper – start with it turned off, treat, then on across the room, treat again. You’re basically teaching their brain, “this noisy thing predicts snacks”. Pair that with calm massage around the shoulders and chest, slow breathing from you, and keeping your voice soft, and you’ll notice your dog’s body soften too. If they freeze, pant hard, or refuse food suddenly, you’ve pushed a bit far – step back a level and keep it easy.
Creating a Relaxing Grooming Environment
Setting up the right space for diy dog grooming at home does half the work for you. Choose a non slip surface like a rubber bath mat so your dog doesn’t slide, and keep tools laid out so you’re not scrambling around. Soft background noise, like low volume music or white noise, plus calming scents like dog safe lavender sprays can help some pups settle faster. You’re basically building a little “spa corner” that always feels predictable, safe, and low drama.
Many groomers now talk about “fear free” setups, and you can totally copy that at home without fancy gear. Use warm, not hot, water, keep bright overhead lights out of your dog’s eyes, and avoid super strong smells from harsh shampoos or cleaners. Try grooming at a time when your home is quieter – after a walk, when your dog’s a bit tired and the kids aren’t running around. Over a few sessions, your dog learns that this specific spot, these specific tools, and your calm routine all go together, which reduces anxiety before you even touch a brush.
The Real Deal About Grooming in the Winter
Picture your dog doing zoomies in the first snow, then tracking in salt, ice balls, and that weird slush between the toes. Winter grooming is less about fancy cuts and more about protecting skin, paws, and coat from cold, dryness, and de-icers. You focus on keeping the coat clean, trimmed in the right spots, and fully dry so your dog stays warm outside but comfy inside.
Winter Coat Care: What To Keep in Mind
On chilly days, your goal is to let the coat act like a natural insulating blanket, not shave it all off. You can lightly trim feathering on legs and belly to cut down on snow clumps, then brush 3 to 4 times a week to keep air flowing to the skin. Hydrating sprays and omega-3s help keep that winter itch from driving your dog (and you) a little nuts.
Bathing Frequency: Should It Change?
During winter, you usually dial baths back to every 4 to 6 weeks instead of every 2 to 3, so the skin doesn’t get stripped of natural oils. Warm but not hot water plus a gentle, moisturizing dog shampoo keeps the coat clean without making it flaky or tight. You just want enough baths to remove salt, grime, and indoor dust, not turn your pup into a dried-out loofah.
If your dog is rolling in road salt or muddy snowbanks every walk, you might do quick rinse-offs of paws, belly, and tail more often, then only full shampoo sessions less often. You dry thoroughly with a towel first, then use a dryer on low and keep it moving so you never overheat any spot. Dogs with skin issues or seniors sometimes need even fewer full baths, relying on spot cleaning and paw washes instead, which still fits perfectly into diy dog grooming at home when you’re trying to keep a well-maintained and happy pooch without upsetting that winter skin barrier.
Indoor Grooming Tips That’ll Make It Easier
On those freezing nights when you don’t even want to take the trash out, indoor grooming becomes your best friend. You set up a little “grooming corner” with a non-slip mat, soft towel, and treats ready to go so your dog knows this is a cozy hangout, not a torture chamber. Use slower, calmer sessions with breaks instead of one marathon grooming day, and you’ll both be way less stressed.
- Non-slip mats under your dog so they feel stable and safe.
- Soft brushes that glide through winter coat without static or tugging.
- Lukewarm room so your dog isn’t shivering while damp or freshly bathed.
- High-value treats or lick mats to keep grooming linked with good vibes.
- Quiet tools like low-noise dryers and clippers to reduce stress.
Any small upgrade like better lighting or a comfy grooming bench makes diy dog grooming at home feel smoother, safer, and way more doable for regular winter maintenance.
- Storage baskets for keeping brushes, nail clippers, and wipes in one grab-and-go spot.
- Microfiber towels that dry faster and soak up more water than old bath towels.
- Calming aids like pheromone sprays if your dog gets a bit edgy indoors.
- Short grooming bursts of 5 to 10 minutes spread over the week instead of a single long session.
Any time you tweak your setup for comfort and convenience, you turn indoor grooming into a simple little routine instead of a big production, which is exactly what you want for easy diy dog grooming at home in the winter.

Summer Grooming Needs: Staying Cool
Why Summer Grooming is Super Important
Short-coated breeds are all over TikTok right now with “summer glow-ups”, but what you don’t see is how much careful grooming is keeping them safe in 90°F heat. When you stay on top of shedding with weekly brushing, you help that coat ventilate properly so your dog can actually cool off. Heavy, packed undercoat traps heat and raises the risk of heat stress, especially during mid-day walks or backyard play sessions.
Best Practices for Hot Weather Grooming
Instead of shaving everything off, you focus on smart trimming, lighter tools, and shady timing so your dog stays comfy when the temps spike. Brushing 3 times a week in summer pulls out dead undercoat and boosts air flow to the skin, which is a big deal for huskies, goldens, and any double-coated pup. Aim to groom early morning or after sunset, when surfaces are cooler and your dog isn’t already overheated.
When you’re doing diy dog grooming at home for a well-maintained and happy pooch in July or August, think “cooling routine” more than “shortest haircut possible”. Use a slicker brush, metal comb, and a de-shedding tool in gentle, slow passes so you don’t scratch hot, sensitive skin. Spot-trim feathering on legs, tail, and belly with blunt-tip scissors to reduce tangles without stripping natural insulation. Skip full shaves on double-coated breeds because that coat works like a thermal thermos, helping block both heat and UV, and instead keep it tidy, clean, and thinned of loose fur.
Hydration Tips While Grooming Outside
Anytime you’re grooming outside in summer, you treat water like a grooming tool, not an afterthought. Set a bowl nearby and offer a drink every 5 to 10 minutes, especially if your dog pants hard or keeps shifting around. If your dog refuses water, cuts the session short, or seems wobbly, you stop grooming immediately and move to shade or indoors, then cool them with fans and contact your vet if they don’t perk up fast.
- Fresh water in a shaded, heavy, non-tip bowl right next to your grooming spot
- Cool but not icy water (rapid temp changes can upset some dogs’ stomachs)
- Frequent breaks every few minutes for panting checks and sip offers
- Electrolyte-safe options made for pets only if your vet has approved them
- Thou should watch for heat stress signs like bright red gums, glassy eyes, or staggering and end the session the second you see them
For diy dog grooming at home in peak summer, you kind of become your dog’s personal hydration manager. Start grooming sessions only when your dog has already had a drink, then keep that bowl refreshed if they’re a sloppy drinker. Rotate between a few short grooming bursts and short water breaks so your dog never hits that “I’m cooked” point. On days with humidity over 70%, you want to cut outdoor grooming time in half and move anything detailed, like nail work or sanitary trims, indoors where it’s cooler.
- Pre-hydrate your dog 15 to 20 minutes before any outdoor grooming starts
- Shade-first setups on grass or a mat, never hot concrete or deck boards
- Mist bottles or cooling cloths if your dog actually enjoys light dampness
- Session limits of 10 to 15 minutes outside before going indoors to finish
- Thou should treat any refusal to drink plus heavy panting as a red flag, stop grooming, cool your dog, and call your vet if things don’t improve quickly
My Top Tricks for a Fluffier Pup
One of my clients once joked that her Cocker Spaniel went into the tub as a dog and came out as a walking cloud, and that’s kind of the goal here. You can get that same fluffy, salon-style finish with diy dog grooming at home for a well-maintained and happy pooch by layering simple habits: regular brushing, the right shampoo, and gentle drying that lifts the coat instead of flattening it. Fluff is all about healthy hair plus smart technique, not just whatever brush is on sale.
Brushes and Techniques for That Fluffy Look
When you see those insanely poofy Goldendoodles on Instagram, there’s almost always a slicker brush and metal comb behind the magic. You start with a soft-pin slicker brush, working in small sections from the skin out, then follow with a detangling comb to catch sneaky knots. Try line brushing: lift a layer of hair, brush the row beneath, move up a little, repeat – it takes a few extra minutes but gives that floaty, blow-out finish that makes your dog look professionally groomed.
Best Products for Added Volume
A friend of mine swore her Pomeranian only fluffed out at the groomer, until we swapped in a volume-boosting, sulfate-free shampoo and a light, leave-in spray. You want products labeled for “lift” or “body” that rinse clean so they don’t weigh the coat down. Skip heavy oils or thick conditioners on double coats – they flatten everything and can trap heat, which is the opposite of what you want with diy dog grooming at home.
For extra oomph, you can use a protein-enriched, volumizing shampoo once every 2-3 weeks, then follow with a super light conditioner only on the ends of longer coats. Spray a fine mist of silicone-free detangler before blow drying so the brush glides but the hair still has grip for lift. If your dog has sensitive skin, test any new product on a small patch for 24 hours and avoid strong perfumes. And please, no human mousse or hairspray – those can irritate your dog’s skin and eyes in a big way.
Tricks You Won’t Believe Work – But They Do!
One of my favorite before-and-after pups was a flat, sad-looking Cavapoo that turned into a fluffy marshmallow just by changing the drying routine. Drying against the grain of the coat on low heat, then finishing in the direction of growth, puffs everything up like crazy. If you towel-dry by squeezing instead of rubbing, then use a slicker while you blow dry, you’ll see 20-30% more visible volume, easy. It sounds tiny, but even swapping to a microfiber towel can make your dog’s coat look bigger and softer.
What really surprises people is how much timing matters for these odd little tricks. If you start brushing while the coat is about 70% dry, not soaking wet or bone dry, you get way more lift with way less frizz. Try blasting the coat with cool air for the last minute of drying – it helps “set” the fluff, kind of like a finishing step on your own blowout. And if your dog has a wavy coat, scrunching the hair gently with your fingers as you dry can add texture, so you end up with a fluffy, lived-in look instead of that stiff, helmet-head finish.
Final Thoughts: Grooming is a Journey, Not a Destination
Keeping Progress, Not Chasing Perfection
Your diy dog grooming at home routine will never be “finished” – it just keeps evolving as your dog ages, seasons change, and you learn new tricks. One month you might only manage 5-minute paw checks and a quick brush, another you’re confidently trimming nails every 2 weeks and doing full ear cleaning. So track what works in a simple notes app, keep photos of coat changes, and adjust your tools as needed, because that slow, steady progress is exactly what keeps your pooch well-maintained, comfortable, and genuinely happy over the long haul.