Most riders find a clear trail riding etiquette guide helps you safely navigate right-of-way rules, polite passing, and multi-use trails while protecting riders, horses, and other users. You should greet others courteously, manage speed, and expect wildlife encounters that can be dangerous, follow Leave No Trace principles to preserve trails, and learn group and emergency protocols so your outings stay positive and sustainable.
Key Takeaways:
- This trail riding etiquette guide: prioritize right-of-way and calm communication—give horses priority on multi-use trails, announce your approach, slow to a walk for passing, and pass wide and slowly while asking permission when needed.
- Protect trails and wildlife by following Leave No Trace—stay on designated routes, avoid riding when trails are wet or soft, manage manure and trash responsibly, keep distance from wildlife, and report trail damage or hazards.
- Ride safely and considerately in groups—travel single-file with steady spacing, control speed, assign a lead and sweep, carry emergency gear (first-aid, phone, map), and be aware of seasonal conditions and local emergency protocols.
Understanding Trail Etiquette
Importance of Etiquette in Trail Riding
You cut down conflicts and delays when you follow the trail riding etiquette guide: announce yourself from about 25–50 feet, keep a 6–10 foot buffer when passing, and slow to a walk near others. Doing so reduces spook incidents, speeds up traffic flow on narrow tread, and protects trails from erosion by preventing sudden group surges. Simple habits like single-file travel on narrow sections and packing out waste make trails safer and more usable for everyone.
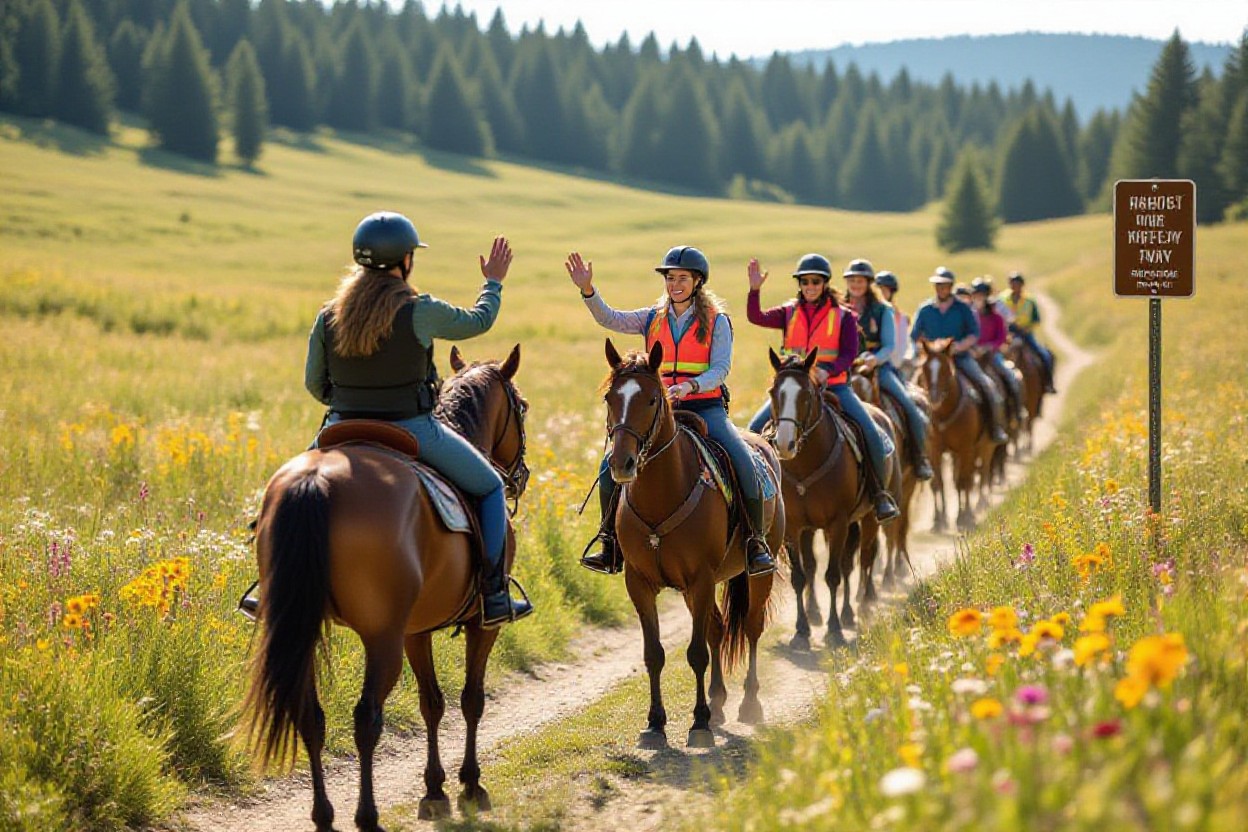
Building Respect with Other Trail Users
You show respect by using a calm voice, making eye contact, and signaling intent early—say “horse and rider on your left” at ~30 feet. Yielding to uphill users and horses, stepping aside for faster traffic, and asking before passing cyclists or hikers creates positive encounters. Small courtesies reduce tension, prevent spooks, and build a reputation that helps secure access for riders long-term.
When you meet groups, take the lead: call your horse to a controlled halt, ask cyclists to slow or dismount if needed, and request dog owners to leash animals; if a loose dog approaches, stop your horse and keep a firm, low voice—panic often escalates spooking. In multi-use trail case examples, riders who consistently yield and communicate regain access after disputes; conversely, incidents involving loose dogs or sudden passes commonly lead to complaints and trail restrictions. Your choices directly influence local land managers’ willingness to keep trails open to equestrians.
The Role of Trail Etiquette in Safety
You reduce accidents by enforcing predictable behavior: keep speed to a walk when passing, maintain spatial separation, and follow right-of-way norms (give priority to horses where posted). Carry a charged phone, whistle, and basic first-aid kit; knowing trail exit points and reporting hazards promptly prevents minor issues from becoming emergencies. Consistent etiquette minimizes spooking and collisions on shared-use corridors.
In emergencies you act methodically: secure your horse first—turn it slightly downhill or tie to a tree using a quick-release knot—then assess injuries and call for help using the nearest landmark or GPS coordinates. If someone falls, dismount helpers should calm nearby animals, control traffic flow by stationing a person 50–100 feet away to warn oncoming users, and document the scene for park staff. Following these procedures and keeping communication clear with other users both mitigates immediate danger and speeds response from search-and-rescue or park rangers.
Basic Right-of-Way Rules
General Right-of-Way Principles
You give priority to the most vulnerable or least maneuverable users: horses and riders generally get right-of-way, then hikers, then cyclists. On narrow singletrack, uphill traffic usually has right-of-way; downhill users yield. When approaching, slow to a walk (about 4–5 mph), keep at least 6–10 feet (2–3 m) lateral distance where possible, and stop if your horse shows signs of anxiety to avoid spooking and a dangerous fall.
Specific Rules for Different Trail Users
With hikers, politely ask them to step to the downhill side and give a clear verbal cue before passing. For cyclists, require they slow to walking pace and dismount when requested, keeping at least 50 feet (15 m) behind if following. Motorized users should yield to non-motorized groups and obey posted restrictions. Control dogs on a short leash; unleashed dogs that approach can easily spook a horse.
When in mixed groups, form single file to let oncoming users pass; split larger parties into groups of 4–6 to reduce trail impact and improve safety. For blind corners, bridges, or narrow passages, stop and communicate clearly—your proactive behavior prevents incidents. If signs or land managers specify different rules, follow posted regulations over general etiquette.
Communicating with Other Riders
You use clear, calm voice commands and standard phrases: “Passing on left,” “Rider stopped,” or “Horse spooked, please slow.” Announce intentions at least 30–50 feet (10–15 m) before reaching others. Make eye contact when possible, use open palm gestures to indicate space, and keep radio or phone chatter to a minimum so your horse stays focused.
For groups, designate a lead and sweep rider to call passes and hazards; the lead announces upcoming users and the sweep ensures spacing and safety. When passing walkers or cyclists, pause and ask them to stand still rather than move unpredictably. At dusk or dawn, wear reflective gear and use a white light to make your position clear—visibility cuts down on sudden encounters that can spook horses.
Passing Safely
Approaching Other Riders
As you close on other riders, slow to a walk and call out early—about 10–15 feet (3–5 m)—with a clear phrase like “Passing on your left.” Keep your horse slightly offset and maintain single-file spacing of at least 6 feet when the trail narrows. If you’re in a group, pass one at a time; large groups should break into pairs or singles to avoid startling a skittish mount. This trail riding etiquette guide favors calm, predictable movement over speed.
Passing Horses and Hikers
Always ask permission before passing: a simple “May I pass on your left?” gives the other rider or hiker control. Halt if the other party signals no, then proceed only when your horse is relaxed. Give a wide berth—aim for 6–10 feet on narrow trails and more on open sections—and move smoothly without sudden noises or fast adjustments.
When passing groups of hikers, ask them to form a single file and leash dogs; if someone has a large dog, suggest they step back 5–10 feet and keep the animal calm. On blind corners or steep pitches, stop well before the approach (about 15–20 feet), speak firmly—“Horse coming, please hold”—and wait 5–10 seconds after they acknowledge before moving. If a horse pins its ears, tosses its head, or raises a hind leg, stop immediately and give extra space; in several trail incident reports, quick, steady handling and a 10–20 second pause prevented spooking and falls.
Navigating around Mountain Bikers
Expect faster traffic: typical singletrack speeds run 10–18 mph, so make yourself visible early and bring your horse to a controlled halt when cyclists approach. Ask cyclists to slow to walking pace and pass wide—at least 10–15 feet—and position your horse on the outside of the trail to give the biker the inside line. Use calm commands and avoid sudden movements while the bike passes.
If a cyclist fails to slow, step slightly downhill or to the trail edge and keep a hand on the saddle or mane to steady your mount; call out a firm “Slow, please” and the direction you expect them to pass. For blind corners and switchbacks, radios or hornless alerts are helpful—announce twice, 15–20 feet apart. In case studies from shared-use trails, incidents dropped when riders requested a full stop and had cyclists dismount on technical sections; when you assert clear, polite direction, most cyclists comply and risk is reduced.
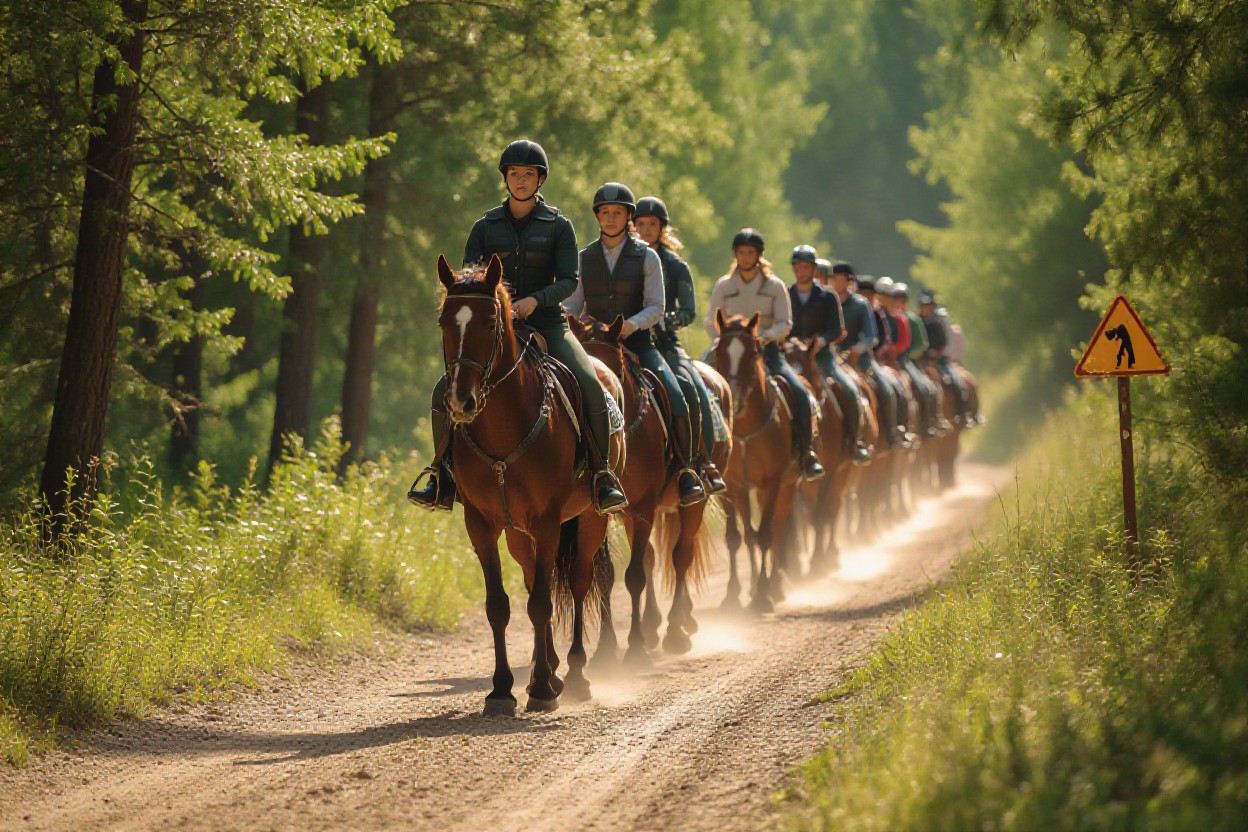
Group Riding Etiquette
Riding in Formation
On narrow single-track you should ride single file; where the trail is wide (roughly 8–10 feet) you may ride two abreast if space allows and other users can pass safely. Keep about 3 horse lengths (15–20 ft) between mounts to cut risk of kicks and spooks, let the leader set pace, and position an experienced rider at the back as a sweep so you avoid stragglers and can respond quickly to hazards.
Communicating within the Group
You must hold a quick pre‑ride briefing and agree on concise calls—examples: “Passing left,” “Single file,” “Whoa,” and “Trail right”—and use hand signals for quiet crossings; announce passes at least 30 ft (10 m) before you reach another rider or user to reduce surprises and keep control.
In practice, assign simple standardized signals: one short whistle or tap = slow, one long = stop, three = emergency, and have the leader call obstacles early (“rocky creek, single file, steady”) so riders have time to react. Speak calmly—loud, sudden shouts increase spooking—use radios for groups over 8 riders, and ensure every rider knows the sweep’s role so communication stays clear even if someone’s horse acts up.
Dealing with Larger Groups
When your party exceeds about 8–10 riders, split into subgroups with a 5–10 minute gap to prevent trail congestion, assign at least two leaders and a dedicated sweep, and check land‑manager limits (many agencies cap groups at 12–15 horses). These steps lower erosion, reduce wildlife disturbance, and make emergency management easier.
Plan logistics: stagger departure times, set rendezvous points, and brief each subgroup on passing rules and speed control. On narrow bridges or sensitive sections run groups one or two horses at a time; keep an emergency kit and contact list with each leader, and confirm permits or special rules before you go so your larger ride stays legal and low‑impact.
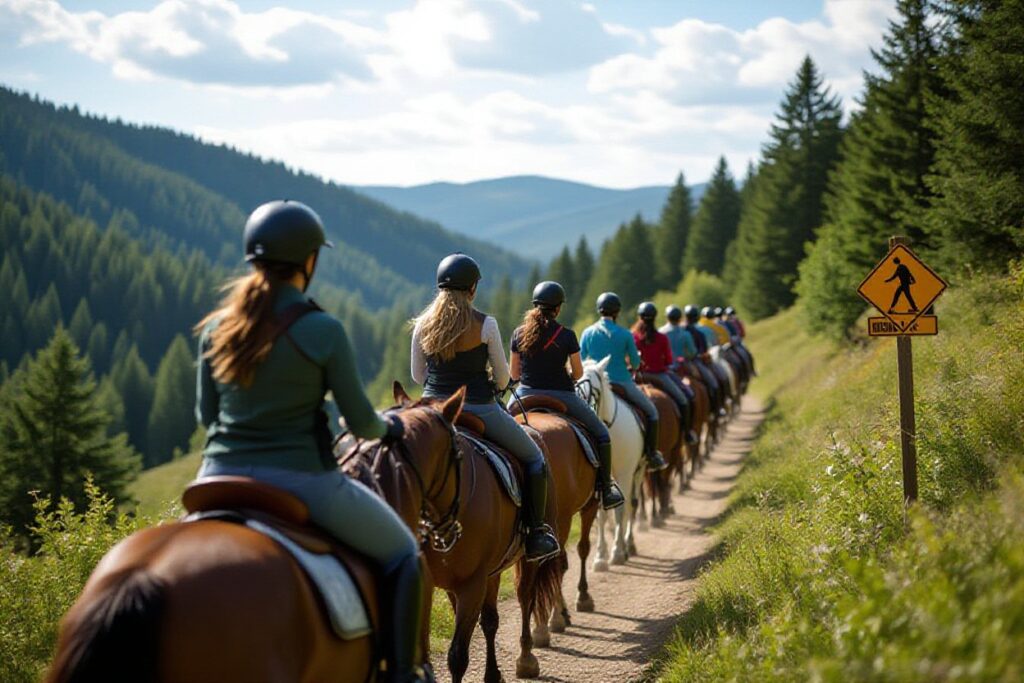
Multi-Use Trail Guidelines
Understanding Trail Designations
Check trailhead signs, maps, and park websites before you ride; trails are typically designated as equestrian-only, multi-use, hiking-only, or motorized-permitted. On a trail labeled “multi-use” you should expect pedestrians and cyclists; on maps, look for symbols (horse, bike, boot). Follow posted rules—if a segment is closed to horses, plan an alternate route to avoid fines or unsafe encounters.
Adjusting Behavior for Shared Trails
When you meet other users, slow your horse and call out politely—aim to announce yourself about 30–50 feet ahead. Keep your mount under control at a halt or walking pace (~3–4 mph), shorten your reins, and step to the downhill edge if the corridor is narrow; sudden movements or loud noises can spook a horse and create the most dangerous situations.
On narrow single-track (under ~8 feet) dismounting and leading may be the safest option if visibility is limited. Signal oncoming cyclists with a calm, clear voice—”horse and rider passing”—and ask them to slow to walking speed or stop. If a cyclist approaches at speed, request they brake rather than swerve; braking is less likely to startle your horse. Use hand signals and keep your horse’s head turned slightly toward you so you can monitor reactions. In group rides, have one rider at the front and one at the back to manage encounters; statistics from trail managers show group communication reduces conflict incidents by a large margin.
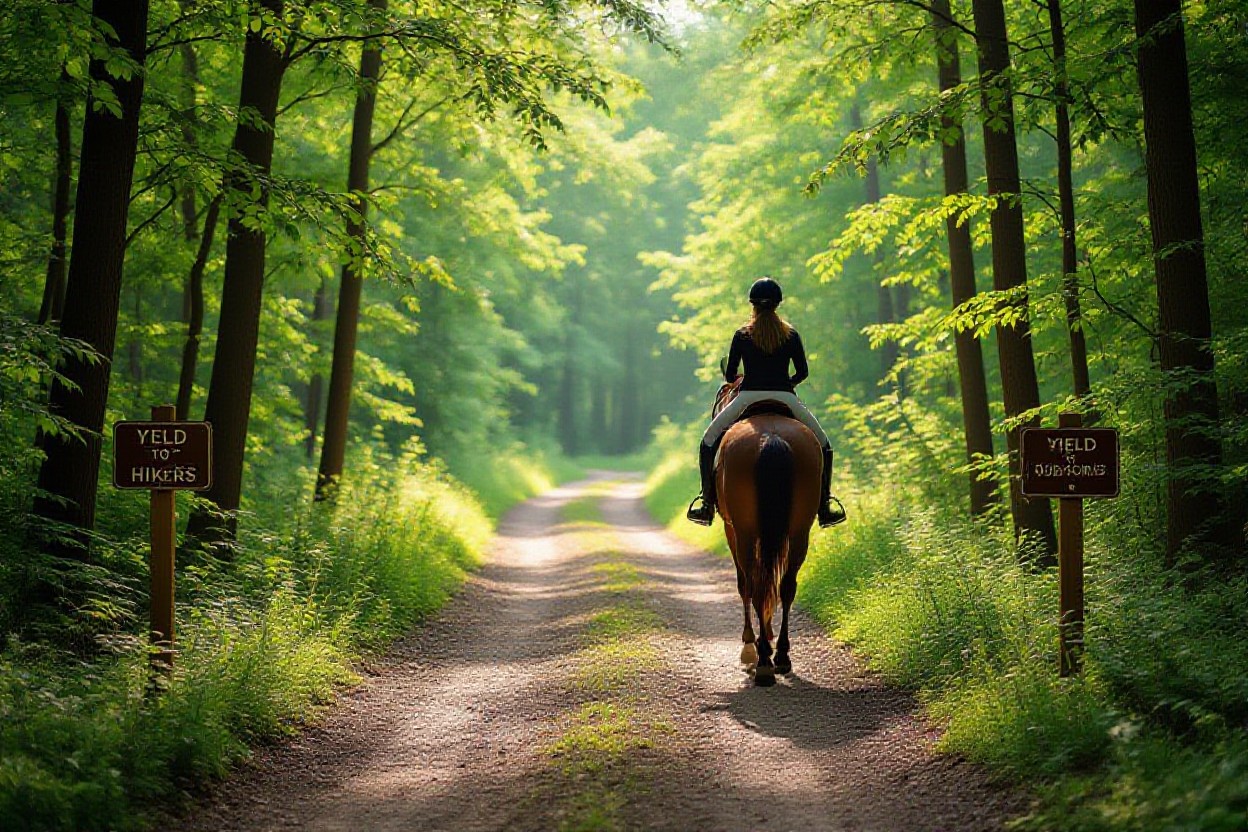
Respecting the Needs of Other Users
Give extra space to hikers, runners, and people with dogs or mobility aids—aim for at least 6 feet (2 meters) when possible and slow to a walk when passing. Control your horse and avoid riding through packed groups; if someone waves you through, proceed slowly and thank them. Yield to trail maintenance crews and follow any posted temporary restrictions to keep the route open for everyone.
When a dog is off-leash and approaching, stop and keep your horse quiet; call to the owner to leash the dog and position yourself between the animal and your horse if safe. For elderly or visually impaired users with poles or canes, give extra clearance and, if necessary, dismount to allow a comfortable passage. Positive interactions—like offering a brief greeting and steadying your horse—build trust in shared spaces and reduce complaints that lead land managers to restrict equestrian access in overused areas.
Wildlife Encounters
Observing Wildlife Safely
Keep a respectful distance and control your horse: do not approach or feed wild animals. Stay at least 100 feet (30 m) from large mammals like elk, moose, and bears, and allow smaller animals 25–50 feet. If an animal is stationary, halt, speak softly, and let it move away on its own; if it shows agitation—stomping, hair raised, or vocalizing—slowly back away and give more space. Your calm handling reduces spooking and aligns with this trail riding etiquette guide.
Understanding Animal Behavior
Give animals room and time to react; many species display warning signals before an aggressive move. For example, moose during rut (typically September–October) may display ears back and charging behavior, while bears with cubs behave unpredictably. Your awareness of seasonal patterns and clear, steady cues to your horse prevents incidents.
Study specific local wildlife: know whether you’re riding in mule deer country, elk habitat, or areas with black bears or cougars. Watch for seasonal signs—fawning in spring and rut in autumn—and adjust your route and timing accordingly. Anticipate herd flight behavior: a deer bounding across the trail can trigger a spook, so shorten your reins and pre-warn your horse with soft voice or cluck. If a predator is nearby, keep your group together, stay mounted if safe, and move calmly to an open area; avoid running, which can escalate pursuit. These practical steps cut risk and support the broader trail riding etiquette guide goals.
Minimizing Environmental Impact
Stay on designated trails and avoid widening paths; off-trail travel accelerates erosion and damages vegetation. Pack out all trash, scatter manure off the trail and away from water, and use established mounting blocks or corrals when stopping. Your choices help protect habitat and keep trails open for everyone.
Plan stops at approved areas and limit grazing to designated zones to prevent overuse. At stream crossings, use existing fords to prevent bank collapse; repeated new crossings can increase sedimentation and harm aquatic life. In popular systems, a single rider wandering 5–10 feet off-trail can create persistent braids that double maintenance needs. Follow local closures and seasonal restrictions—many agencies close sensitive areas during nesting or calving seasons—to reduce disturbance and support long-term trail access.
Environmental Ethics
Respecting Trail Integrity
You keep trails usable for everyone by staying on the designated route, riding single-file on narrow sections under 1.5 meters (5 feet), and avoiding shortcuts that widen tread. When the ground is saturated, wait 24–48 hours or choose a different route—wet trails can rut and erode exponentially faster. Carry a small brush or hoof pick to remove excess mud from your horse before leaving sensitive trailheads to limit transferred sediment and seed.
Leave No Trace Principles
You follow the seven Leave No Trace principles: plan ahead, travel on durable surfaces, dispose of waste properly, leave what you find, minimize campfire impacts, respect wildlife, and be considerate of others. For packstock and horses specifically, scatter or remove manure and forage at least 200 feet (60 m) from water, camps, and trailheads to reduce nutrient loading and invasive seed spread.
In practice, that means carrying a manure fork or small bag in high-use or wilderness areas and using established corrals or vault toilets where provided. Many federal and state lands require certified weed-free hay within park boundaries—Yellowstone and several National Forests enforce this to prevent invasive grasses. If you ride in alpine or heavily used areas, pack out manure from parking areas and campsites or spread it thinly on durable surfaces well away from trails; this lowers pathogen and weed transfer and shortens recovery time for trampled vegetation.
Protecting Sensitive Areas
You avoid meadows, wetlands, and riparian zones whenever possible, using bridges and hardened crossings. Seasonal closures—often posted March–June for nesting or calving—are enforced for a reason: trampling and hoof compaction can alter drainage and vegetation for years. Stay at least 200 feet (60 m) from water and nesting sites when passing.
Where crossing is unavoidable, dismount and lead your horse in single file to minimize hoof shear and channeling; studies and land manager reports show that a single set of hooves across a wet meadow causes far less lasting damage than multiple passes or galloping. Local land-management plans frequently reroute trails around sensitive habitats—check trailhead boards and park websites before you ride. When you encounter post-and-rope closures, treat them as legal barriers: they protect nesting birds, rare plants, and restored streams, and violating them can trigger fines and long recovery timelines for the habitat.
Handling Emergencies on the Trail
Preparing for Potential Situations
Pack a compact kit and plan: carry a rider first-aid kit, a basic equine kit (hoof pick, spare halter and 10–12 ft lead rope, vet wrap), a map/compass or GPS, and a fully charged phone plus a portable battery (10,000 mAh). Tell someone your route and ETA and ride with at least one partner when possible. Check weather and trail reports 24 hours ahead, and scout water and exit points so you can act fast if conditions change.
First Aid for Riders and Horses
For riders, stop heavy bleeding with direct pressure and apply a sterile dressing; immobilize suspected fractures and keep the rider warm and still while you call for help. For horses, control external bleeding with pressure and a clean bandage, then quickly assess vitals: normal temp ~99–101.5°F, heart rate ~28–44 bpm, respiratory rate ~8–16 breaths/min, and capillary refill under 2 seconds. If you see colic signs (pawing, rolling) or abnormal vitals, seek veterinary help.
Stock your equine kit with adhesive tape, sterile gauze, roll cotton, vet wrap, a hoof boot or spare shoeing solution, poultice, and a twitch or halter with padding. Learn to take a digital pulse at the fetlock and check gum color/capillary refill; press the gum for 2 seconds and time the return. When controlling bleeding, maintain steady pressure for 5–10 minutes before rechecking; avoid moving a horse with suspected fracture—stabilize and call your vet for evacuation options.
Emergency Communication Methods
Do not rely solely on cell signal; carry a satellite messenger like a Garmin inReach or SPOT device for two-way messaging and SOS. Pre-program 911, local ranger stations, and your emergency contacts into devices, and bring a whistle (three short blasts = distress) and a reflective mirror for visual signaling. Keep devices in waterproof cases and test them before each trip.
Practice sending an SOS and sharing GPS coordinates so you can give precise location (decimal degrees or UTM) under stress; pack a map with trail junction names or mile markers to quote rescuers. Conserve battery by turning off nonnecessary features, and carry a fully charged 10,000 mAh power bank. Offline mapping apps and marked waypoints on a handheld GPS can cut search time from hours to minutes during evacuations.
Trail Maintenance
The Importance of Trail Preservation
As part of this trail riding etiquette guide, you must limit damage by staying on designated tread, avoiding soft or muddy sections, and riding single file where the trail narrows. Horse hooves can create deep ruts and accelerated erosion after heavy rain, turning a manageable route into an impassable hazard in one season. Follow Leave No Trace principles: pack out manure in high-use trailheads, dismount to cross sensitive areas, and avoid widening switchbacks.
Participating in Local Trail Care
You should join volunteer workdays run by land managers or equestrian clubs—these typically last 3–4 hours and focus on brush clearing, waterbar installation, and tread repair. Bring gloves, sturdy boots, a sturdy saw or loppers, and eye protection; chainsaws and powered equipment should only be used by certified operators. Small crews of 6–12 people commonly clear 0.5–1 mile of single-track in a day.
Find events on your forest district or state park website, local trail association pages, or Facebook groups, then sign waivers and RSVP. Tasks range from benchcutting and building rock drains to resetting trail markers; basic tools you might use include a Pulaski, McLeod, loppers, and folding saw. If you bring a horse, tie in a designated area off the trail and avoid unsaddling on the tread. Log your volunteer hours—many agencies use them for grant funding and maintenance planning.
Reporting and Addressing Trail Issues
When you spot a hazard, document it immediately with photos, a waypoint/GPS coordinate, trail name, and mile marker. Report urgent threats—downed trees blocking the entire trail, undermined bridges, or large ruts that can injure a horse—to park staff or rangers by phone; non-urgent issues go through online condition-report forms or apps like Trailforks/AllTrails. Clear, time-stamped evidence speeds repairs and protects other riders.
When reporting, include: trail name, direction of travel, exact location (GPS or milepost), size/type of obstruction, and whether horses are directly threatened—e.g., “10-inch oak across tread at mile 2.3, blocks passage.” If a hazard is small (thin branches), and it’s safe to do so, you can clear it with hand tools; avoid moving large logs or unstable earth. Flag the site with biodegradable tape if allowed, follow up with the local trail association for repair status, and volunteer to help if heavy equipment or trail engineering is required for durable fixes.
Rights and Responsibilities of Trail Riders
Understanding Legal Aspects
You must follow landowner rules, federal and state regulations, and any permit conditions when you ride; violations can lead to fines or revoked access. Know that liability for damage or injury often falls on you or your party if negligence is involved, so carry proof of permission or a permit when required, keep your horse under control, and obey posted closures and signage to avoid penalties and protect access for everyone.
Following Local Regulations
You should check local rules before every ride: many state parks limit horses to designated trails, municipal parks may ban riding, and some National Forest units require a free or paid permit—fees commonly range from $10–$25. Observe seasonal closures for nesting birds or wet-season protections, comply with leash rules for dogs, and respect posted group-size limits to prevent trail damage and maintain access.
Use official sources—land manager websites, park brochures, or ranger stations—to confirm specifics; apps like AllTrails or state park maps can help but always verify with the managing agency. If a trail posts a closure from, say, March through June for breeding or surface repairs, adjust your route or ride a different area; carrying a screenshot of permit info or a park confirmation helps if questioned by rangers.
Responsibilities to the Community
You are expected to act as an ambassador: yield politely, announce passes early (e.g., call “passing on your left” at ~15–20 feet), and control your horse to minimize spooking others. Pick up litter, avoid riding on muddy trails to prevent erosion, and manage manure at trailheads and high-use spots—leaving the trail cleaner than you found it keeps riding privileges open.
Consider volunteering for trail maintenance or local equestrian club events; crews typically spend 2–4 hour sessions clearing drains, repairing tread, and installing water bars to reduce washouts. When you report hazards or broken signs to land managers, include trail name, GPS coordinates, and photos—this concrete information speeds repairs and demonstrates that riders are responsible stewards of shared trails.
Educating New Riders
Onboarding New Trail Users
You should run a structured orientation: a 30–60 minute prep covering tack checks, basic signals, mounting/dismounting, and emergency stops, followed by a short guided ride. Use a 1:4 instructor-to-beginner ratio when possible, show common hazards (off-leash dogs, sudden ATV noise) and teach the 7 Leave No Trace principles so your new riders leave trails intact and safe.
Sharing Knowledge About Etiquette
You should model passing procedures and verbal cues, provide a one-page checklist, and demonstrate keeping at least a horse length (8–10 ft) when passing other users. Include the phrase “trail riding etiquette guide” on handouts and signage so rules are consistent across outings and easier for beginners to recall.
Expand learning with short drills: run 10-minute practice passes at the walk, role-play encounters with cyclists and dogs, and use video clips of real trail scenarios. Pair demonstrations with local rules—post trail-specific right-of-way examples—and give each rider a laminated quick-reference card covering speed control, passing etiquette, and emergency dismount procedures.
Promoting Positive Experiences
You should organize small, skill-focused rides (4–6 riders) that pair novices with experienced mentors, limit beginner rides to 1.5–2 hours, and include a 10-minute pre-ride briefing and post-ride debrief to reinforce good behavior. Highlighting positive actions with public praise builds confidence and community.
Go further by setting clear, measurable goals—such as completing three safe passes or 15 minutes of controlled posting trot—and tracking progress across rides. Offer constructive feedback, celebrate milestones with simple certificates or social posts, and rotate mentors so new riders experience varied styles and local trail conditions.
Connecting with Other Trail Riders
Building a Community of Riders
Organize regular meetups, online groups, or trail workdays so you and others can share local knowledge; many successful groups run weekly or monthly rides with 4–12 riders to keep things manageable. Set clear ride rules up front—pace, passing signals, emergency contacts—and post them in a shared thread so everyone arrives informed. Volunteering for trail maintenance bonds riders and protects access while teaching new riders practical skills.
Engaging with Riding Clubs and Organizations
Join established clubs like local chapters or national groups to access organized rides, clinics, and advocacy work; typical membership fees range from about $25–$75/year, and clubs often offer group insurance for events. You’ll gain training opportunities, trail-advocacy updates, and a pipeline to experienced mentors who can guide safe group riding practices aligned with this trail riding etiquette guide.
Look for clubs on Facebook, Meetup, and at riding centers; attend a meeting or volunteer at a trail maintenance day to evaluate culture and safety standards. Many clubs log hundreds of volunteer hours annually and require proof of horse health—ask about Coggins and vaccinations before joining rides. Also check whether events use waivers and if organizers provide emergency plans so you know how liability and response are handled.
Networking through Events and Rides
Use charity rides, endurance events, and local club outings to expand contacts—events can range from intimate 10–20 rider clinics to weekend rides of 50–150 participants. Exchange contact details, join post-ride chats, and ride with different groups to learn varied trail etiquette and techniques. Keep interactions professional and safety-focused to build a reliable network.
Arrive early to tack up and introduce yourself, carry a concise emergency card with your medical and horse-contact info, and offer to swap trailer space or gear. Follow event rules, verify that horses meet health requirements, and avoid alcohol before riding. Afterward, send a quick thank-you or add new contacts to a group chat to coordinate future rides—consistent follow-up turns single encounters into lasting riding partnerships.
Special Considerations for Specific Riders
Seniors and Mobility Impaired Riders
You should prioritize routes with firm footing, gentle grades and easy access to parking and rest areas; choose trails under 2 miles or with regular exit points. Use a mounting block, tack with grab handles, and ride with a partner or guide so someone can assist if you have balance or dismounting issues. Carry medical ID and a phone in a waterproof case, and alert group leaders to any mobility limitations before the ride.
Young or Inexperienced Riders
You must start on quiet, flat trails and ride with an experienced adult or instructor; limit initial rides to 15–30 minutes and avoid steep or narrow singletrack. Use a properly fitted helmet and tack, ride at the walk or slow trot, and keep horses that are calm and used to traffic. Expect to lead or be led until you handle basic steering, stopping and emergency mounting confidently.
Build progression with specific milestones: schedule 3–5 supervised rides before independent trail attempts, focus on repeated walk-trot transitions and simple obstacle exposure (gates, dogs, hikers), and practice emergency stops in a safe arena. You should ride with a 1:4 instructor-to-student ratio when possible, gradually increase distance by 10–20% per week, and log incidents—if a horse spooks two rides in a row under similar stimuli, swap to a steadier mount.
Advanced Riders and Performance Training
You can integrate performance work off main trails but must prioritize shared-use safety: schedule interval canter sets only on wide, low-traffic corridors, notify groups before faster work, and avoid galloping where visibility is under 200 meters. Respect speed-control rules, carry a whistle or radio, and use turnout areas or designated training loops rather than multi-use singletrack.
- Plan sessions at low-traffic times (early morning, weekday).
- Always brief your group: planned speed, distance, signals.
- Use a lead vehicle or spotters on blind corners when doing fast work.
Performance vs. Trail Safety
| Training Focus | Trail Application |
| Interval canter sets | Use on wide service roads with ≥3 m clear width and low user density |
| Desensitization drills | Perform near trailheads or designated warm-up areas, not on narrow trails |
| Conditioning hill work | Choose stable, wide climbs and notify other users before sessions |
When you advance training on trails, quantify risk: limit high-speed efforts to 2–4 minutes per repetition with full recovery walk intervals, cap total fastwork on-trail to one session per week, and alternate with arena or private-property sessions to reduce impact on public trails. Track horse fitness with simple metrics—heart rate recovery within 8–10 minutes to baseline after a session—and rotate mounts so no single horse accumulates excessive wear.
- Document session plan and emergency procedures with your group.
- Carry spares: bridle rein, safety stirrup, first-aid kit for horse and rider.
- Avoid intense training within 48 hours of predicted severe weather or soft trail conditions.
Advanced Rider Checklist
| Item | Why It Matters |
| Pre-ride route recon | Identifies safe stretches for speed work and potential hazards |
| Spotters/ride support | Maintain sight lines and warn oncoming users, reducing collision risk |
| Post-ride cooldown protocol | Prevents injury and reduces trail erosion from overheated horses |
Final Words
With this in mind, you can use this trail riding etiquette guide as your roadmap to safe, respectful, and sustainable riding; apply right-of-way, passing, group and multi-use rules, control your speed, respond calmly to wildlife, and support trail maintenance so your actions protect trails, riders, and the riding community for seasons to come.
FAQ
Q: What are the fundamental right-of-way and passing rules I should follow on multi-use trails?
A: A clear, consistent approach to right-of-way and passing keeps everyone safe and preserves goodwill between trail users. The baseline hierarchy on most multi-use trails is that horseback riders generally yield to no one because horses are large, easily spooked animals; cyclists yield to hikers and equestrians; hikers yield to equestrians when there is potential for startling a horse. Local regulations can vary, so always obey posted signs and land manager rules. Key practices:
– Announce your presence early and politely: call out “Horse and rider” or “Hello” from a distance to alert cyclists, hikers and dogs. Use a calm voice so your horse hears a human sound and doesn’t react to a sudden shout.
– Slow and stop when meeting others: reduce speed to a walk and stop if space is tight or if approaching downhill traffic. Allow a safe passing distance (several feet) and ensure both the horse and the other party are stationary when necessary.
– Passing etiquette when you are the overtaking party: if you are passing hikers or a slower rider, call your intent well in advance (“Passing on your left”), wait for acknowledgement, and pass wide and slowly. If you are being passed, keep your horse working straight and avoid sudden movements.
– Cyclist-specific guidance: cyclists should dismount or walk bikes past horses if the horse is nervous; they should also give an audible warning well before the pass and slow to a walking pace. Equestrians should indicate whether they prefer the cyclist to dismount or pass slowly.
– Single-file and spacing: on narrow trails, ride single-file; maintain spacing to allow the horse room to react (a few horse-lengths in non-technical terrain). When approaching blind corners, slow to a walk and call out to warn of your presence.
– Gates, bridges and narrow structures: dismount if the structure is slick or the horse is unsure. Hold the horse on the downhill side if possible. When opening gates, close them behind you to prevent loose animals or other users from entering sensitive areas.
– Greeting other users: a brief friendly greeting is often enough. Avoid loud or high-energy greetings that can startle a horse. When meeting dog walkers, request the dog be leashed and controlled; a loose dog should be called back and secured before you proceed.
– Environmental and safety considerations: avoid riding wide around obstacles to prevent trail widening. On wet or muddy trails, reduce traffic and consider an alternate route to minimize erosion. Follow posted speed limits and slow in areas with reduced visibility, near wildlife, livestock, or children.
Applying these practical behaviors from this trail riding etiquette guide reduces surprise encounters, keeps horses calm, and supports shared use of trails for everyone.
Q: How should I manage group rides, trail maintenance responsibilities, and emergency protocols before, during, and after a ride?
A: Good group ride management and preparedness reduce incidents and improve outcomes when problems occur. Pre-ride planning:
– Plan and brief: select routes that match the least-experienced rider and least-surefooted horse. Conduct a pre-ride briefing covering expected pace, spacing, hand signals, regroup points, emergency plan, and how to handle encounters with other users and wildlife.
– Roles and communication: assign a leader and a sweep/tail person who stays at the back. Carry maps, a route plan left with a responsible person at home, and at least one charged cell phone, plus a backup (satellite messenger in remote areas).
– Gear and supplies: each rider should carry a basic first-aid kit for riders and horses, tools for tack adjustment, a multi-tool or knife, water, snacks, and weather-appropriate clothing. Pack a small repair kit for tack and a rope for potential entanglements.
During the ride:
– Single-file, pace control, and spacing: maintain single-file on narrow trails; control speed to suit conditions and the least-experienced rider. Use cadence warnings (e.g., “Trot left, hold”) so everyone is prepared for gait changes.
– Passing within the group: the leader coordinates single-file passing of obstacles and other users; pass only when signaled and safe. Close gaps to keep the group compact on technical segments; widen spacing on open terrain to reduce the chance of domino falls.
– Trail maintenance etiquette while riding: avoid widening trails; step over sensitive vegetation; cross water at durable crossings and minimize the number of horses crossing the same spot when banks are fragile. Remove or report significant hazards (downed trees, erosion) to land managers. Pack out trash and any non-biodegradable items.
Emergency protocols:
– Immediate accident response: stop the group and secure horses. If a rider falls, ensure the horse is contained and calm. Check the rider for consciousness, breathing and major bleeding. Apply first aid while calling for help. If the fallen rider is trapped by a horse or tack, prioritize freeing them safely—cutting tack may be necessary.
– Communication and evacuation: if the incident requires professional rescue, call emergency services and provide clear coordinates or landmarks. If cell coverage is poor, use a satellite device or send a runner with written directions to the nearest access point. Stabilize the injured person and keep them warm until help arrives.
– Lost or separated riders: set a meeting point during the pre-ride briefing. If someone is missing, the leader stays with the horses while designated searchers look along the route. Avoid scattering the group widely.
Post-ride actions:
– Report incidents and trail problems to land managers so they can address hazards and closures. Share lessons learned with the group to improve future safety.
– Maintain community stewardship: volunteer for trail maintenance days, report erosion or signage needs, and support local trail organizations to keep riding areas open and sustainable.
Q: What are the best practices for handling wildlife encounters, aggressive animals, and contentious situations while following Leave No Trace principles?
A: Interacting responsibly with wildlife and other trail users protects ecosystems and reduces dangerous incidents. Wildlife encounters:
– Give wildlife space: slow to a stop, keep horses steady, and allow wildlife to move away. Do not approach, feed, or attempt to photograph animals at close range. Sudden movements can trigger flight or defensive behavior.
– Species-specific guidance: for deer and elk, maintain distance and avoid approaching during rut or calving season when animals are more defensive. For moose, back away slowly and put a large obstacle (trees, vehicles) between you if the animal approaches; do not turn your back or run. For bears, make noise while moving through bear country, carry bear spray in an accessible holster, and keep a safe distance; if a bear approaches, group together and be as large and assertive as necessary.
– Keep dogs under control: dogs should be leashed or reliably recalled. A loose dog can chase or harass wildlife and spook horses, creating hazard chains.
Aggressive animals and confrontations:
– Aggressive dogs: stop, hold your horse, and keep it facing the dog so it can see what’s happening. If the dog is attacking or charging, dismount only if safe, use a voice command to call the dog’s owner, and use a deterrent (whistle, horn, or a safe, legal spray) if the dog continues. Note owner information and report repeated problems to land managers or local animal control.
– Unpredictable horses or riders: if another rider’s horse is acting dangerously, maintain distance, signal the concern calmly, and pull back to a safe distance. If the situation escalates, exit the area and report the behavior to the ride leader or land manager.
– De-escalating human conflict: stay calm, keep voices low, and avoid confrontational body language. Explain your actions and adherence to trail rules; if the conflict cannot be resolved, withdraw and report the incident to authorities or land managers with details and, if possible, photos.
Leave No Trace and environmental stewardship:
– Plan ahead and prepare: choose trails appropriate to horse traffic and current conditions. Check seasonal closures and fire restrictions before departing.
– Travel and camp on durable surfaces: stay on established trails to avoid trampling vegetation. Avoid crossing fragile wet areas; if crossing is necessary, use the most durable point and minimize the number of crossings to prevent streambank damage.
– Dispose of waste properly: pack out all trash and gear. Scatter manure away from trailheads and water sources when possible; follow local guidance on manure removal in high-use areas.
– Minimize campfire impact and respect wildlife: use existing fire rings where allowed, keep fires small, and never leave fires unattended. Store feed and garbage securely.
Seasonal considerations and wildlife timing:
– Avoid sensitive periods such as calving, nesting, or migration corridors. Many areas have seasonal closures to protect wildlife—adhere to those restrictions.
– Adjust equipment for conditions: use studs or hoof boots on ice, avoid trails during thaw/mud season to prevent erosion, and carry extra water in hot weather to prevent dehydration for horse and rider.
Combining courteous behavior, readiness for wildlife encounters, and Leave No Trace practices from this trail riding etiquette guide protects natural resources and sustains safe, positive trail access for equestrians and other users.