Many new aquarium owners feel overwhelmed by maintenance; in this fish tank cleaning for beginners guide you’ll learn a simple, weekly routine, important equipment, water change and filter care to keep your aquarium healthy. You’ll avoid deadly mistakes—never use soap or replace all the water at once—and follow safe steps like dechlorinating replacement water and testing for ammonia. With steady practice you’ll enjoy clear water and thriving fish while saving time and stress.
Key Takeaways:
- fish tank cleaning for beginners: Adopt a simple weekly routine—test water, perform a 10–25% dechlorinated water change, gravel-vacuum substrate, wipe glass, and inspect equipment; budget 30–60 minutes depending on tank size and stocking.
- Keep filters and algae under control—rinse filter media in tank water (not tap) to preserve beneficial bacteria, clean or replace pre-filters monthly, use an algae scraper and manage lighting, and test ammonia/nitrite/nitrate weekly to prevent cloudy water.
- Avoid common mistakes and pick the right tank size—don’t overclean, avoid large simultaneous water changes, prevent overfeeding/overstocking, and start with a larger, stable tank if possible to make maintenance easier and reduce problems.
Understanding Freshwater and Saltwater Environments
Differences Between Freshwater and Saltwater Tanks
You’ll notice freshwater tanks run at about 0 ppt salinity and are generally more forgiving, while saltwater systems require 30–35 ppt (specific gravity ~1.023–1.026), a protein skimmer, and live rock for biological filtration. Freshwater setups often start under $100 for small tanks; reef-capable marine systems typically exceed $500. Maintenance frequency differs too: both need weekly checks, but saltwater demands stricter chemistry stability and tighter monitoring of salinity, calcium, and alkalinity.
Choosing the Right Environment for Your Fish
Pick based on your budget, time, and species goals: if you want low-cost, lower-maintenance learning you’ll likely choose freshwater; if you aim for colorful reef fish or corals you must commit to higher costs, stronger lighting, and more frequent testing. Also consider tank size—many marine species require larger volumes to stay healthy.
Practically, if you can dedicate ~3–5 hours weekly and have a $100–300 startup budget, start with freshwater community fish like tetras or guppies; if you can invest >$500, want reef aesthetics, and will test water 2–3 times weekly, marine is viable. Pay attention to equipment: saltwater setups need a protein skimmer, hydrometer/refractometer, and often a sump, while freshwater thrives with a reliable filter, heater, and regular 10–20% weekly water changes. Wrong salinity or rushed cycling can cause massive fish loss, so plan acclimation and cycling time accordingly.
Common Fish Species and Their Requirements
For freshwater, consider hardy choices: neon tetras (schooling, 6–10+), guppies and platies (livebearers), bettas (solitary, 5+ gal), and corydoras catfish (bottom-dwelling, groups of 4–6). Marine starters include clownfish (Amphiprion ocellaris), blennies, and small gobies; larger species like tangs need 75+ gallons. Temperature ranges usually sit around 24–27°C (75–80°F) for tropicals.
Stocking rules matter: the old “1 inch of fish per gallon” is overly simplistic—body shape, bioload, and activity alter needs. For example, 10 neon tetras do well in a 10–20 gal community tank, but a single angelfish prefers 20+ gallons. Match pH and hardness to species: community tetras like pH 6.5–7.5, African cichlids want 7.8–8.6, and marine fish need stable salinity at specific gravity 1.023–1.026. Overcrowding and inadequate filtration lead to ammonia/nitrite spikes and stress, so size your filter and tank for the fish’s true bioload.
Essential Cleaning Equipment
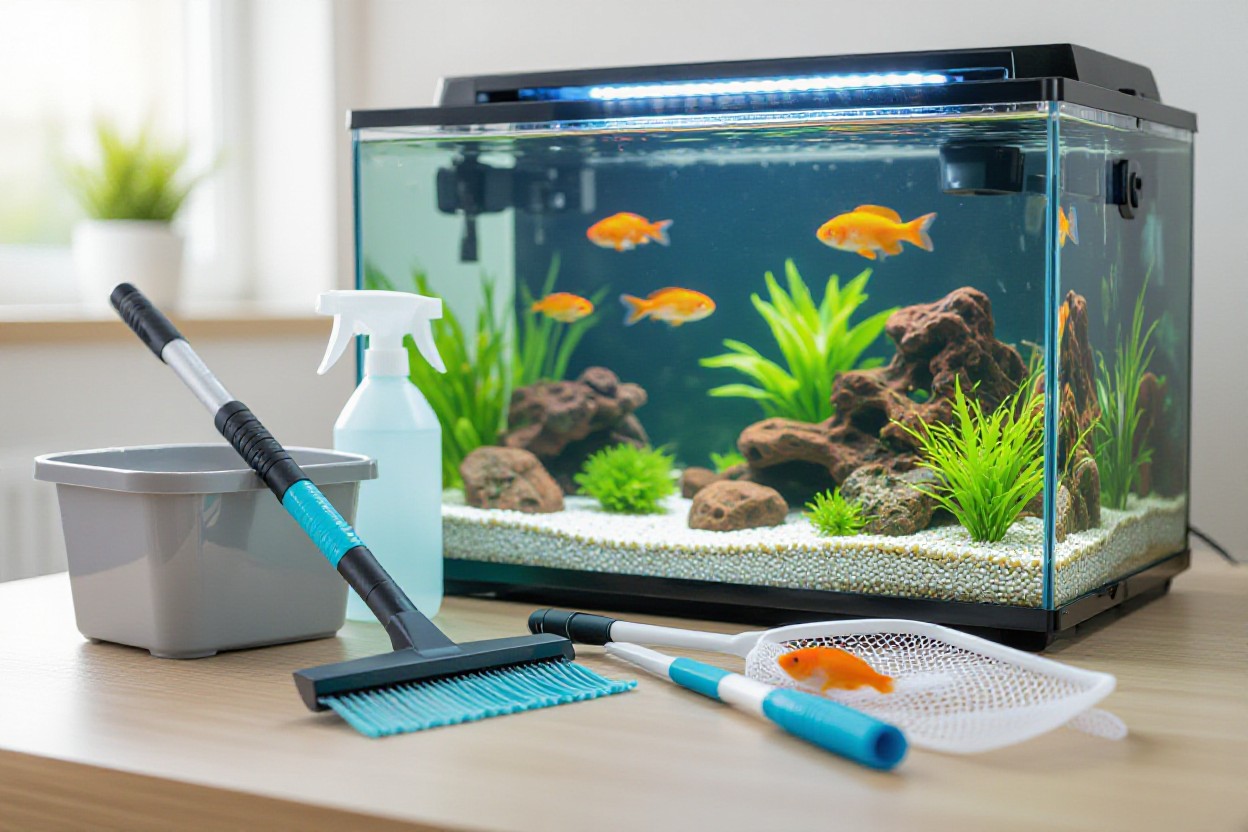
Basic Cleaning Supplies
For fish tank cleaning for beginners, equip yourself with a dedicated 3–5 gallon bucket, a soft aquarium-safe sponge or pad, a nylon fish net, a gravel vacuum/siphon, replacement filter media, and a bottle of water conditioner. You should keep a clean towel and a pair of rubber gloves for spills. Use only tools reserved for the tank to avoid contamination; household soaps and detergents are dangerous to fish.
Special Tools for Fish Tank Maintenance
Consider adding a magnetic algae scraper (choose one rated for your glass or acrylic thickness), a long-reach gravel vacuum head for deep tanks, an aquarium siphon pump or a Python-style water changer for faster water changes, and small brushes or airline-cleaning needles for tight spots. Magnetic scrapers and gravel vacuums are especially helpful for saving time and reducing stress on fish during maintenance.
Pick tools based on tank size and material: for example, magnetic scrapers work well on glass up to ~12 mm thick but can clatter on acrylic—use a soft pad instead. A Python-style hose can remove and return water directly to a sink, cutting a 20–30 minute manual change down to 5–10 minutes for a 20–40 gallon tank. Always label these tools for aquarium use only to avoid cross-contamination.
Water Testing Kits
Start with a liquid master test kit that measures pH, ammonia, nitrite, and nitrate; many beginner kits also include GH/KH. You should aim for ammonia 0 ppm, nitrite 0 ppm, and nitrate below about 20–40 ppm. Test strips are faster but less accurate—liquid reagents give reliable color comparisons that matter when troubleshooting.
Test your water at least once weekly and always before and after major water changes, after adding new fish, or if water looks cloudy. If ammonia or nitrite rises above 0 ppm, perform an immediate 25–50% water change and add a conditioner that detoxifies ammonia while you locate the source. For pH swings, use a buffered water change or adjust slowly; abrupt shifts stress fish. Consider a digital pH meter for tanks where pH control is critical.
Weekly Cleaning Routine (Step-by-Step)
Weekly Checklist
| Step | What to do |
| Checking Water Parameters | Test ammonia, nitrite, nitrate, pH and temperature; log results and compare to target ranges for your species. |
| Performing Water Changes | Remove 20–30% of water (higher for small or crowded tanks), vacuum gravel, replace with conditioned water at matching temp. |
| Cleaning Filters & Decorations | Rinse mechanical media in tank water, replace chemical media as needed, scrub decorations with aquarium-safe tools—no soap. |
| Inspecting Equipment | Check heater accuracy, filter flow, air pumps, tubing, seals and lights; address noises, leaks, or falling temps immediately. |
Checking Water Parameters
Once a week you should test for ammonia (0 ppm), nitrite (0 ppm), nitrate (ideally under 20–40 ppm), pH and temperature. Use a liquid test kit or reliable strips, log values, and compare them to your species’ needs (e.g., community tropical: pH 6.5–7.5, 24–27°C / 75–81°F). Sudden changes of >0.5 pH or any detectable ammonia/nitrite are danger signs that demand faster action.
Performing Water Changes
Aim for a regular 20–30% weekly water change; smaller tanks (<10 gal / 40 L) often need 30–50% weekly. Siphon gravel to remove detritus, match replacement water temperature within 1–2°C, and add a dechlorinator per product instructions. Avoid removing all biofilm or more than half the water at once.
When you start, turn off electrical devices that sit in the tank (heaters and filters usually stay running unless you need to clean them). For a 20% change on a 40 L tank remove 8 L using a siphon bucket—angle the vacuum to pull waste from the substrate without stirring up too much. If nitrate is above 40 ppm, increase to 40–50% and retest in 24–48 hours. Always condition tap water to neutralize chlorine/chloramine, and let replacement water sit or heat/adjust as needed so you don’t shock fish with a temperature swing.
Cleaning Filters and Decorations
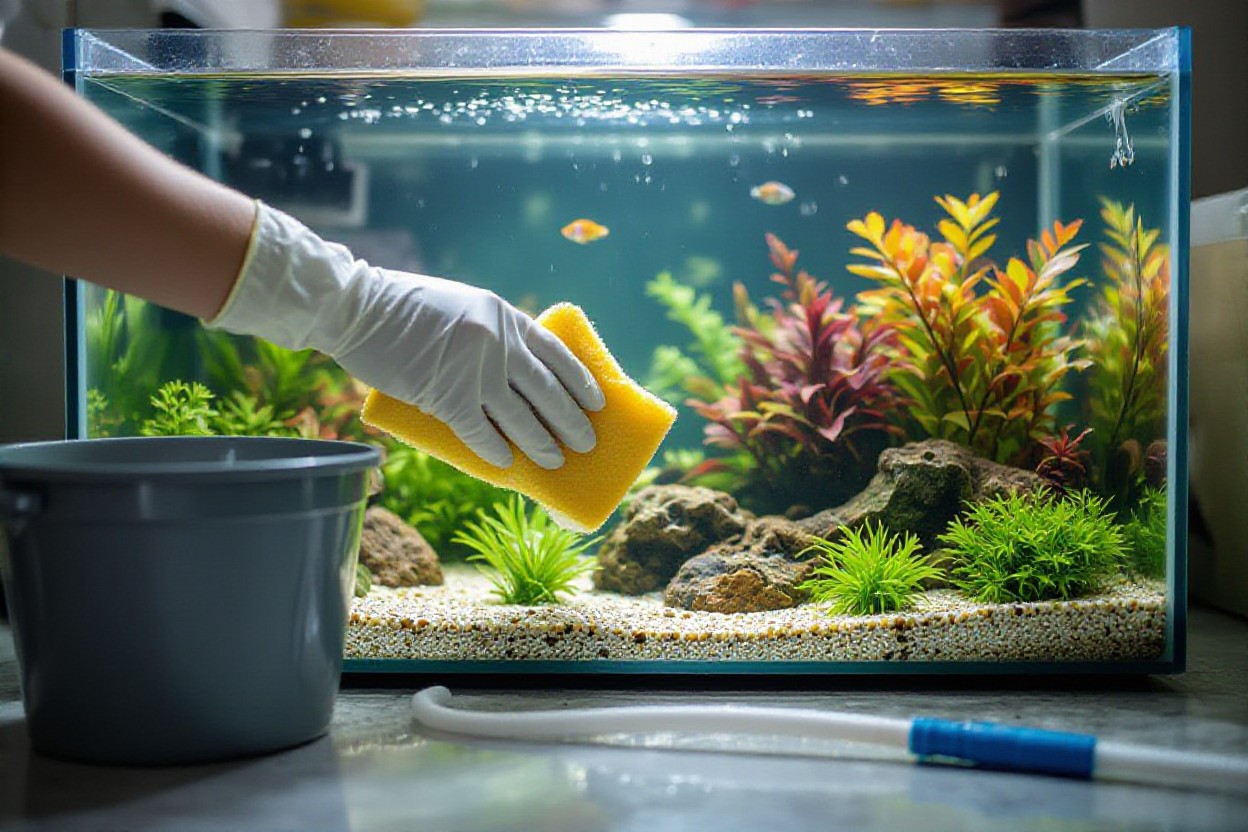
Clean mechanical filter media by rinsing in the bucket of removed tank water to preserve beneficial bacteria; replace carbon or chemical media monthly or per manufacturer. Scrub decorations and glass gently with an algae scraper or old toothbrush, and never use soap. If a decoration is heavily fouled, use a diluted bleach dip then neutralize fully before returning it to the tank.
Filter types matter: for HOB and canister units, rinse sponges and floss in tank water and swap only a portion of biological media at a time to keep nitrifying bacteria stable. Replace filter cartridges on a schedule—typically every 4–6 weeks for carbon, but change less often for biological media. For stubborn algae on driftwood or resin ornaments, soak for 10–15 minutes in a 1:10 bleach:water solution, rinse repeatedly, dechlorinate with sodium thiosulfate, then air-dry; mark this as a last-resort step and only do one batch at a time.
Inspecting Equipment
Check heater setpoint against an independent thermometer; confirm filter flow is steady, listen for unusual noises, and inspect tubing, seals and the canopy for leaks or frayed cords. Test air stones and check light timers, replacing bulbs every 6–12 months if you keep live plants. Any sudden loss of heat or filter flow is a danger to fish and must be fixed immediately.
Perform a quick functionality test: observe filter intake and outflow for reduced flow (a clogged impeller or dirty media often causes this), feel the heater casing for consistent warmth, and run a paper towel along seals to spot micro-leaks. For motion and oxygenation issues, swap in a spare air pump or temporary sponge filter while you service devices. Keep a small kit of spare parts (impeller, tubing, basic tools) so you can resolve common failures within hours rather than days.
Monthly Deep Cleaning Tasks
Cleaning the Tank Walls and Substrate
Start with a magnetic or plastic scraper to remove algae from the glass, then use a gravel vacuum to clean 1–2 inches into the substrate and remove trapped detritus; perform a 30–40% water change while you vacuum. Take decor out and scrub it in a bucket of tank water—never use soap—and siphon any cloudy water until it runs clear. For planted tanks, be gentle around roots and remove dead leaves to reduce nitrate buildup.
Thoroughly Cleaning Filters
Always unplug the filter before disassembly, then rinse mechanical media (sponges, floss) in a bucket of tank water to preserve beneficial bacteria; replace carbon and chemical media monthly, and swap cartridge-style media every 4–6 weeks. For canisters and HOBs, clean the impeller, tubing, and housings to restore flow; avoid tap water on bio-media to prevent chlorine kill-off.
When you clean filters, work quickly: keep bio-media submerged in tank water while rinsing to retain nitrifying colonies, and only replace a portion (about 20–30%) of the biological media at a time if you need to reduce bacterial loss. For canister filters, strip and reassemble following the manufacturer’s order—impeller first, then media—to avoid trapping air. If flow drops >20%, deep-clean the unit or inspect for clogs.
Inspecting and Replacing Equipment
Check heaters, thermometers, air pumps, lighting, and seals monthly: verify a heater’s set temperature with a separate probe thermometer, look for frayed cords or moisture near outlets, and ensure lights and timers work properly. Replace cracked heaters or brittle tubing immediately and keep a basic spare parts kit (heater, airline, impeller) on hand to avoid prolonged downtime.
Dig deeper by measuring heater accuracy (+/−1°C tolerance) and noting lamp hours—replace aquarium bulbs every 6–12 months for plant growth and color rendition. Also, swap airline tubing and worn O-rings annually, and log flow rates: a persistent drop of >20% usually indicates filter or pump servicing is needed. Prioritize safety—unplug devices before touching electrical components.
Consistency and Scheduling
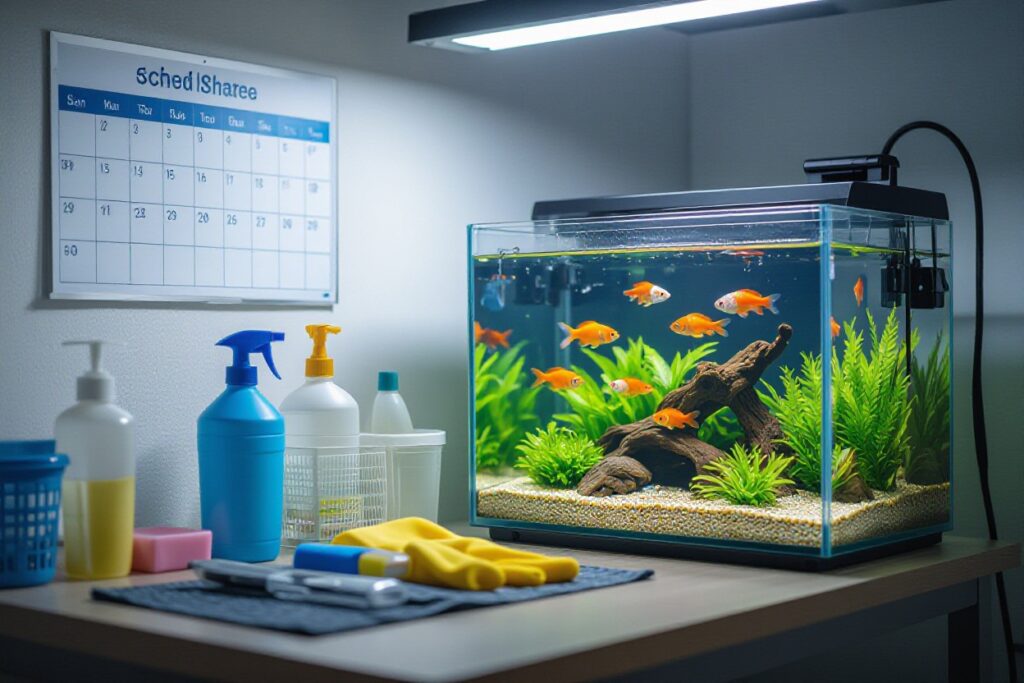
Creating a Cleaning Schedule
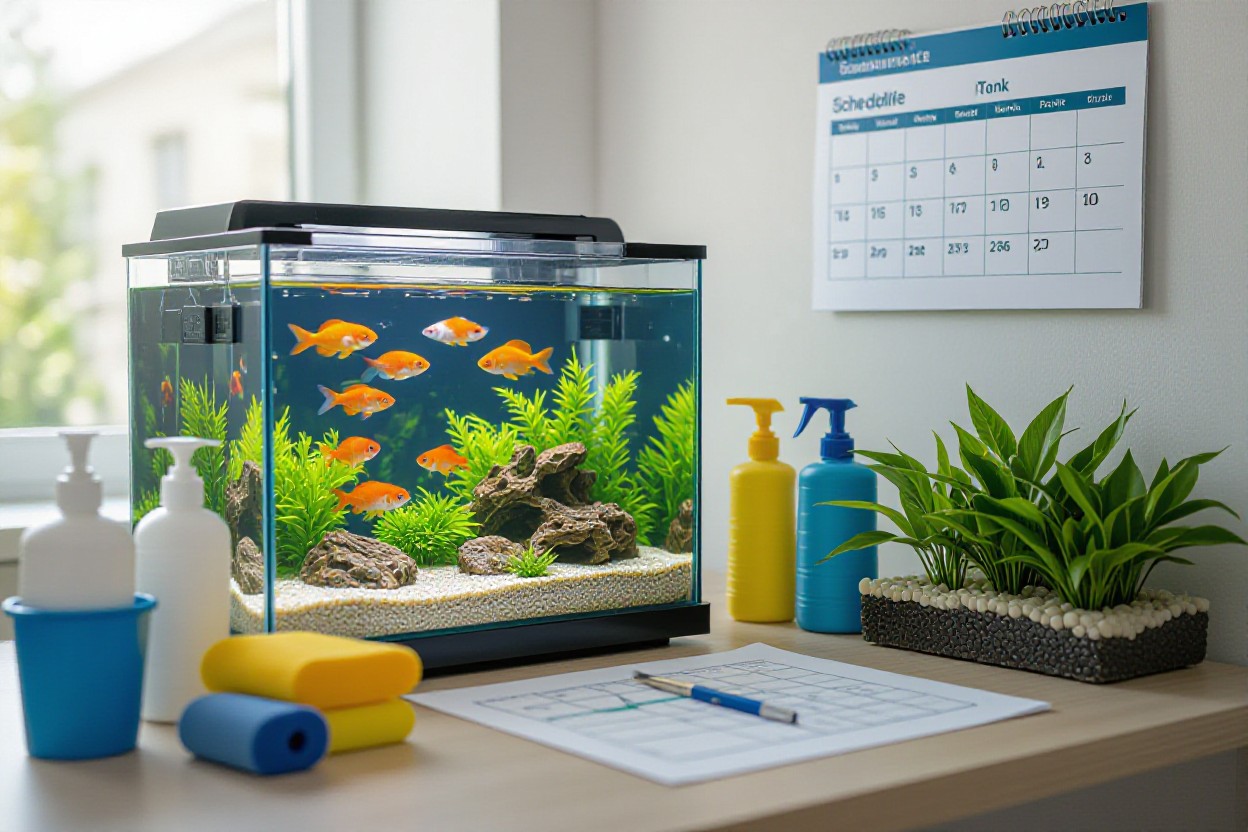
Set a predictable cadence: for most tanks, plan a weekly 10–20% water change, a 10–20 minute gravel vacuum, and a quick glass wipe; schedule a monthly filter media rinse and equipment check. Use days you can commit to—Saturday mornings or Wednesday evenings—and block 20–30 minutes. For fish tank cleaning for beginners, write the tasks on a calendar or set phone reminders to keep water parameters stable and avoid sudden, large changes that stress fish.
Building a Routine
Link small tasks to habits: each week test ammonia, nitrite, and nitrate, then do your water change and gravel siphon; every month replace 25% of filter media or rinse it in tank water. Start with a 15-minute weekly routine and expand as needed—80% of issues are prevented by consistent, short sessions. Keep supplies—bucket, siphon, algae scraper—within reach to shave minutes off the job.
For example, if you own a 20‑gallon community tank, schedule 10–15% water changes weekly and a deeper 30% change monthly. Many hobbyists find pairing quick tests with feeding time helps: test, then siphon 15–20 minutes while fish are fed. Store a log (paper or app) and note parameter trends; this turns cleaning into data-driven maintenance rather than guessing.
Adjusting Cleaning Frequency
Watch test results and fish behavior to fine-tune timing: increase water-change volume or frequency if nitrates climb above 40 ppm, algae returns quickly, or stocking density is high. Small tanks and heavily planted or breeding setups often need more frequent attention—example: a 5–10 gallon tank may need 30–50% weekly changes. Track changes and adapt rather than sticking rigidly to one plan.
If you detect ammonia or nitrite above 0 ppm, take immediate action—perform a 25–50% water change and retest within 24 hours. Conversely, if parameters are stable for three months and algae is minimal, you can reduce water-change volume slightly (e.g., from 20% to 10% weekly) while keeping weekly tests. Use that data-driven approach to prevent problems and keep maintenance efficient.
Tank Size Guidelines
Importance of Tank Size in Maintenance
Tank volume directly changes how often you clean and how stable water parameters stay: a 5–10 gallon nano accumulates waste fast so smaller tanks need water changes up to twice weekly, while 20–40+ gallon setups usually manage weekly 10–20% changes with standard filtration. You’ll spend less time firefighting algae and ammonia in larger tanks, so match filtration, heater, and stocking to volume to simplify your fish tank cleaning for beginners routine.
Recommended Sizes for Different Fish Species
Bettas do fine in 5–10 gallon tanks (10 gal preferred), small schooling tetras and guppies need at least 10–20 gallons for groups, angelfish prefer 20+ gallon tall tanks, dwarf cichlids 20–30 gal, fancy goldfish 30+ gal per fish and common goldfish 40+ gallons per fish, while larger plecos and large cichlids often require 55–75+ gallons.
Consider tank dimensions as well: surface area governs oxygen exchange, so long, shallow tanks suit active swimmers (danios), and tall tanks suit vertical species (angelfish). Choose a tank larger than the minimum—upgrading from 10 to 20 gallons often halves parameter swings—and always plan for adult sizes rather than juvenile length.
Understanding Stocking Limits
Forget the one-inch-per-gallon rule as a hard law; stocking depends on adult size, waste production, filtration, and maintenance. Use stocking calculators and start conservative: aim for 50–70% of theoretical capacity while you test ammonia and nitrate. Overcrowding causes ammonia spikes, disease, and high mortality, so scale stocking to your filtration and your willingness to perform water changes.
Practical method: list adult lengths, multiply by species-specific bioload (goldfish ≈3× a similar-length tetra), and compare to filter flow/biological capacity. For example, a 20-gallon can support about 8–12 neon tetras (1″ each) or 1–2 small gouramis, but not both plus messy bottom-feeders; monitor ammonia (target 0 ppm) and nitrate (<40 ppm) and downsize stocking if levels climb despite regular maintenance.
Common Beginner Mistakes
Overfeeding the Fish
Feeding more than your fish can eat in about 2 minutes per feeding creates excess waste that spikes ammonia and fuels algae; feed small portions once or twice daily, or use an automatic feeder on vacation. If uneaten pellets float after feeding, scoop them out within 10 minutes and cut portions down to a pinch per fish to keep water stable and reduce the need for extra water changes.
Neglecting Water Quality
Letting water tests slide causes hidden problems: ammonia and nitrite must be 0 ppm, and nitrates should stay below about 20–40 ppm for most community tanks. Test weekly with a liquid kit, watch pH drift, and act fast if fish show gasping, lethargy, or flashing — those are early signs of toxic levels.
Use an API Freshwater Master Test Kit or equivalent to track ammonia, nitrite, nitrate, and pH; aim for ammonia <0.25 ppm (ideally 0) and nitrite 0. During setup, cycling takes about 4–6 weeks; if ammonia rises, do a 25–50% water change, reduce feeding, and consider Seachem Prime to detoxify while you correct the root cause.
Skipping Regular Maintenance
Putting off weekly chores leads to clogged filters, reduced flow, oxygen dips, and cloudy water; a quick routine—10–25% water change weekly, gravel vacuuming, and rinsing mechanical filter media in tank water—prevents these issues and keeps biological filtration healthy. Spread tasks so you’re not overhauling everything at once.
Follow a simple schedule: for a 10–20 gallon tank, do ~25% water changes weekly; larger tanks can do 10–20% weekly or 25% biweekly. Clean mechanical media every 2–4 weeks in removed tank water, replace carbon every 4–6 weeks, and never replace all biological media at once to preserve beneficial bacteria and avoid cycle crashes.
Troubleshooting Problems
Identifying Signs of Poor Water Quality
You’ll spot poor water quality through visual and behavioral clues: ammonia above 0.25 ppm or any detectable nitrite are harmful, nitrates ideally stay below 20–40 ppm, and sudden pH swings >0.5 stress fish. Cloudy or green water often means bacterial or algal blooms from overfeeding or excess light, while fish gasping at the surface typically points to low oxygen or high toxins. If you smell a strong ammonia odor or see rapid algae growth in a week, test water and act immediately.
Recognizing Fish Illness
You’ll notice illness as changes in behavior and appearance: loss of appetite, clamped fins, visible spots (ich appears as 1–2 mm white specks), red streaks or fraying fins (bacterial/fin rot), flashing/rubbing, labored breathing, bloating or sunken belly, and lethargy. Quarantine symptomatic fish for 2–4 weeks and check water parameters first—many “diseases” are water-quality driven.
When you identify symptoms, isolate the fish in a hospital tank with identical temperature and pH to avoid additional shock. Run daily tests for ammonia, nitrite and nitrate and perform 25–50% water changes if levels are off; in bacterial outbreaks, raising temperature to 78–82°F can speed recovery and improve medication efficacy. For parasites like ich, increasing to ~86°F for short periods plus an anti-parasitic treatment often breaks the life cycle, but do not use copper-based treatments if you keep invertebrates or live-bearing fish. Always follow product instructions, track improvements over days, and if multiple fish decline despite correct water chemistry, treat broadly or consult a vet/experienced aquarist. An example: a newcomer’s neon tetras developed ich after a cold snap to 72°F—after a gradual temp bump to 78–80°F and antiparasitic dips, the spots cleared within a week while strict 30% daily changes kept water clean.
Handling Specific Situations
Dealing with Algae Blooms
As part of fish tank cleaning for beginners, tackle algae by cutting light to 6–8 hours/day, doing a 25% weekly water change, and lowering phosphates with a clean filter and less feeding; scrub glass with an algae pad and spot-clean decorations. You can add algae-eaters like Otocinclus, Amano shrimp or Nerite snails for sustained control, and test phosphate levels if blooms persist after two weeks.
Managing Fish Diseases
At the first sign of white spots, frayed fins, gasping or lethargy, isolate the sick fish immediately in a quarantine tank for 2–4 weeks, test ammonia/nitrite/nitrate, and perform 25–50% water changes while you diagnose; avoid adding medications to the display tank until you confirm the issue and species sensitivities.
For treatment, follow a stepwise approach: confirm the symptom (ich = white spots, fin rot = ragged fins), maintain ideal water parameters for the species (ammonia/nitrite at 0 mg/L, nitrate 20–40 mg/L), and use targeted medications per label—antiparasitics for ich, antibacterial treatments for bacterial infections—while removing activated carbon during dosing. If you keep invertebrates, avoid copper-based treatments; when in doubt, photograph symptoms and consult a local aquatic vet or experienced hobbyist before dosing.
Handling Tank Mates Conflicts
When fish chase, nip fins, or hide, assess compatibility and stocking: many tetras, rasboras and corydoras need groups of 6+, while aggressive cichlids often require >50–55 gallon tanks. Reduce aggression by adding hiding spots, rearranging decor to break territories, and increasing group sizes for nippy species; if attacks continue, separate or rehome the aggressive individual.
Use practical fixes: add 5–10 extra rock/plant hiding zones, introduce a visual barrier or tank divider for a week, and monitor feeding times to reduce competition. For common cases—male bettas fighting or tiger barbs nipping—either move the aggressive fish to its own tank or keep barbs in larger schools of 6–8 to diffuse aggression; track injuries over two weeks and act swiftly to prevent chronic stress or infection.
The Role of Filtration Systems
Types of Filters
For fish tank cleaning for beginners, you’ll encounter five common filter styles: hang-on-back, canister, sponge, internal, and undergravel—each affects maintenance and water quality differently. Hang-on-back suits 10–50 gallon tanks, canisters handle 40–150+ gallons, sponges are gentle for fry and shrimp, internals fit small setups, and undergravel moves water through substrate. Use the list and table below to compare features and pick what matches your stocking and schedule. Assume that you prioritize biological media and steady flow over flashy extras.
- HOB (Hang-on-back) — Easy access, good for weekly media swaps.
- Canister — High media volume, best for 40–150+ gal tanks.
- Sponge — Low flow, ideal for fry, shrimp, and hospitals.
- Internal — Compact, fits nano tanks up to ~20 gal.
- Undergravel — Uses substrate for biological filtration; needs consistent flow.
| HOB | Best for 10–50 gal; flow 100–300 GPH; easy swaps. |
| Canister | Handles 40–150+ gal; 200–800 GPH; large media capacity. |
| Sponge | Nano and breeder tanks; 20–150 GPH equivalent; excellent biological support. |
| Internal | Small tanks ≤20 gal; 50–250 GPH; compact but limited media. |
| Undergravel | Works with substrate; dependent on powerhead/airlift; avoids chemical media. |
Proper Filter Maintenance
You should inspect filters weekly and perform basic cleaning during a 25–30% water change: rinse mechanical media in removed tank water to clear debris, replace chemical media like activated carbon every 3–4 weeks, and avoid rinsing biological media with tap water because chlorine will kill beneficial bacteria. Quick checks of flow and impeller noise help you spot problems early.
When doing a deeper service, follow a sequence: shut off equipment, remove and gently squeeze sponges in a bucket of tank water, swap only part of the biological media if you need to replace it, and clean the impeller and tubing every 1–3 months to prevent flow loss; for canisters, disassemble per manufacturer steps and re-prime carefully to avoid airlocks. If you have heavy stocking (more than 1 inch of fish per gallon), increase cleaning frequency and monitor nitrate levels weekly to avoid oxygen dips and ammonia spikes.
Understanding Flow Rate
Match flow to your tank: general freshwater community tanks do well with a turnover of about 4–6× the tank volume per hour, so a 20-gallon tank needs roughly 80–120 GPH; planted tanks often prefer 3–4× to avoid disturbing plants, while reef systems may require 10× or more and directed surge. Flow influences debris removal, oxygenation, and fish comfort.
Measure flow by timing how long the filter output fills a known container, then calculate GPH; install valves or spray bars to fine-tune currents, and use baffling to reduce turbulence for species like bettas or fry. For example, if your 40-gallon tank’s filter pumps 200 GPH, you’re at 5× turnover—good for community setups but too strong for delicate species, so add a flow diffuser or lower pump output. Watch behavior and test water parameters after changes to verify that increased flow improves clearance without stressing your fish, and keep high flow warnings in mind for slow-swimming or long-finned species.
Understanding Cycle Time and Nitrogen Cycle
Importance of Cycling
You need a stable colony of nitrifying bacteria because ammonia and nitrite are highly toxic to fish even at low concentrations; aim to keep both at or near 0 ppm. Typical natural cycling takes about 4–6 weeks, but seeding from an established tank or using bottled bacteria can shorten that to 1–2 weeks. Test water frequently during setup so you can spot and respond to dangerous spikes before stocking or adding sensitive fish.
How to Cycle a New Tank
Start with a fishless cycle by dosing a pure ammonia source (or ammonium chloride) to about 2–4 ppm, then test daily: you’ll see ammonia peak, nitrite rise next, and finally nitrate as bacteria convert toxins; when ammonia and nitrite both read 0, the cycle is complete (usually 2–6 weeks). Alternatively, seed with filter media, gravel, or a small amount of water from an established tank to cut time dramatically.
For example, if you add a cup of established filter floss or a handful of gravel, you can often shorten cycling to 1–14 days under good conditions. Keep temperature steady at 24–28°C (75–82°F) and provide strong aeration—nitrifying bacteria prefer oxygenated water. If you use commercial ammonia, follow the product dosing chart for your tank volume and never use soaps or detergents when handling seeded media.
Maintaining a Stable Cycle
Test ammonia, nitrite, and nitrate weekly and after any major change; avoid overcleaning biological filter media—rinse media in old tank water only and replace media in stages so you don’t remove >25–50% of the bacteria at once. Also, limit sudden stocking increases and overfeeding, since extra waste can trigger spikes that harm fish.
If you add several fish at once, test every 2–3 days for two weeks and plan more frequent partial water changes (10–25%) if nitrate climbs above 20–40 mg/L. When cleaning filters, swap or rinse one cartridge or sponge at a time and consider using bottled nitrifying bacteria as a temporary boost after unavoidable media loss; this keeps your cycle stable while you perform necessary maintenance.
Seasonal Considerations
How Weather Affects Tank Environment
Outdoor and indoor temperature swings change your tank quickly: warm summer days can raise water temperature by several degrees, lowering dissolved oxygen and speeding fish metabolism, while winter drafts can drop temps below preferred ranges. Aim to keep tropical tanks at 24–27°C (75–81°F) and watch for increased ammonia spikes when metabolism rises. Evaporation concentrates nitrates and salts, so check water level and tests more often during big weather shifts.
Adjusting Care with Changing Seasons
When seasons shift, adjust heater settings gradually (±1–2°C over 24–48 hours), increase water testing frequency to at least twice weekly during transitions, and change 10–20% of water weekly if you see parameter drift. For summer, add circulation or a fan to keep surface agitation high; in winter, insulate the cabinet and avoid placing the tank near cold vents.
For equipment, install a reliable thermostat and, for larger tanks, consider a chiller if ambient temps exceed 28°C (82°F). Use an auto top-off to counter evaporation and keep salinity/nitrate concentration stable. If you alter lighting for seasonal algae control, reduce photoperiod by 1–2 hours rather than abrupt cuts. Track trends in your logbook—temperature swings of >2°C in 24 hours are a red flag and justify immediate partial changes and extra testing.
Planning for Holiday Absences
Short trips (1–3 days) usually require no major changes; use an automatic feeder and leave lights on a timer. For absences of 4–7 days, reduce feedings to once daily and arrange a neighbor or friend to check filters and water level. If you’ll be gone >7 days, line up a reliable caretaker to perform a 20–30% water change and inspect equipment.
Prepare by doing a full maintenance check 48 hours before leaving: clean or replace filter media if due, top off water, and test ammonia/nitrite/nitrate so baseline is stable. Provide written instructions (dosage, where to find spare parts), and warn caregivers about power outage risks—a stopped filter for 12+ hours can cause oxygen drop and ammonia buildup. For multi-week trips, hire someone experienced; automated systems help but don’t replace a human for extended absences.
Best Practices for Adding New Fish
Quarantine Procedures
You should quarantine every new fish for 10–14 days in a separate tank (10–20 gallons/40–80 L for small community fish) to watch for signs like ich, fin rot, or parasites. Maintain the same temperature and perform daily 20–30% water changes while observing eating and behavior. For treatment, use targeted remedies only after identification, and never add quarantine water or sick fish to your display tank until cleared to avoid introducing disease.
Acclimation Processes
Start by floating the sealed bag for 15–30 minutes to equalize temperature, then either drip-acclimate (use airline tubing at ~1–3 drops/second) or add small amounts of tank water every 5–10 minutes until volume doubles—usually 30–90 minutes. Move fish with a net to avoid adding bag water, and watch for stress signs like gasping or clamped fins; rapid changes in pH or salinity can cause shock.
For drip acclimation, set up an airline or small siphon and adjust to roughly 1–3 drops per second so the quarantine bag’s water volume doubles over 30–60 minutes; for sensitive species (discus, many tetras), extend to 60–90 minutes. Match temperature within 1–2°F (0.5–1°C) before mixing, and for marine fish check salinity to within 0.002 specific gravity. After acclimation, use a net to transfer the fish and discard bag water. If you notice heavy breathing, erratic swimming, or pale gills, pause transfers and let the fish recover—fast fixes like sudden med dosing can make problems worse.
Introducing Fish to an Established Tank
When adding fish to an established tank, introduce one or two at a time to monitor aggression and bioload; aim for a gradual increase so you don’t exceed the rough guideline of 1 inch of fish per gallon (adjust for species and bio-load). Add fish in the evening with lights dimmed, provide extra hiding spots, and feed sparingly for 24–48 hours while watching for bullying or illness.
Place the new fish near decor or plants to give instant cover and lower stress; avoid pouring bag water into the display and use a net transfer after acclimation. If aggression starts, separate with a breeder box or rehome the aggressor—large or territorial species (African cichlids, some gouramis) often need staged introductions or significantly larger tanks. Track water parameters daily for 3–5 days after introduction; sudden ammonia or nitrite spikes can follow even small additions, so be ready to do a 25–50% water change if levels rise.
Responsible Fishkeeping
Ethical Considerations
You should match your commitment to the species’ needs: some goldfish live 10–20 years, angelfish and many cichlids can live a decade or more, while bettas often live 2–5 years. Avoid impulse buys and impulse breeding; focus on welfare over looks. Never release aquarium fish into the wild—doing so can create invasive populations and disease outbreaks. Aim to provide adequate space, proper diet, and stable water to reduce stress and disease for your fish.
Importance of Research Before Purchase
Before you buy, check adult size, social needs, and water parameters: bettas need a minimum of 5 gallons, neon tetras thrive in groups of 6+ in a 10–20 gallon tank, and many cichlids need 30+ gallons. Consider bioload—goldfish generate much more waste—and how that affects your weekly maintenance and the fish tank cleaning for beginners routine. Quarantine new arrivals for 10–14 days to prevent introducing disease.
Do a species-specific checklist: confirm adult length, temperament (peaceful, semi-aggressive, territorial), preferred temperature and pH range, and minimum recommended tank volume. Evaluate compatibility by matching schooling and solitary species, and avoid mixing large, territorial fish with small schooling species. Factor in lifespan and cost of long-term care—some species require specialized diets or heavy filtration. Buy captive-bred fish when possible to lower disease risk and ecological impact, and ask sellers about source and recent water parameters; this helps you plan filter capacity, water-change frequency (typically 10–25% weekly), and stocking limits to prevent ammonia and nitrite spikes.
Sustainable Fishkeeping Practices
You can reduce environmental impact by choosing captive-bred, locally sourced fish and efficient equipment: use LED lighting, energy-efficient filters, and timers to cut power use. Favor planted tanks and live plants to absorb nitrates and lower water-change frequency. Reuse dechlorinated, nutrient-rich aquarium water on houseplants, and avoid wild-caught species to protect ecosystems. Small changes add up to a more sustainable hobby.
Implement practical steps: switch to sponge or canister filters sized correctly for your tank to improve efficiency and reduce replacement waste; set lights on a 6–10 hour timer to control algae and energy consumption; and maintain a feeding routine—feed only what your fish consume in about 2 minutes—to reduce uneaten food and nitrate buildup. Use live plants like Anubias, Java fern, or Vallisneria to uptake nitrates and provide hiding spots that lower stress. When performing water changes, aim for targeted partial changes (10–25% weekly) rather than infrequent large swaps, and use biodegradable cleaning tools where possible. Prioritize captive-bred purchases and support local breeders to lower the carbon footprint and reduce pressure on wild populations.
Conclusion
Conclusively, fish tank cleaning for beginners becomes manageable when you follow a consistent weekly routine, use the right equipment, perform partial water changes, vacuum gravel, maintain filters, test water, and address algae and cloudiness promptly; by practicing these steps and avoiding common mistakes you will protect your fish’s health, save time, and build confidence as a keeper, allowing you to expand your experience and enjoy a clear, thriving aquarium.
FAQ
Q: What is a simple, step-by-step weekly routine for fish tank cleaning for beginners?
A: Weekly routine (30–60 minutes for small tanks, 60–90 for larger): 1) Check fish and equipment — look for stress, odd behavior, leaks, heater and filter flow. 2) Test water — ammonia, nitrite, nitrate, pH; log values. 3) Turn off electricals if you’ll reach into the tank, then use a gravel vacuum/siphon to remove 20–30% of the water while cleaning the substrate; focus on detritus under plants and decorations. 4) Scrape or magnet-clean the glass to remove algae. 5) Rinse mechanical filter media in removed tank water (never tap water) to preserve beneficial bacteria; replace carbon or chemical media per manufacturer. 6) Top off with dechlorinated water matched to tank temperature and, if needed, perform a partial water change to reach target volume. 7) Trim plants, remove dead leaves, reposition décor. 8) Restart equipment, re-test parameters if you had big swings, and note any changes. Small tanks and newly cycled tanks need shorter but more frequent checks; keep a weekly checklist to build the habit.
Q: What equipment do I need and how do I perform proper water changes and filter maintenance?
A: Essential equipment: siphon/gravel vacuum, dedicated bucket (no soap), water conditioner/dechlorinator, algae scraper or magnet, spare filter media, soft brush or toothbrush, thermometer, test kit, and a hose or pitcher for precise top-offs. Water change steps: 1) Prepare dechlorinated replacement water at the same temperature as the tank. 2) Turn off heater/filter if you must reach into the tank; avoid leaving heater out of water long. 3) Use the siphon to vacuum the gravel and remove 20–30% of water (more frequent smaller changes beat rare big ones). 4) Dispose of tank water and refill slowly to avoid disturbing inhabitants. Filter maintenance steps: 1) Check manufacturer guidance for cartridge replacement intervals. 2) For biological media (sponges, ceramic rings), gently rinse in tank water removed during the water change and only clean part of the media at a time — don’t clean all biological media at once. 3) Replace or rinse mechanical media (pads) when clogged; replace chemical media (carbon) on schedule. 4) Inspect impeller and housing; clear blockages. 5) Note that over-cleaning media or using tap water will harm beneficial bacteria; use tank water for rinsing and space out media replacements.
Q: Why does my aquarium get cloudy, what common mistakes cause problems, and how do I fix them fast?
A: Common causes of cloudy water: bacterial bloom (new-tank or after large changes), disturbed substrate, overfeeding, inadequate filtration, high dissolved organics, or suspended dust from new gravel/decor. Common mistakes: overfeeding, changing too much water at once, cleaning all filter media together or with tap water, using soaps/chemicals on equipment, and overstocking small tanks. Troubleshooting and fixes: 1) Test water immediately for ammonia, nitrite, nitrate and pH. 2) Stop feeding for 24 hours or feed very small amounts; remove uneaten food. 3) Do a 20–30% water change and vacuum the substrate; repeat daily until clarity improves. 4) Ensure filter flow is adequate and media aren’t clogged; rinse mechanical media in removed tank water. 5) If a bacterial bloom is suspected, it often clears in 24–72 hours after reducing nutrient load and stabilizing conditions; adding a reputable nitrifying bacteria product can speed recovery. 6) For persistent particulate cloudiness, use finer mechanical filtration (polishing pads) or consider a temporary sponge pre-filter. Prevention tips: match tank size to stock levels (smaller tanks need more frequent maintenance), avoid overstocking, dose water conditioner when adding tap water, and schedule regular partial water changes. Track time requirements: routine weekly care is the most efficient way to avoid large problems that require hours of troubleshooting.