You need a structured, safety-first approach to horse jumping so you and your horse progress confidently; this guide covers prerequisites, types of jumps, equipment, and how to develop a secure basic position, safe approaches, and clean landings. Pay attention to proper safety gear and the risks of falls and injury, practice progressive training, and expect a rewarding partnership with your horse as you build skill and confidence.
Key Takeaways:
- Start with the basics: develop solid flatwork, a balanced two‑point position, and appropriate fitness for rider and horse; confirm horse suitability and use correct tack and safety gear (ASTM helmet, body protector, boots) before introducing height to horse jumping.
- Focus on approach and mechanics: maintain a steady rhythm and impulsion, pick the right distance, keep a secure lower leg and soft hands at takeoff, give a crest release, and absorb impact through hips and two‑point on landing to reduce risk of falls and injury.
- Progress methodically with professional instruction: begin over poles and grids, increase height gradually, use targeted drills to correct common mistakes (rushing, leaning, dropping the release), track training costs and frequency, and prioritize coach feedback for safe advancement.
Prerequisites for Horse Jumping
Necessary Horse Riding Skills
You should already ride with a secure, independent seat and a stable lower leg, able to hold two‑point for at least 3–5 minutes and adjust your balance instantly. Be comfortable riding a steady canter with consistent rhythm for 3–10 minutes, applying half‑halts and lengthening/shortening the stride on command. Practice pole work and small crossrails (30–60 cm) to develop timing; jumping without these basics significantly increases the risk of falls and injuries.
Understanding Your Horse’s Capabilities
Assess your horse’s soundness, age, temperament and conformation before progressing: have a vet perform a basic lameness exam and check feet and joints, and note prior jumping history. Many horses begin basic jumping around 4–6 years but often reach maturity for regular work at 6–8 years; temperament matters—willing, scopey horses with strong hindquarters and a good shoulder suit jumping best. Prioritize soundness and temperament; pre‑existing lameness is a major safety issue.
Start evaluations practically by lunging over poles and introducing crossrails at 30–40 cm to gauge willingness and technique; a horse that clears 1.0 m comfortably in schooling often has scope for 1.10–1.20 m competition with proper conditioning. Examine conformation: long sloping shoulder, correct front pasterns and powerful hind end predict better bascule and scope. If a 15.2 hh warmblood regularly clears 80 cm with ease, plan gradual increases rather than abrupt jumps.
Physical Conditioning for Jumping
Both you and your horse need specific fitness: you should hold two‑point for 5+ minutes, perform 15–20 bodyweight squats and a 45–60 second plank to build leg and core endurance. For the horse, do hill sets, cavaletti work and canter intervals (3–5 minute canters with 2–3 minute walk rests, 3–4 reps) three times weekly. Emphasize a thorough warm‑up and cool‑down; overtraining or skipping warm‑ups increases injury risk.
Implement a progressive 6–8 week plan: weeks 1–2 focus on flatwork, rhythm and poles four days/week; weeks 3–4 add cavaletti and short hill canters; weeks 5–6 introduce grids and single fences twice/week, monitoring fatigue and recovery (heart rate and gait). Coordinate with your vet and farrier for shoeing and fitness checks, and allow at least one full rest day plus light hacking to prevent strain.
Basics of Horse Jumping
You need a reliable rhythm, steady contact and a secure lower leg before you start jumping; many beginners progress by schooling grids and cavalletti at 0.40–0.60 m, then move to single fences at 0.60–0.80 m. Focus your sessions on approach straightness, consistent canter stride length and horse fitness: aim for 20–30 minutes of focused jumping work twice weekly while keeping flatwork sessions to maintain balance. Falls and concussions increase with speed and height, so pace your escalation.
What is Horse Jumping?
Horse jumping is a timed, scored discipline where you guide your horse over a course of fences without knocking rails down or incurring refusals; under typical rules a knocked rail = 4 faults and each refusal adds faults or elimination depending on level. Courses test accuracy, scope and adjustability, and you’ll be judged on clear rounds and time—so you must manage pace, line and impulsion to avoid penalties and keep you and your horse safe.
Different Disciplines in Jumping
You’ll encounter several formats: stadium show jumping (height from 0.60 m for beginners to 1.60 m at Olympic level), hunter classes judged on style, eventing which includes cross-country, and equitation which evaluates the rider. Local circuits often run beginner divisions at 0.60–0.80 m, while national amateur classes commonly range 0.90–1.20 m. Each discipline demands different preparation, fitness and tack choices.
Show jumping emphasizes speed and minimal faults; hunters prioritize consistent pace and tidy jumping style with rails typically 0.60–1.05 m in lower divisions. Eventing’s cross-country features solid obstacles and varied terrain where fences at novice levels are often 1.00–1.10 m, progressing to 1.20–1.25 m and beyond—solid fences carry higher injury risk so conditioning and protective gear are non-negotiable. Equitation focuses on your position over fences, which affects your score directly.
Equipment Overview
Your basic kit should include an ASTM/SEI-certified helmet, approved body protector for cross-country, a close-contact jumping saddle, tendon and fetlock boots, a well-fitted bridle and a secure girth. Stirrups with safety features and non-slip reins improve control. Check fit every time: ill-fitting tack causes sores, resistance or dangerous slipping during takeoff and landing, so inspect gear before each session and replace worn parts promptly.
Helmet prices commonly range $80–$400, body protectors $70–$300 and good jumping saddles $800–$3,000. Choose open-front tendon boots for jumping and brushing boots for stable work; an anatomic girth reduces pressure on the horse’s sternum. Bit selection—loose-ring, D-ring or pelham—affects response, so work with your trainer to match bit to your horse’s mouth. Properly fitted tack reduces accidents and improves performance.
Understanding Jump Types
| Vertical | You face a straight upright of poles; heights for beginners typically run from 0.6–0.9 m, and the fence tests your horse’s scope and your position—watch for rushing on the approach. |
| Oxer | As a spread fence with two elements, oxers build width as well as height; beginner spreads often sit around 0.6–1.0 m, helping you and your horse develop a proper bascule. |
| Combination | Combinations are doubles or triples with 1–3 strides between elements (1 stride ≈ 3.6 m); they demand quick balance changes and accurate rhythm from you and the horse. |
| Cross Rail | Low, forgiving X-shaped rails used for teaching line and confidence; you should use them at 0.3–0.6 m when starting courses to reduce fall risk. |
| Triple Bar | Progressive spread fence with increasing heights; used at higher levels (often > 1.2 m) to test scope—avoid introducing this until your horse is confirmed on oxers and verticals. |
- horse jumping
- vertical
- oxer
- combination fence
- cross rail
Vertical Jumps
Verticals are single-plane fences that force a straight takeoff; you should start your practice at 0.6–0.9 m to build a clean bascule and secure lower leg. Focus on a steady 6–8 stride approach indoors or 8–12 strides outdoors, and keep your hands soft so the horse can lift its shoulders; a narrow landing makes mis-timing more dangerous, so prioritize rhythm over height.
Oxers
Oxer spreads require both height and width—beginners typically work at 0.6–1.0 m spreads—to teach scope and riding a forward, controlled line. Ride with a slightly more forward seat than for verticals, keep your canter balanced, and avoid accelerating the last three strides since width increases the risk of knocking rails.
More info: Oxers come in forms like square, ascending, and ramped; a square oxer tests power, while an ascending oxer rewards bascule. You can set a 1.0 m square oxer for progression, and practice placing a ground pole 7–9 m before to help your horse find the right takeoff—this reduces refusals and helps you gauge stride length.
Combination Fences
Combinations (doubles/triples) demand rapid adjustment—common setups use 1-stride (~3.6 m) or 2-stride (~7.2 m) distances—so you must manage impulsion and stride length precisely. Practice a simple vertical–oxer double at low heights to train your eye for distances; wrong tempo typically causes knockdowns or run-outs, making precise canter balance necessary.
More info: When schooling combinations, walk the line and measure distances with poles first, then ride at a consistent canter; coaches often use a 2-stride exercise (vertical then oxer) to teach you collecting between jumps. Use a ground pole or gymnastics grid to fix the first element, which improves your horse’s adjustability and reduces fall risk.
Assume that you review these jump types with your instructor and set progressive, measured exercises before adding height or complexity.
Jumping Position and Technique
You must combine a secure two-point, fluid hands, and an active lower leg to jump effectively; aim to establish a balanced position 3–5 strides before the fence so your horse can find the correct stride. Maintain a roughly 45° hip angle in two-point, keep your weight in the stirrups, and follow the bascule with your upper body. Focus on small measurable goals—reduce interference on takeoff and landing by keeping your lower leg quiet, softening your elbows, and staying centered over the horse.
Proper Seat and Balance
Keep a deep, secure lower leg and a mobile upper body: sit in a half-seat with hips closed to about 45°, heels down, and weight over the balls of your feet. Use your core to stabilize—10–15 minutes of no-stirrup work twice weekly improves shock absorption and balance. If you drift forward or sit hard on landing, you’ll unbalance the horse; instead, absorb motion with your hips and glance two to three strides ahead to maintain a straight, rhythmic approach.
Hand Position and Contact
Hold a soft, following contact with your hands just above the horse’s neck on takeoff—move them forward about 6–12 inches in a crest release so the horse can stretch its neck; keep elbows bent and close to your sides. Aim for elastic contact with the bit, allowing the horse to carry itself without being pulled back. Pulling hands down is dangerous and can leave you off-balance or cause a refusal.
Practice independent hands: sit a fence and rehearse making a steady following motion while keeping your lower leg quiet. Try grid work (five to seven related fences) to develop timing—focus on advancing your hands forward at exactly the moment the horse rounds and then regaining a soft contact on landing within two strides. Use a mirror or coach video to check that your hands move as one unit and that your thumbs stay on top to maintain correct rein orientation.
Leg Placement and Use
Position your lower leg under your hip with heels down, calf contacting behind the girth, and a steady ankle to provide a firm base. Shorten stirrups 2–4 holes from your flat length for jumping to improve shock absorption without gripping with the knee. Apply half-halts 3–4 strides out to regulate pace; punching or swinging your leg is dangerous because it disrupts the horse’s rhythm and can lead to rails.
Drill strength and stability: do 10–15 minutes of two-point and no-stirrup work, plus lateral exercises to fix your lower-leg position. When approaching a grid, maintain a constant squeeze—short, rhythmic pulses rather than a single strong kick—to keep impulsion. On landing, close your calf quickly to offer immediate support, then reestablish your seat within 2–3 strides so the horse can rebalance for the next fence.
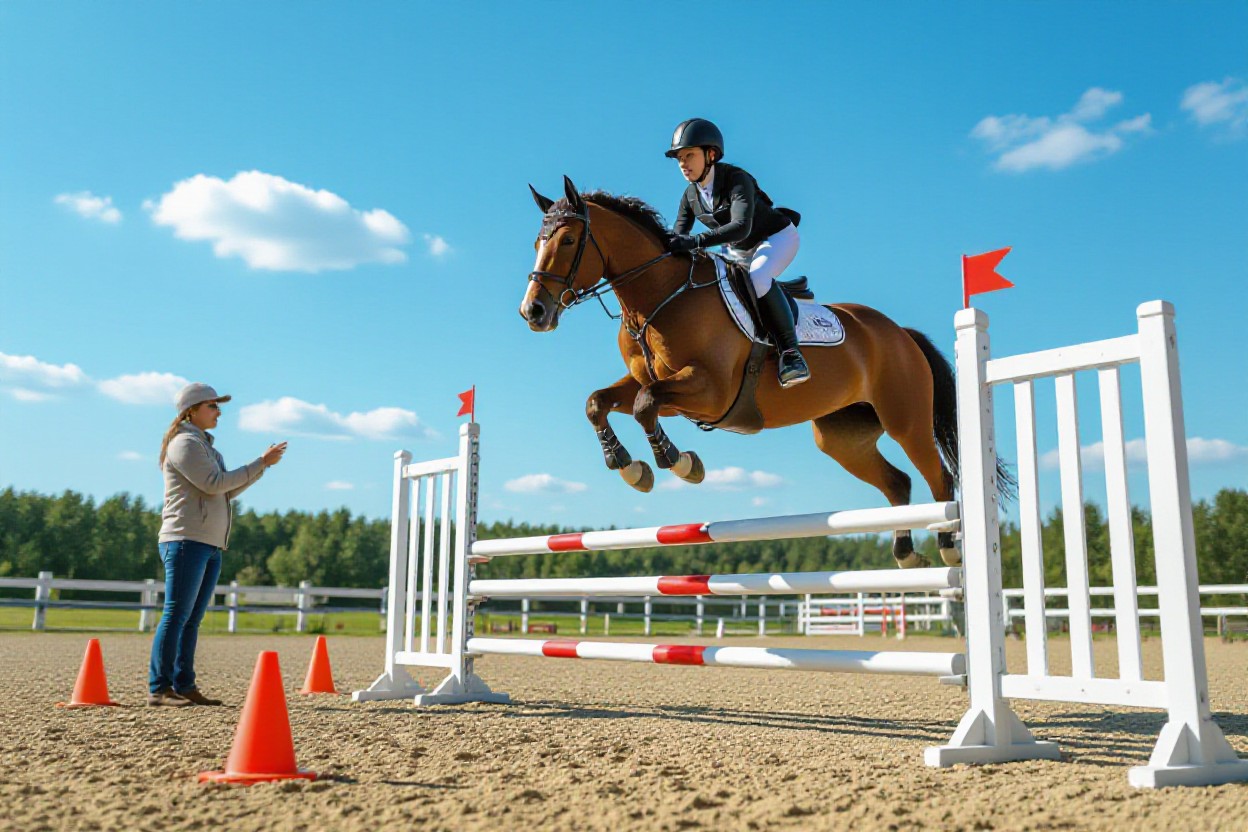
Training Progression
You should structure horse jumping training into phased goals: flatwork and groundwork first, then pole exercises, small jumps, and finally courses. Plan 2–3 short sessions weekly per rider-horse pair, with one day focused on grids or gymnastics and another on rhythm and canter work. Use measurable checkpoints—consistent balance at canter for three rides, 80% clear schooling attempts, and relaxed approach before raising height—to avoid pushing too fast and increasing the risk of refusals or falls.
Groundwork Fundamentals
Start groundwork to build straightness, responsiveness, and trust: lunge for 10–15 minutes each side, include transitions, circles and serpentines, then long-rein or in-hand pole work to teach line and timing. Add ground poles at 0.9–1.1 m spacing for trot work and keep sessions under 30 minutes to prevent fatigue. Always check tack and use a surcingle when riding from the ground; poor gear or overwork can lead to dangerous behavior.
Introduction to Small Jumps
Begin with ground poles and cavaletti at 20–30 cm, progressing to small verticals around 30–45 cm once you and the horse are rhythmical. Ride simple grids—three-to-five elements—to reinforce takeoff points and a steady canter; aim for sets of 4–6 repetitions per session. Focus on maintaining your two-point and soft hands; rushed approaches are a common cause of refusals and falls.
For example, set a grid with a ground pole, a 3.2–3.6 m canter distance to a small vertical, then a 2.4–2.7 m bounce to a following pole to teach cadence and adjustability. Keep jumps low for several weeks and track improvement: if your horse clears 80% of attempts with even strides and relaxed ears, raise height in 5–10 cm increments. This builds confidence without compromising safety.
Gradually Increasing Complexity
Once small jumps are consistent, introduce combinations, bending lines, and oxers in planned increments—raise height by 5–10 cm only after multiple successful sessions. Practice related distances (one, two, three strides) and course changes to develop adjustability and decision-making. Limit higher-intensity schooling to one session weekly and monitor fatigue; overdoing complexity too quickly increases the risk of knocks, refusals, and rider falls.
A practical six-week plan works well: weeks 1–2 solidify poles and cavalletti, weeks 3–4 add single small verticals (30–45 cm), and weeks 5–6 introduce simple combinations and a low oxer (45–60 cm). Use objective markers—consistent rhythm, secure two-point, and 80% clear rounds—before progressing further, and always keep safety gear on for every ride.
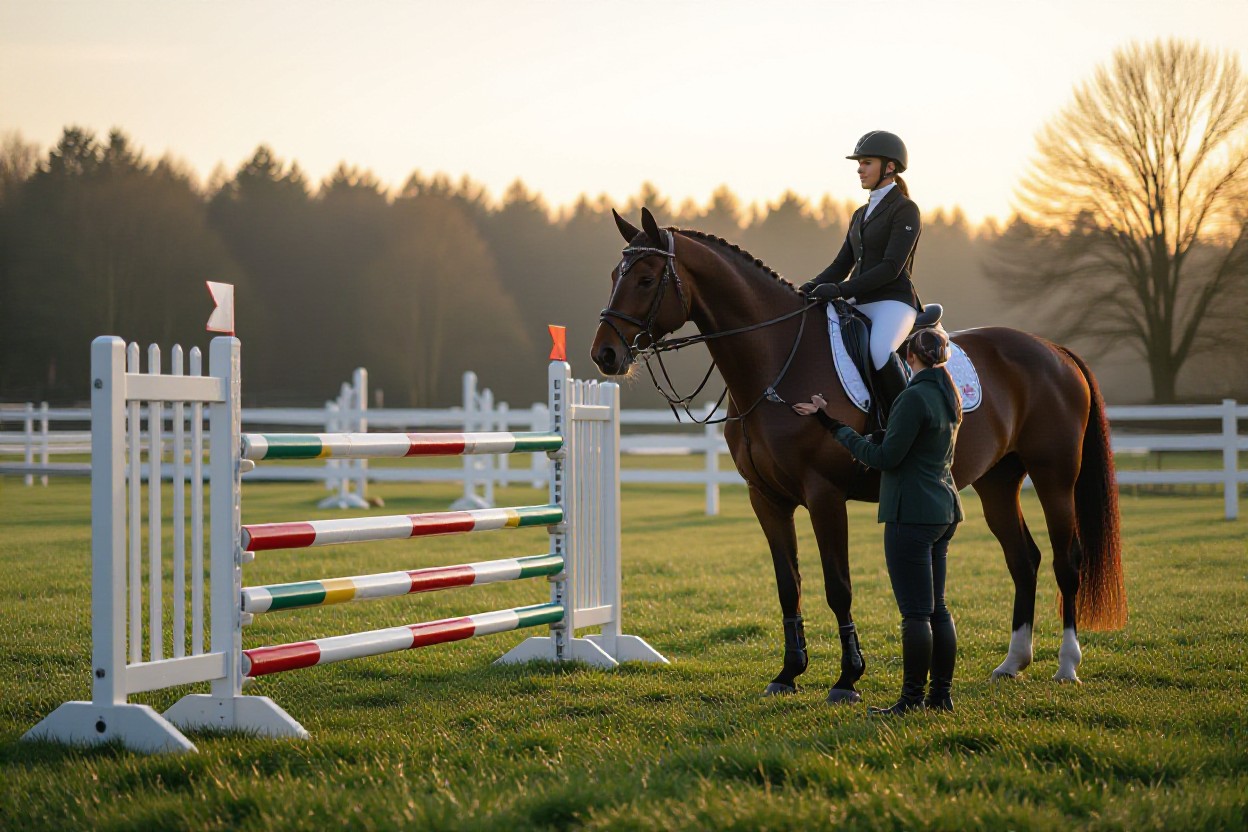
The Role of the Rider
You shape pace, line and balance for every jump; by holding a secure two‑point, keeping an active lower leg and using fluid hands you influence the horse’s takeoff and landing. Work on 10–15 fence gymnastic grids and short course practice to sync timing—mistimed weight or a late release often causes refusals or rail knocks, while a steady, balanced rider increases clear rounds and consistency.
Rider Mindset and Focus
You must scan 3–5 strides ahead, set a simple plan for each approach and control breathing to avoid tension. Use a short mental checklist—straight line, consistent tempo, eyes up, soft hands—and replicate pressure with timed rounds or 2‑minute canter sets to build composure; rushing or anticipatory leaning are the fastest ways to unsettle both you and the horse.
Effective Communication with Your Horse
You communicate with seat, legs, hands and voice: apply a concise half‑halt 1–2 strides before the base to rebalance, use a short crest release over the jump and restore contact gently 1–2 strides after landing. Clear, timely aids prevent muddled takeoffs and help the horse interpret your plan on approach and in the air.
Practice targeted drills to refine those aids: set a grid of 4–6 fences with 9–12m related distances to train consistent contact and timing, and place ground poles at 3.5–4m to rehearse canter stride length. Work on micro‑aids—tap leg, hold seat, then half‑halt—and note whether the horse shortens or lengthens by a stride; avoid pulling during bascule, which forces the head down and breaks the horse’s arc.
Building Trust and Confidence
You build confidence through predictable routines, progressive challenges and positive reinforcement: start with cross‑rails around 30–50cm, keep sessions 20–30 minutes with clear goals, and raise obstacles in 5cm increments as the horse succeeds. A calm, consistent rider and successful small tasks create measurable gains in willingness and steadiness.
Follow a progressive 8‑week plan: weeks 1–2 focus on flatwork (4 sessions/week: transitions, half‑halts, 20–30 minute sessions); weeks 3–4 add ground poles and cross‑rails (3–4 sessions, include 8–12 pole exercises); weeks 5–6 introduce simple gymnastic grids and a single low course; weeks 7–8 increase height gradually to 70–80cm only if the horse is relaxed. Use praise, short breaks and avoid forcing through resistance; progress at the horse’s pace for lasting trust.

Safety Equipment
When you step into the arena, prioritize both rider and horse protection: a certified helmet, body protector or air vest, and appropriate tack for your horse make the difference between a safe schooling session and a harmful incident. Select gear that fits, inspect it before every ride, and replace items after impact or excessive wear to keep risk low and confidence high.
Essential Safety Gear for Riders
Always wear a helmet that meets ASTM F1163/SEI standards and replace it every 5 years or after any fall. Add a BETA Level 3 body protector for practice over fences, tall-heeled riding boots (about ½–1 inch) to prevent the foot slipping through stirrups, gloves for grip, and consider quick-release stirrups or an air vest for extra protection on larger jumps.
Protective Gear for Horses
Use front tendon boots for brush protection, fetlock or ankle boots for landing support, and bell boots to prevent overreach injuries; choose neoprene or molded synthetic shells with secure Velcro and proper padding. Fit should be snug without pressure points, and swap or adjust boots between flatwork and jumping to avoid chafing.
Inspect boots before each ride: check Velcro integrity, seams, and liner wear, and replace any boot showing compressed padding or exposed hard edges. Measure the cannon bone circumference and follow manufacturer sizing charts—too-large boots can shift and cause abrasions, while too-small ones can constrict tendons. Clean after each session and rotate sets to extend protective life.
Importance of Proper Tack
Correct tack fit directly affects performance and safety: ensure the saddle has 2–3 fingers clearance behind the wither, even panel contact along the back, and a girth tight enough to allow two fingers underneath. Bridle fit should let the bit sit comfortably without pinching and the noseband follow the two-finger rule to avoid breathing or mouth issues.
Poorly fitting tack leads to refusals, hollowing, or sudden bucking that can unseat you; check for sweat patterns, rub marks, or uneven wear as indicators of misfit. Have a qualified saddle fitter assess fit when you buy a saddle, after significant weight changes, or every 6–12 months to prevent chronic back pain and reduce the chance of dangerous reactions during jumping.
Common Mistakes to Avoid
Misalignment with Jumps
Approaching at an angle or letting your horse drift off the line causes rails, refusals, and can create dangerous unbalanced landings; focus on a straight line from the last 3–5 strides (about 12–18 m) and maintain your outside rein to guide the shoulder. Use visual markers on the ground and set a single ground pole 10–12 feet before the jump to train consistent straight approaches. Misalignment increases the risk of falls and refusals, so correct it early in schooling.
Inconsistent Rhythm
Breaking pace or lengthening/shortening your canter unpredictably spoils takeoff and distance, often costing you a half-stride that turns a safe jump into a chip or run-out. Use ground poles spaced at about 12 feet (3.7 m) to re-establish a steady stride, count strides aloud, and focus on a balanced seat so your horse can maintain a consistent impulsion into the fence.
Work simple exercises: trot poles, a 4–6 pole cavaletti line at 12–13 ft spacing, and short gymnastic grids to teach regular rhythm and adjustable stride length. Ride these 2–3 times weekly for 10–15 minutes, gradually adding a canter pole into the sequence. If you still lose rhythm, drop the fence height and concentrate on steady tempo rather than jumping bigger; consistent rhythm equals safer, more reliable distances.
Lack of Preparation and Warm-Up
Jumping without an effective warm-up makes refusals, sourness, and soft tissue injuries more likely; spend at least 10–20 minutes loosening through walk, trot, transitions, lateral work, and progressive canters before jumping. Check tack fit, boots, and the arena footing, and introduce fences gradually—start with ground poles, then small cross-rails—to ensure both you and your horse are physically and mentally prepared.
Follow a stepwise routine: 5–8 minutes walk/trot to warm muscles, 6–10 minutes working canter with transitions every 2–4 strides, then 8–12 minutes of pole and gymnastic work (ground poles to a cross-rail at 50–60 cm). Limit total jumping to 20–30 efforts per session for beginners and monitor fatigue; poor preparation increases injury risk and undermines confidence for both rider and horse.
Building a Training Routine
You should build a routine that balances flatwork, gymnastic grids, and progressive fence work to develop rhythm, strength, and confidence; aim for a baseline of 3–5 sessions per week with 2 focused jumping sessions, alternating harder days with easy hacks or turnout to prevent fatigue and injuries, and track progress with measurable targets like clearing 60–70 cm courses over 6–8 weeks.
Setting Goals and Objectives
Set short-term, measurable goals (4–8 weeks) such as improving a steady 6–strides line or clearing a 60 cm course, and long-term targets like competing at a local show within 6–12 months; you should write goals down, include fitness and safety metrics (heart rate recovery, soundness checks), and review them every 2–3 weeks to adjust intensity and fence height by small increments.
Developing a Weekly Training Schedule
Structure a week with 2 jump-focused sessions, 1–2 flatwork sessions for suppleness and straightness, 1 low-intensity hacking or hill session, and at least 1 full rest or turnout day; keep jumping sessions limited to 8–12 quality efforts to reduce concussion and mental fatigue, and alternate hard/easy days in a 1:2 ratio.
For example: Monday flatwork (30–45 minutes, lateral work), Tuesday gymnastics or grids (20–30 minutes, 6–10 efforts), Wednesday turnout or walk-hack (30–60 minutes), Thursday poles and transitions (25–35 minutes), Friday course practice (30–40 minutes, 6–8 jumps), Saturday hill or conditioning work, Sunday rest; monitor your horse’s appetite, gait, and attitude—if stiffness or reluctance appears, drop intensity and consult your vet or trainer.
Incorporating Variety in Training
You should rotate exercises—gymnastic grids, cavaletti, flatwork, trail rides, and pole work—to build scope, balance, and mental engagement; vary fence types (verticals, oxers, banks) and distances every 2–3 weeks, and use cross-training like hill work or dressage to lower injury risk while improving collection and straightness.
Specifically, include one gymnastics day per week (4–6 element grid), one distance day using measured lines (use ~3.66 m / 12 ft as a starting canter stride and adjust for your horse), and alternate surface types where safe; this diversity reduces repetitive impact—overuse can cause tendon or joint strain—and speeds learning by exposing your horse to varied challenges and success patterns.
Understanding Course Design
You’ll encounter courses built to test scope, balance, and decision-making: typically 8–12 numbered fences with combinations, related distances and a set time allowed. Walks reveal measuring lines, bending approaches and built-in tests like rollbacks or tight one-stride questions. When you study course maps, focus on where pace control, line choice, and correct distance make the difference between a clear round and a faulted one; treat combination complexes and sharp turns as high-risk points that demand precise planning.
Basics of Jump Course Set-Up
Course designers use standards—one-stride ≈ 12 ft (3.6 m), two strides ≈ 24 ft (7.2 m)—and a mix of verticals, oxers, and fillers to shape options. You’ll see gymnastic lines for rhythm, bending lines for balance, and long distances to test gallop. Pay attention to ground lines, height progression, and frangible devices; these elements affect your horse’s takeoff window and can turn a simple fence into a dangerous challenge if you misread stride length or angle.
Analyzing Course Maps
When you study a map, mark your intended track, the approach to each fence, and where you’ll count strides—start by circling combinations and tight turns. Note distances between jumps, estimated canter strides, and where a rollback or trot transition might be needed. Use the map to plan whether you’ll ride an inside or outside line and flag any high-risk options so you can prioritize safer lines during the actual ride.
Dig deeper by annotating exact stride counts on the map: for an average horse with a 12 ft stride, a 60 ft line equals about five strides (60/12). Also mark when you’ll shorten or lengthen to fit distances—label fences 3–4–5 with intended striding and where you might add one. Practice reading the map with a stopwatch for time-allowed sections and note ground poles or fillers that can alter takeoff; these small measurements convert theory into a clear plan for your round.
Strategies for Navigating the Course
You should prioritize a straight, balanced approach and consistent pace—ride to a fence on a predetermined rhythm, count strides between fences, and choose your track to minimize sharp corrections. Use forward impulsion into wider oxers and a collected canter for bending lines; when approaching combinations, commit to a line and focus on a positive, quiet release. Emphasize safety by avoiding late-race rushes, which are a common cause of rails or dangerous refusals.
More specifically, plan recovery points: identify three fences where you can reset pace if things go off (often after a long approach or a corner). Practice exercises like a 24 ft two-stride grid and a 60–72 ft bending line to simulate course demands. When in doubt, opt for the safer line that keeps your horse straight and balanced—this approach reduces knockdowns and builds confidence for progressively technical tracks.
The Importance of Warm-Up and Cool Down
Warm-up and cool down bridge ridden work and recovery: aim for a total warm-up of 10–20 minutes (walk 5–10, trot 5–10, a few canters) to lubricate joints and fire fast-twitch muscles, and a cool-down walk of 10–15 minutes to clear lactate and lower heart and respiratory rates. If you skip these stages your horse risks muscle strain, stiff joints, and reactive behavior that increases fall and refusal hazards.
Pre-Jumping Warm-Up Exercises
Start on the buckle with 5–10 minutes walking, then 8–10 minutes trot including 3–5 active transitions to wake the hind end; follow with 3–5 short canter sets focusing on balance and rhythm. Add ground poles or a grid of 3–4 trot poles to improve timing, and include lateral work (leg-yield, small shoulder-in) across 10–20m circles to supple the body. Check tack fit and your horse’s breathing before your first fence.
Post-Jumping Recovery
Immediately walk for 10–15 minutes after your last jump to reduce lactate and normalize breathing; remove boots and cool any hot legs, then re-check girth and saddle areas for rubbing. Monitor respiration and gait—if you see hot, swollen limbs, an abnormal gait, or persistent heavy breathing beyond 20–30 minutes, stop work and evaluate further.
While walking, offer small sips of water once breathing slows; avoid letting your horse gulp after intense sets. Continue monitoring recovery: heart and respiratory rates should trend toward baseline within 20–30 minutes in a fit schoolmaster, and any prolonged elevation or uneven recovery warrants rest and potential veterinary advice.
Stretching and Aftercare
Finish with 5–10 minutes of in-hand stretches and targeted grooming: chin-to-chest and neck-to-shoulder soft holds, plus gentle hind-limb toe touches to maintain suppleness. Apply cold therapy (ice boots or cold hosing) to any hot joints for 10–15 minutes, clean and pick hooves, and remove or loosen tack to prevent pressure points. Do not force stretches—if your horse resists, stop and reassess.
For protocol, hold each stretch for 10–20 seconds and repeat 2–3 times per side; use the “carrot” stretch to encourage neck flexion and a controlled hind stretch while supporting the limb. If you spot localized swelling, ice for 10–15 minutes, then re-check at 30 and 60 minutes—ongoing heat or lameness should prompt a vet call.
Competing in Horse Jumping Events
Choose shows that match your training goals: start with local schooling or beginner-friendly circuits before moving to rated competitions, and plan to ride classes that test pacing, accuracy, and course management. Aim for consistent rounds at lower heights and focus on clean rounds and time faults rather than placing; this approach builds confidence, protects your horse from overwork, and reduces the risk of refusals and falls as you step up.
Understanding Competition Levels
Levels run from leadline and cross‑rails for kids to adult amateur divisions, then graded heights like 0.60m (2′), 0.85m (2’9″), 1.00m (3’3″), 1.20m (3’11”) and onward to national/FEI classes at 1.40–1.60m. You should match classes to your and your horse’s current fitness and experience; for example, school 70–80% of show height before entering a new level to avoid overfacing your mount.
Preparing for Your First Show
Get paperwork (entry form, Coggins), tack check, and attire sorted early, and school 8–12 fence courses at home at or below target heights. Walk the course with your trainer, plan lines and stride adjustments, and give your horse a 10–20 minute warm‑up per previous routine so you arrive relaxed and focused—this reduces mistakes and helps deliver a safe, polished round.
Double‑check stabling, arrival times, and emergency contacts the week before; bring a checklist with spare reins, boots, a neck strap, and a basic vet kit. Complete entries and payments on time, measure ponies if needed, and schedule a schooling round or warm‑up jump at the show to familiarize your horse with the surface and atmosphere to lower anxiety and prevent spooking.
Navigating Rules and Regulations
Follow the show’s rulebook and governing bodies like USEF/FEI for permitted tack, class eligibility, and penalties—helmets meeting ASTM/SEI or PAS015 standards are mandatory in most rings. Note time faults, elimination criteria (three refusals), and tack restrictions ahead of time so you don’t incur penalties or unsafe equipment issues on show day.
Confirm memberships, horse registration, vaccination and Coggins requirements, and any measurement cards for ponies well before the event. Be aware of medication rules and post‑competition testing protocols; violations can mean fines, disqualification, or suspension, so consult the prizelist and rulebook and keep detailed records to avoid administrative problems.
The Psychology of Jumping
You build on course design and technical drills by training your mindset: pressure on an 8–12 fence course amplifies small errors, so you must manage pace, decision-making, and confidence. Use short, specific goals—ride a clean approach to a single oxer or plan a safe turn at fence 4—and track progress in sessions of 20–30 minutes. Focus on rhythm and feel; when you control pace and breathing, you reduce refusals, runs-out, and stiffening that cause most falls.
Overcoming Fear and Anxiety
You reduce fear through graded exposure and controlled repetition: start with ground poles and crossrails, then progress to small verticals (40–60 cm) and 70–90 cm oxers as you gain confidence. Use 5–10 deep, paced breaths before the approach and keep lessons to 30–45 minutes, 2–3 times per week. Pair each successful attempt with a deliberate reward and debrief with your coach to avoid panic-driven gripping or late releases that increase risk.
Visualization Techniques
You sharpen performance by rehearsing the course mentally for 5–10 minutes before riding: picture the line, number of strides, your two-point position on takeoff, and the exact spot to look. Visualize correct tempo and a calm horse, then imagine recovering from a mistake to build resilience. This mental practice improves timing and reduces on-course hesitation, producing more consistent approaches and fewer refusals.
Start visualization in a quiet space: close your eyes and run the course in full detail—gates, turns, fences 1–12—and count or feel stride patterns (for example, a five-stride line). Combine sensory cues: hear hoofbeats, feel the saddle, sense the release over the fence. Practice this 3–5 times before a session and for 5–10 minutes daily during the week of competition; when paired with a physical walk-through, it converts imagery into reliable motor responses.
Positive Reinforcement Strategies
You accelerate learning by rewarding correct behavior immediately—within 1–3 seconds—with a soft pat, vocal praise, a short rein release, or a small treat. Start by rewarding every successful attempt for 7–10 reps, then thin rewards to maintain performance. Keep sessions to 15–20 quality jumps and end on a positive effort to cement progress; consistent rewards reduce tension and encourage forward, willing responses from your horse.
Implement a stepwise plan: begin on the ground with clicker or target training, then reward clear, impulsive approaches over poles before increasing height. Structure rides with 4–6 focused repetitions per exercise, using immediate reinforcement for the first block and variable rewards later. Monitor calories—limit treats—and favor timing (release or praise) over food. This creates a motivated, attentive horse and reduces avoidance behaviors that lead to refusals and dangerous runs.
To wrap up
To wrap up, horse jumping demands solid basic riding skills, correct equipment, and a patient training progression; you should focus on balanced position, confident approaches, controlled takeoffs and soft landings while using proper safety gear. Progress methodically, address common mistakes with a qualified instructor, assess horse suitability and costs, and practice consistent, measured drills to build you and your horse’s confidence and performance in show jumping.
FAQ
Q: What basic riding skills, equipment, and horse characteristics should a beginner have before starting horse jumping?
A: Before beginning horse jumping, a rider should have a solid foundation in flatwork, stable balance at the walk, trot, and canter, competent two-point (half-seat) and posting trot, reliable control of the horse on the aids, and experience handling transitions and basic lateral work. These skills give you the balance, independent seat, and communication required to approach jumps safely and effectively.
Riding skills and fitness
– Balance and independent seat: You must stay stable in two-point and be able to absorb motion with hips and knees without clinging to the reins. The ability to ride without gripping with the thighs is imperative.
– Secure canter and straightness: Canter quality (rhythm, tempo, up/down transitions) and the ability to keep the horse straight on a line are necessary for accurate approaches and takeoffs.
– Effective aids and half-halt: Use of the rein and leg aids to manage pace, impulsion, and balance helps the horse find the right spot to take off.
– Strength and endurance: Core strength, leg strength and general fitness reduce fatigue, which otherwise causes position breakdowns that can be dangerous over fences.
Horse selection and suitability
– Age and training: Ideal beginner horses are often schoolmasters—mature, experienced horses that have a steady temperament and know the job. Young, inexperienced horses are riskier for novices.
– Temperament: Calm, willing, forgiving horses who are not spooky and recover well from rider errors are best for beginners.
– Conformation and scope: A horse should have sound conformation for jumping—strong hindquarters for impulsion, balanced conformation to land safely. “Scope” (natural ability to jump height and width) should match the rider’s goals; beginners should work on technique over small fences rather than pushing scope.
– Fitness and soundness: Regular farrier care, a clean vet assessment, and appropriate conditioning reduce risk of injury. Avoid starting jump training with horses that have lameness, poor topline, or insufficient fitness.
Equipment and tack
– Saddle: A properly fitted jumping saddle with a moderately forward flap that allows a stable two-point and release is preferred. Ensure saddle fits the horse and rider to prevent pinching or instability.
– Bridle and bit: Use a bit and bridle that provide clear, consistent communication without being harsh. Simple cavesson or flash bridle and a mild snaffle are common for beginners.
– Girth and billet checks: Properly fitted girth and secure billets are important for rider safety.
– Boots and bandages: Tendon boots or splint boots for front and hind legs protect against knocks. Use properly applied polo wraps or shipping bandages for exercise only if you know how to wrap safely.
– Martingales and breastplates: Standing or running martingales can help control head carriage for schooling, but these should be fitted and used under instruction.
– Stirrup choices: Fillis or safety stirrups can reduce risk of the foot getting stuck; consider using quick-release stirrups for cross-country only if qualified.
– Groundwork equipment: Lunge cavesson, lunge line, whip, and mounting block are useful for training and warmup.
Safety gear for the rider
– Helmet: ASTM/SEI/BSI-certified riding helmet is mandatory for jumping. Fit and replacement after any impact are imperative.
– Body protector: A level-appropriate body protector (air vest or standard fitted protector) reduces injury in falls; required at many venues and recommended for beginners.
– Boots and gloves: Riding boots with a defined heel and half-chaps or tall boots provide leg support and safe stirrup retention. Gloves improve grip and prevent blisters.
– Attire: Comfortable breeches or jodhpurs, appropriate layers for weather, and high-visibility gear if schooling outdoors.
Environment and arena
– Footing: Level, well-maintained footing reduces slip and limb stress. Avoid hard, frozen, or overly deep surfaces.
– Jump standards and poles: Use safe, lightweight poles and jump cups that release on impact; avoid heavy wood poles for beginners.
– Ground poles and cavalletti: Start with ground exercises to build confidence and technique before lifting poles off the ground.
Safety checks before jumping
– Tack check: Saddle, girth, stirrups, bridle, and girth tension should be checked each time before mounting.
– Health check: Quick soundness check—free movement, absence of heat/swelling, clean legs, alert behavior.
– Environment check: Inspect arena for hazards, ensure jumps are set correctly and cups are secure but able to release.
– Supervision: Beginners should train under a qualified instructor or with an experienced handler, especially when jumping for the first time.
This preparation ensures the rider, horse, and environment are positioned for safe progression in horse jumping, building confidence and reducing risk while learning the sport.
Q: What are the fundamental technique elements (position, approach, takeoff, flight, landing) a beginner must learn, and what exercises should be used to develop each element safely?
A: Learning the mechanics of horse jumping involves breaking the jump into parts—approach, takeoff, flight, and landing—and training each section with targeted exercises. Safety is primary: begin at poles and crossrails, progress slowly, and maintain consistent flatwork. Use the focus keyword horse jumping during sessions to emphasize the discipline-specific skills you are building.
Basic jumping position
– Two-point/half-seat: Rise slightly out of the saddle, hips forward but not collapsing over the pommel, weight in heels, lower leg steady and behind the girth, shoulders back and eyes up. The two-point allows the horse’s back to round without rider interference.
– Release: Crest release (hands forward along the crest of the neck) for verticals and small fences; automatic/elastic release for higher or technical fences. Hands should follow the mouth without collapsing at the wrist.
– Upper body: Keep a balanced forward inclination that follows, not drives, the horse’s momentum. Avoid leaning onto the neck or collapsing through the shoulders.
– Legs and lower leg stability: Keep the lower leg secure, heels down, and contact through the calf for balance. Avoid swinging the lower leg backward at takeoff.
Approach (setting up the jump)
– Rhythm and pace: Maintain a consistent rhythm and appropriate canter quality (not too fast, not too slow) for the fence type. A half-halt is used to organize the horse and maintain balance without stopping impulsion.
– Straightness: Approach on a straight line or controlled curve; crooked approaches cause misjudged distances. Use markers (poles, cones) to help train straightness.
– Distance judgment: Learn to feel where the horse’s stride will meet the fence by practicing placing poles at known stride intervals (e.g., 12′ for trot, 21′ for canter depending on stride).
Takeoff
– Impulsion and scope: Develop impulsion by strengthening hindquarters with hill work, transitions, and collected canter to allow controlled takeoff power.
– Timing of rider’s release: Release slightly before lift-off so the horse can use its neck. Avoid early long releases that unbalance or late releases that pull on the mouth.
– Not leaning forward: Maintain core stability so the body moves with the horse, not ahead of it. “Jumping ahead” disrupts the horse’s balance.
Flight and bascule
– Support the bascule: A good bascule means the horse rounds its back to clear the fence. The rider’s hands and seat should not block this motion.
– Look ahead: Keep eyes on the line beyond the fence to ensure a correct following stride, not staring at the pole.
Landing and recovery
– Absorb and rebalance: Use your hips and knees to absorb landing shock, move back into a half-seat, re-establish a forward canter, and prepare for the next stride or turn.
– Re-gather: If landing in a gallop, re-balance into an active canter with a half-halt to re-establish connection before the next fence.
– Straighten quickly: Correct any bent/curved body by using bending aids and rein/leg coordination.
Progressive exercises to develop each element
– Ground poles and cavalletti
– Walk/trot/canter over single ground poles to develop eye for distance, rhythm, and limb awareness.
– Raise poles into small cavaletti (6–12 inches) to encourage bascule and elasticity.
– Pole lines and gymnastics
– Pole to pole at canter for stride regulation; spacing adjusted to develop 1–2 spare strides and teach the horse to find balance.
– Two-pole gymnastic (bounces/one-stride) for rider balance and horse’s quickness. Start with crossrails or low verticals before bounces.
– Three- or four-stride grid with poles and small vertical to teach approach, takeoff point, and rider position.
– Crossrails and small verticals
– Crossrails encourage straightness and help riders find the center of the fence. Start with X-rails at trot, then canter.
– Small verticals help practice crest releases and timing.
– Oxer progression
– Begin with square oxers, starting small and slowly increasing width to teach the horse to stretch and jump forward.
– Related distance exercises
– Set a related line (e.g., three strides between fences) to practice distance finding, adjustments with half-halt, and approach control.
– Canter work and transitions
– Frequent transitions within the canter (down-out-up) develop balance and the ability to adjust stride length approaching a fence.
– Bounce and one-stride work
– Short bounces (1–2 strides) increase rider’s balance and the horse’s athleticism. Ensure correct spacing; start with low heights and under supervision.
– Flatwork integration
– Consistent use of flatwork patterns (circles, serpentines, lateral movements) improves straightness, suppleness, and responsiveness.
Common drills for beginners
– “Pole to pole” exercise: Place a pole 15–21 feet before a small fence to help the horse pick up the correct stride and help the rider judge takeoff.
– “Square grid” progression: Ground pole, small cavaletti, vertical at an appropriate distance, can be used to rehearse rhythm and release.
– “Controlled approach” exercise: Set two poles at the approach to force a straight line and fixed stride to the fence.
– “Bounce ladder” (very low): Teach rapid balance changes and encourage a short, compact jump.
Coaching cues and metrics
– Use video to review position and horse’s bascule. Look at hips, lower leg, hand release, and horse’s knees/shoulders.
– Track number of successful poles-cleared sessions, confidence metrics (rider perceived control), and horse’s heart rate recovery as conditioning indicators.
Safety and gradual progression
– Start low (ground poles and crossrails), maintain consistent repetition, and increase height/complexity only when the rider and horse demonstrate secure mechanics and rhythm.
– Supervision by a qualified coach with graded lesson plans reduces risk of developing bad habits.
– Rest days, conditioning, and cross-training are imperative to prevent overuse injury.
By separating the jump into discrete technical elements and using progressive exercises that match your current skill level, a beginner can build a reliable foundation in horse jumping while minimizing risk and reinforcing good habits.
Q: How should a beginner structure a training progression and lesson plan, what common mistakes should they avoid, and what are realistic costs and steps for finding a qualified instructor or program?
A: Training progression, structured lessons, and informed choices about coaching and costs create a clear pathway from novice flatwork to small-course riding. The plan below emphasizes safety, gradual load increase, and consistent assessment. It also lists common errors and how to correct them and gives realistic cost estimates and questions to ask when choosing an instructor.
Training progression and sample timeline
– Phase 1 — Assessment and Flatwork (2–4 weeks)
– Goals: Evaluate rider seat, balance, canter security, and horse suitability. Establish baseline fitness for both horse and rider.
– Activities: Daily flat sessions focusing on transitions, straightness, forward-but-controlled canter, rhythm, and half-halts. Ground poles once or twice weekly.
– Outcome: Rider can maintain balanced two-point and the horse responds reliably to aids.
– Phase 2 — Ground Poles and Cavalletti (4–8 weeks)
– Goals: Develop distance awareness, rhythm, and basic bascule over low obstacles.
– Activities: Walk/trot/canter poles, rising over low cavaletti, single crossrails at the trot, rider position drills (two-point hold, release practice).
– Frequency: 2–3 lessons/week with light at-home practice.
– Outcome: Confident, balanced two-point over small obstacles; horse comfortable with ground poles.
– Phase 3 — Small Fences and Gymnastics (6–12 weeks)
– Goals: Introduce small verticals and oxers, teach takeoff timing, and build rider release and landing recovery.
– Activities: Crossrails to small verticals, grids and one-stride/bounce work, short courses of 3–4 fences.
– Frequency: 1–2 jumping sessions/week, plus flatwork maintenance.
– Outcome: Consistent, straight approaches, effective release, safe landings.
– Phase 4 — Course Work and Riding Variability (ongoing)
– Goals: Ride simple courses, regulate adjustments between fences, develop course strategy and stamina.
– Activities: Course work, varying lines and turn types, gymnastic combinations, and conditioning.
– Frequency: Maintain 2–3 sessions/week; include a rest day and light hacking.
– Outcome: Ability to ride 4–8 fence courses at lower heights with accuracy and rhythm.
– Conditioning and strength-building (ongoing)
– Hill work, pole grids, trotting sets, and interval canter sessions for the horse.
– Rider fitness: core strengthening, balance exercises, flexibility, and cardio work outside the saddle.
Weekly sample for beginner (assuming lessons + at-home practice)
– Monday: Flat lesson — transitions, two-point balance (45–60 minutes)
– Tuesday: Conditioning ride or hack (30–45 minutes)
– Wednesday: Grid/gymnastic lesson (short jumping session) (45–60 minutes)
– Thursday: Rest or light flat work (30 minutes)
– Friday: Course work or pole exercises (45–60 minutes)
– Saturday: Lesson or supervised practice (45–60 minutes)
– Sunday: Rest
Common mistakes and corrections
– Mistake: Rushing the approach (increasing pace)
– Fix: Use half-halts and cadence poles to control tempo; practice canter transitions.
– Mistake: Jumping ahead (leaning forward and getting ahead of motion)
– Fix: Work on core strength, two-point balance, and ride gymnastic exercises that force the rider to remain centered.
– Mistake: Dropping hands or pulling on takeoff
– Fix: Practice crest release, hands that move forward slightly; use low cavaletti to practice maintaining contact.
– Mistake: Overfacing horse or rider (jumping too high/complex too early)
– Fix: Stay at crossrail/low heights until both horse and rider can complete repeated exercises with consistency.
– Mistake: Ignoring flatwork
– Fix: Integrate flatwork sessions focusing on straightness, impulsion, and responsiveness at least twice weekly.
– Mistake: Poor fitness and recovery management
– Fix: Add rest days, condition gradually, and monitor the horse for signs of soreness.
Finding a qualified instructor or program
– Qualifications to look for
– Certifications: National or regional qualifications (e.g., British Horse Society (BHS), United States Pony Clubs, USEF-certified coaches, or equivalent), experience in coaching beginners, and specific experience in show jumping or eventing.
– Teaching experience: Look for instructors with a track record of progressing novice riders safely.
– References and reviews: Speak to current students and visit lessons unannounced to observe teaching style, safety protocols, and barn culture.
– What to ask during initial contact
– Class sizes, instructor-to-student ratio, how lessons are structured (mounted/unmounted), safety measures, emergency procedures, and whether they provide a training plan.
– Instructor’s approach to horse selection and matching horse to rider.
– Costs of lessons, availability of school horses, and requirements for helmet/body protectors and insurance.
– Facilities and program features
– Safe footing, well-maintained jumps, access to grounds for varied schooling, and a program that emphasizes progressive learning.
– Availability of schoolmasters for beginners or a vetted list of suitable lesson horses.
– Support services: farrier, vet, tack fitting, and a culture that enforces protective gear.
Costs and budgeting (approximate, will vary by region)
– Lessons: $30–$120 per group lesson; $50–$200+ per private lesson (per 45–60 minutes).
– School horse use: May be included, or $15–$50 extra per lesson.
– Coaching clinics and weekend intensives: $100–$600+ depending on instructor and duration.
– Horse lease: Partial lease $150–$400/month; full lease $400–$1,000+/month depending on horse and location.
– Buying a jump-trained horse: $5,000 for a very basic beginner schoolmaster to $50,000+ for competitive mounts; prices vary widely by region and level.
– Equipment: Helmet $80–$400; body protector $100–$600; saddle $500–$4,000+; bridle and boots $100–$400; regular tack adjustments and fittings add cost.
– Care and maintenance: Feed, farrier ($50–$200+/visit), routine vet checks ($100+), vaccines, worming, and emergency care. Monthly boarding ranges widely: $300–$2,000+ depending on services and location.
– Competition and show fees: Local shows $50–$200 per class; travel and trainer fees increase costs.
Insurance and risk management
– Personal injury insurance: Rider insurance or membership with local equestrian organizations often includes liability coverage.
– Horse insurance: Mortality and major medical insurance for owned mounts helps manage risk.
– Stable rules and waivers: Understand liability waivers, and ensure the facility has clear emergency protocols.
Measuring progress and deciding when to move up
– Milestones to assess readiness for higher fences:
– Consistent striding and straight approaches over poles and crossrails.
– Repeated successful rounds through grids and small courses with correct position and release.
– Rider can execute basic adjustments (shorten/lengthen stride) without losing balance.
– Horse shows no sign of soreness and keeps a steady rhythm.
– Use objective measures: number of error-free rounds, video reviews, and instructor assessment.
Additional resources and continuing education
– Clinics and camps: Short-format, intensive clinics taught by experienced show jump coaches accelerate learning.
– Books and videos: Use credible instructional materials with visual demos of position and exercises.
– Community: Join local showjumping clubs, Pony Club, or riding associations to gain mentorship and ride different horses.
By following a structured progression, avoiding common pitfalls, selecting a qualified instructor and appropriate horse, and budgeting realistically, beginners can develop safe, reliable horse jumping skills. A methodical, safety-first approach creates a long-term pathway to confident, competent riding and steady progress through the levels.